
a complete tutorial for casting on, the knit stitch, and binding off
Hello everyone! Welcome back. I am so excited for this post today because it is one that I have wanted to make for a while! I love knitting so much and I am so happy that I get to share this activity with my readers. In what follows, I will describe how to knit step-by-step. I will teach you how to cast on (create stitches to knit), the knit stitch, and how to bind off (or cast off stitches). I plan to make a separate post about the purl stitch in the not-so-distant future!
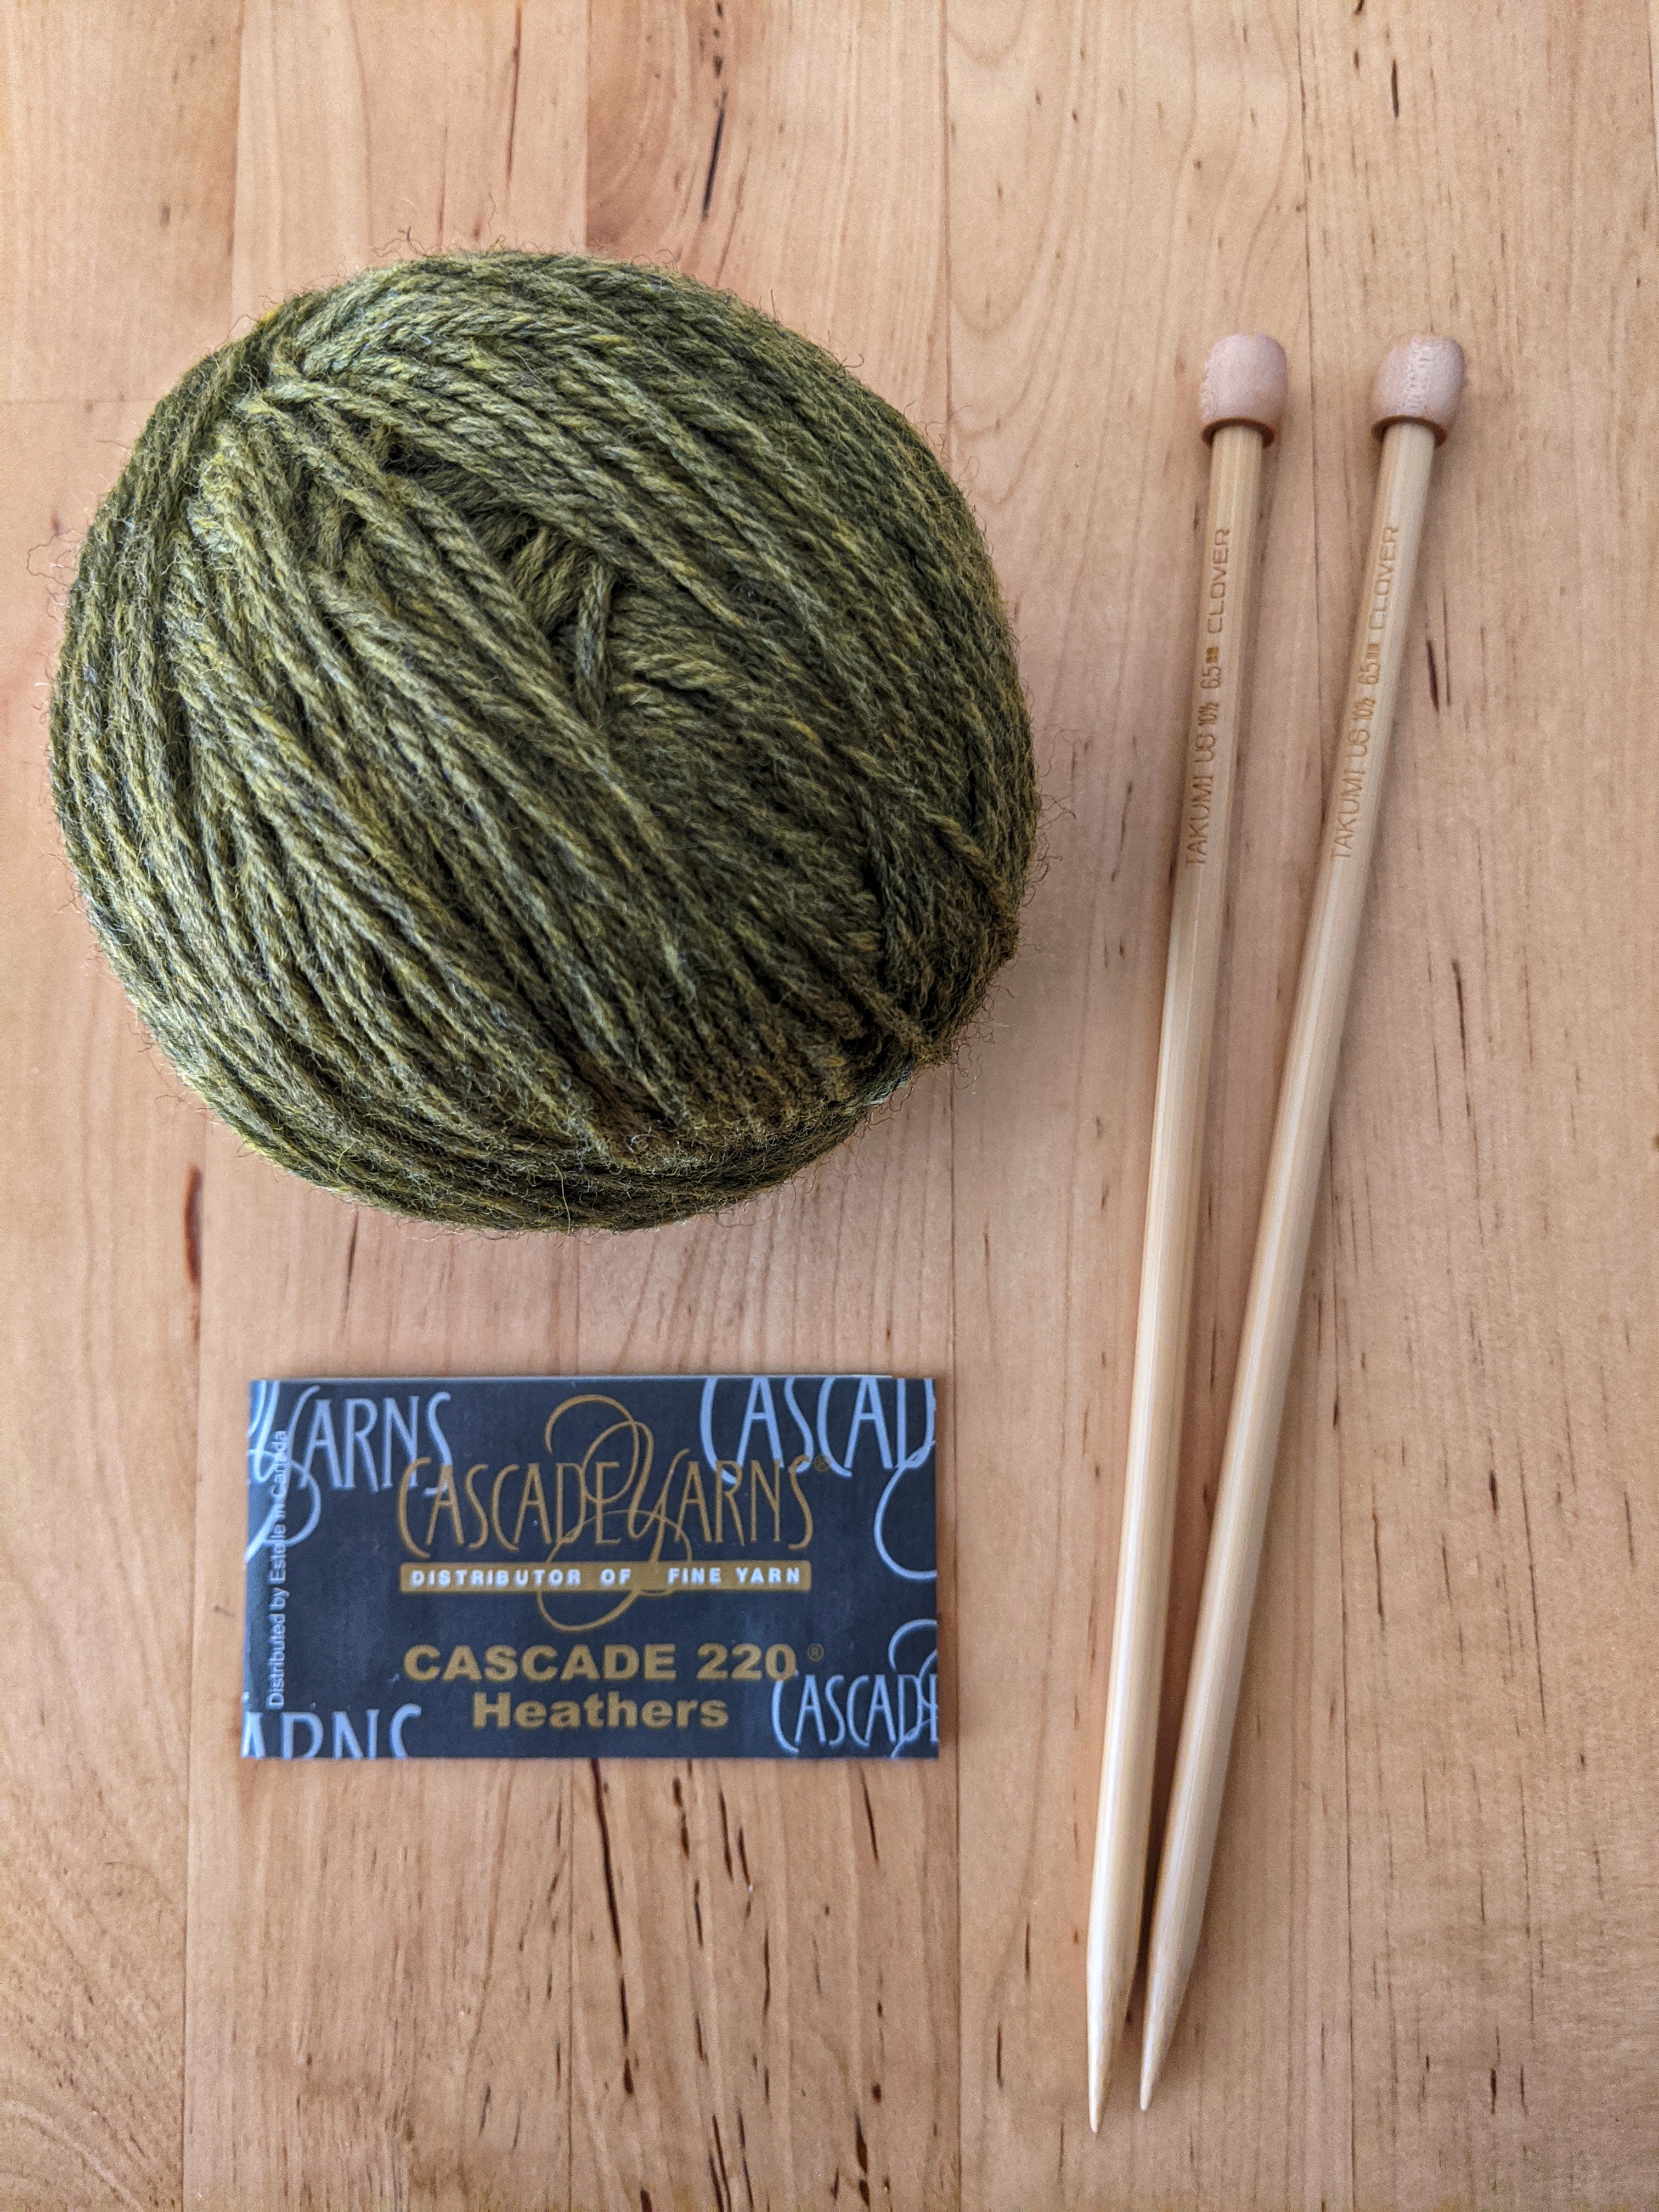
The supplies you will need are
- straight knitting needles
- yarn
- scissors
I suggest finding a yarn and needle size that compliment each other. You can find more information on how to choose a coordinating yarn and needle here.
In the photos and videos below I am using Takumi bamboo straight needles in size 10.5 and Cascade 220 Heathers yarn. These needles are slightly bigger than the suggested needle size for this yarn, however I wanted to be able to exaggerate the techniques in my demonstrations.
Cast On
In order to start to knit, we need stitches to work. The process of creating stitches to knit is called casting on. There are many ways to cast on. I am going to list the steps of the long tail cast on method, which is a versatile and sturdy cast on method.
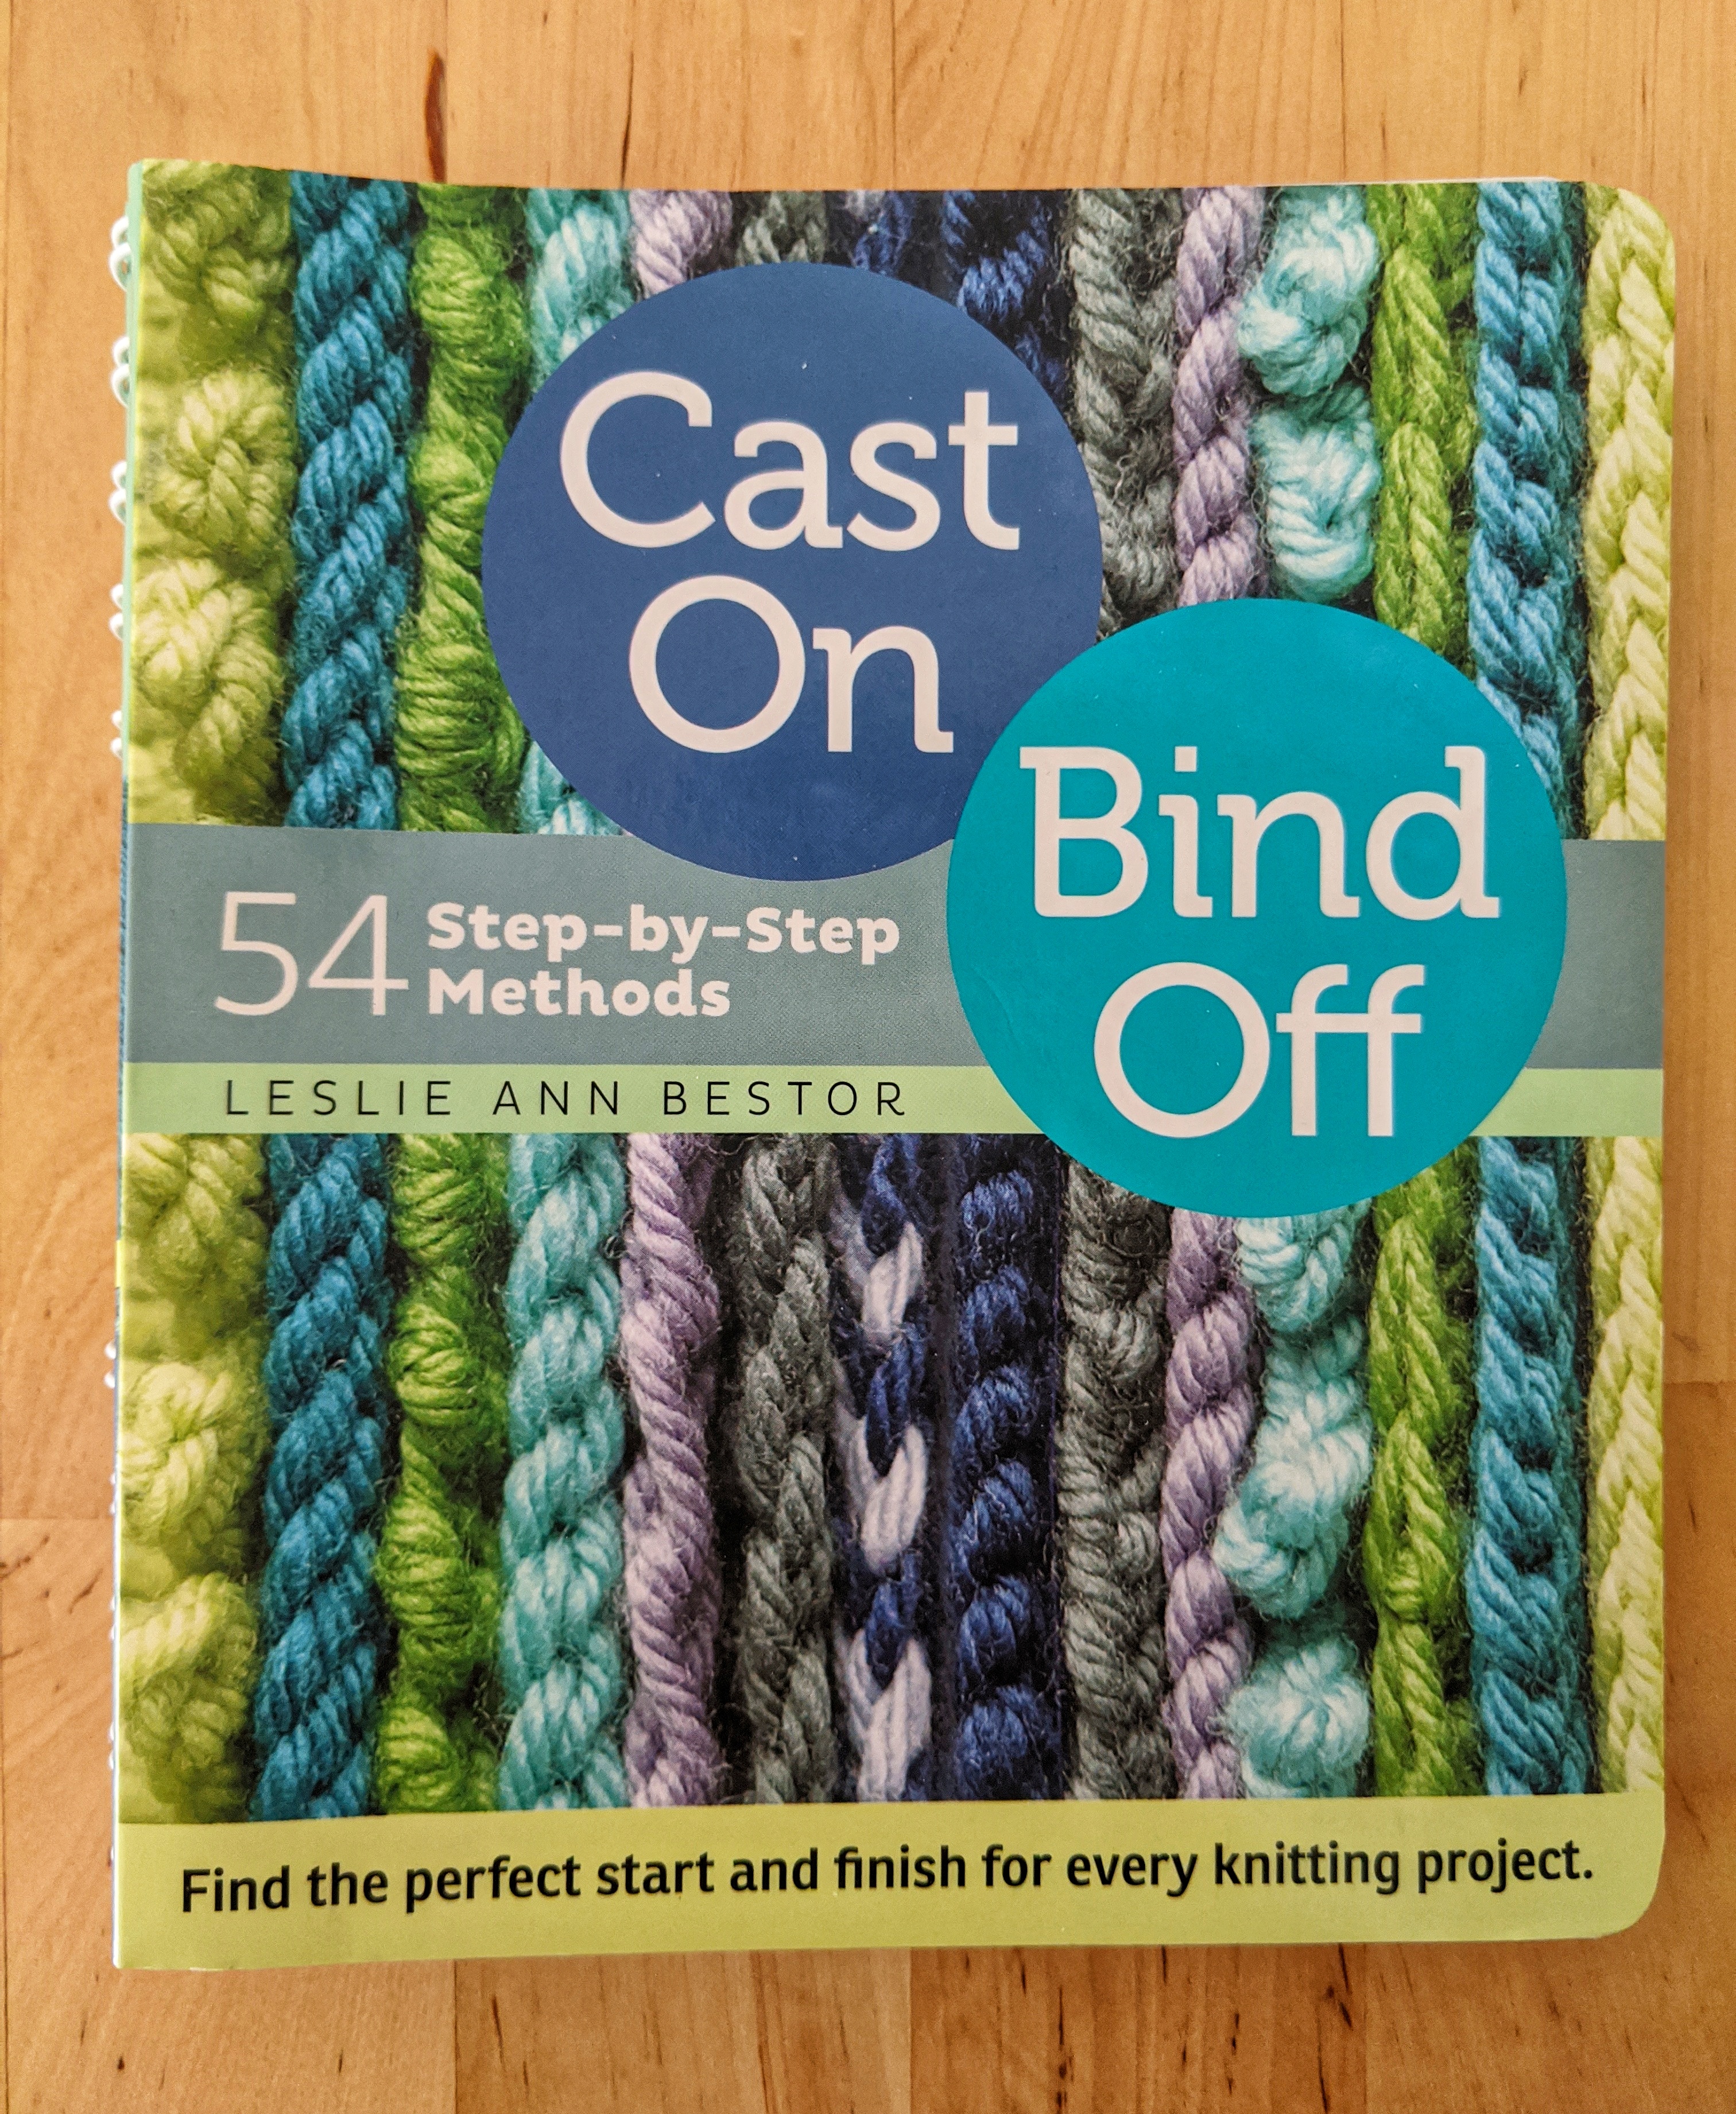
If you are interested in other cast on methods, I recommend checking out this book. It is a fantastic reference guide that I carry with me in my knitting bag. It not only has information on cast on methods but also other ways to bind off. Some factors that impact choosing a different cast on or bind off method include the stretch and pattern of your knitted item. The long tail method I am about to describe can be found on page 25 of Bestor’s book.

First, start with a slip knot. A tutorial for making a slip knot can be found at the beginning of my post, How to Crochet.


Setting up the long tail cast on:
Pull a substantial amount of yarn out of the ball. As this is the long tail cast on, we need to start with a long tail. The more stitches you want to cast on, the longer the tail needs to be. For a small swatch like I am making, I started with at least a two-foot-long tail, which means I made my slip knot two feet from the cut end of the yarn. Remember, the tail is the end of the yarn that is cut, and the working yarn is the end of the yarn that is connected to the ball of yarn.
Put your slip knot on one needle. For this cast on, we will only be using one needle.
Separate out the tail and the working yarn. It is very important to keep track of these two pieces of yarn for this cast on. If it helps, tie a contrasting color of yarn on the very end of the tail so that you can differentiate the tail from the working yarn.
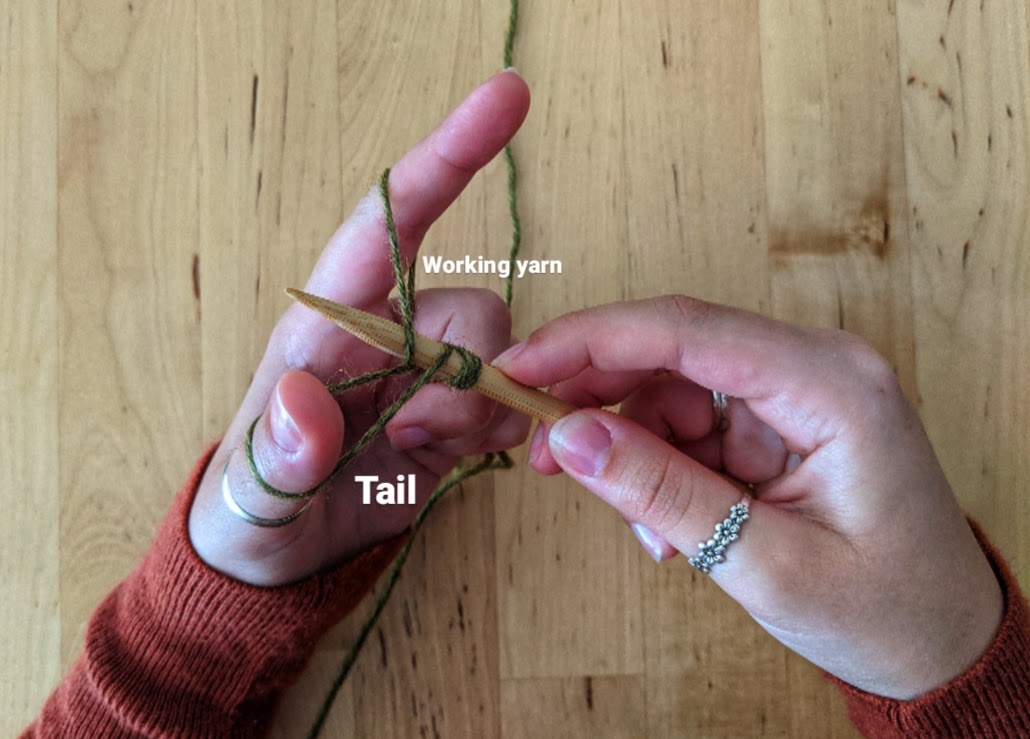
With the slip knot on your right needle, wrap the tail end of the yarn around your left thumb and the working yarn around your left forefinger. Position your thumb and forefinger in a “sling shot” or “finger gun” style, with the slip knot needle in the middle. This will help to maintain tension. Hold the ends of both the tail and the working yarn with your middle, ring, and pinky fingers.
The photos above show different views of the same first step. (Note: I have one stitch on my needle in addition to the slip knot.)

Now it is time to make a stitch. This can get confusing, but I believe in you. Practice these steps and you will have it in no time!
With your right hand, maneuver the tip of the needle over the loop on your thumb. Be sure to hold both the tail and working yarn with your left fingers so that they do not slip off your fingers while in the middle of this process.

Move the needle up through the loop on your thumb, pushing the needle towards the sky.

Now, move the needle over towards your forefinger, to the right of the loop.

Notice the two new loops on your needle. Moving your needle back towards your thumb, move the tip down through the loop on your thumb. It is okay if the yarn feels tight within your thumb and forefinger. Be aware of this and adjust as necessary until the tension feels comfortable for you.

As you pull your needle down through the loop on your thumb, notice the two loops became one new loop that is now your new stitch.

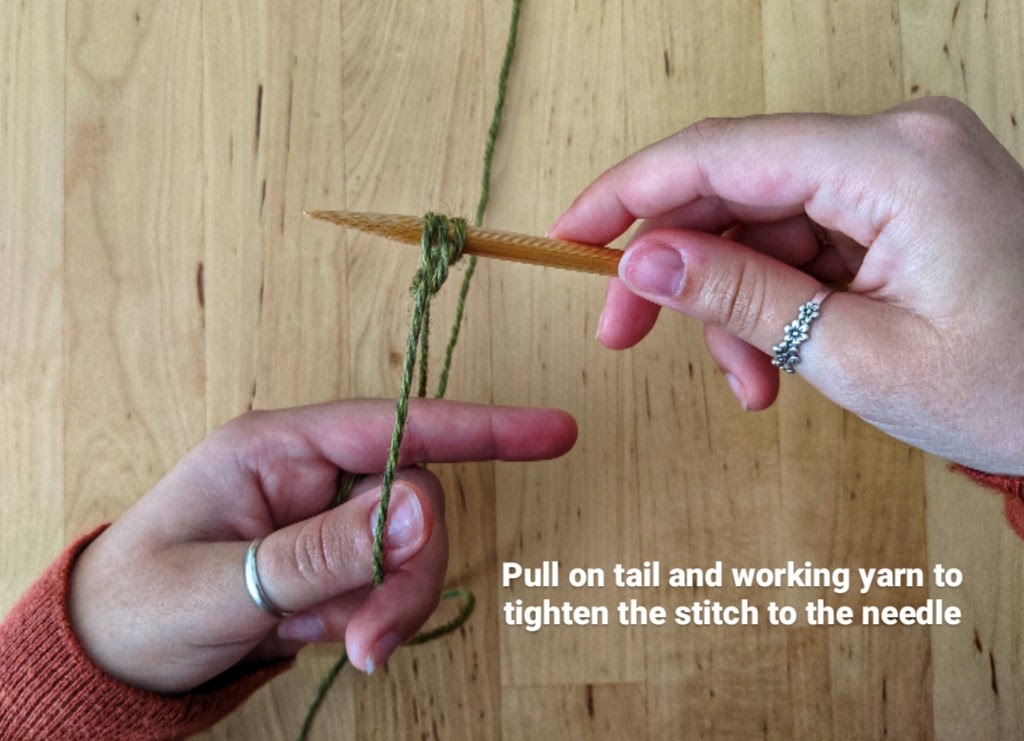
Slide the yarn off your thumb and forefinger and pull on both the tail and working yarn to tighten the stitch to your needle. One stitch has now been cast on.
Repeat this process for your desired number of stitches. For my demonstrative swatch, I cast on 10 stitches. The slip knot counts as one stitch.
Sometimes, it can help to have a repeatable cadence in your head as you do this. Here are some of my favorites:
- Under the loop (on your thumb)
- Over (and through) the loop on your forefinger
- Through the loop on your thumb
- Tail loop on your thumb
- Working yarn loop on your forefinger
- Tail loop on your thumb
- Under the loop on your thumb
- Around the loop on your forefinger
- Down through the loop on your thumb

Here is a video of this process, which helps to capture the flow of movements in the long tail cast on.
The Knit Stitch
The knit stitch is the most foundational building block for learning to knit. A fabric made of only knit stitches is called garter stitch and features these fun ripples and bumps after each row. The fabric is stretchy and squishy. It is great for dishcloths, baby blankets, borders/trim, scarves, and virtually anything you want to make. When knit in the round, the knit stitch creates little ‘V’ shapes that mimic stockinette stitch, but that is a topic for my upcoming post on the purl stitch.
The knit stitch can be augmented to create increases and decreases within the work, as well as numerous fun feature stitches like knots, bobbles, and lace. Here, I will teach you the basic knit stitch on which all of knitting is based. I will be using the English method (also called “American” or “throwing”), however there is another popular method that achieves the same result called Continental Knitting. Continental is where the working yarn is held with the left pointer finger. I was taught the English method when I first learned, and I think it is a great method for beginners. Here is a video on the various styles of knitting, if you’re interested.
First, position your needles so that you can begin. Hold the needle with your cast on stitches in your left hand, and hold the free needle in your right hand. Make sure your working yarn is accessible and held behind your work and that the tail yarn is far away. We will not be using the tail yarn anymore.
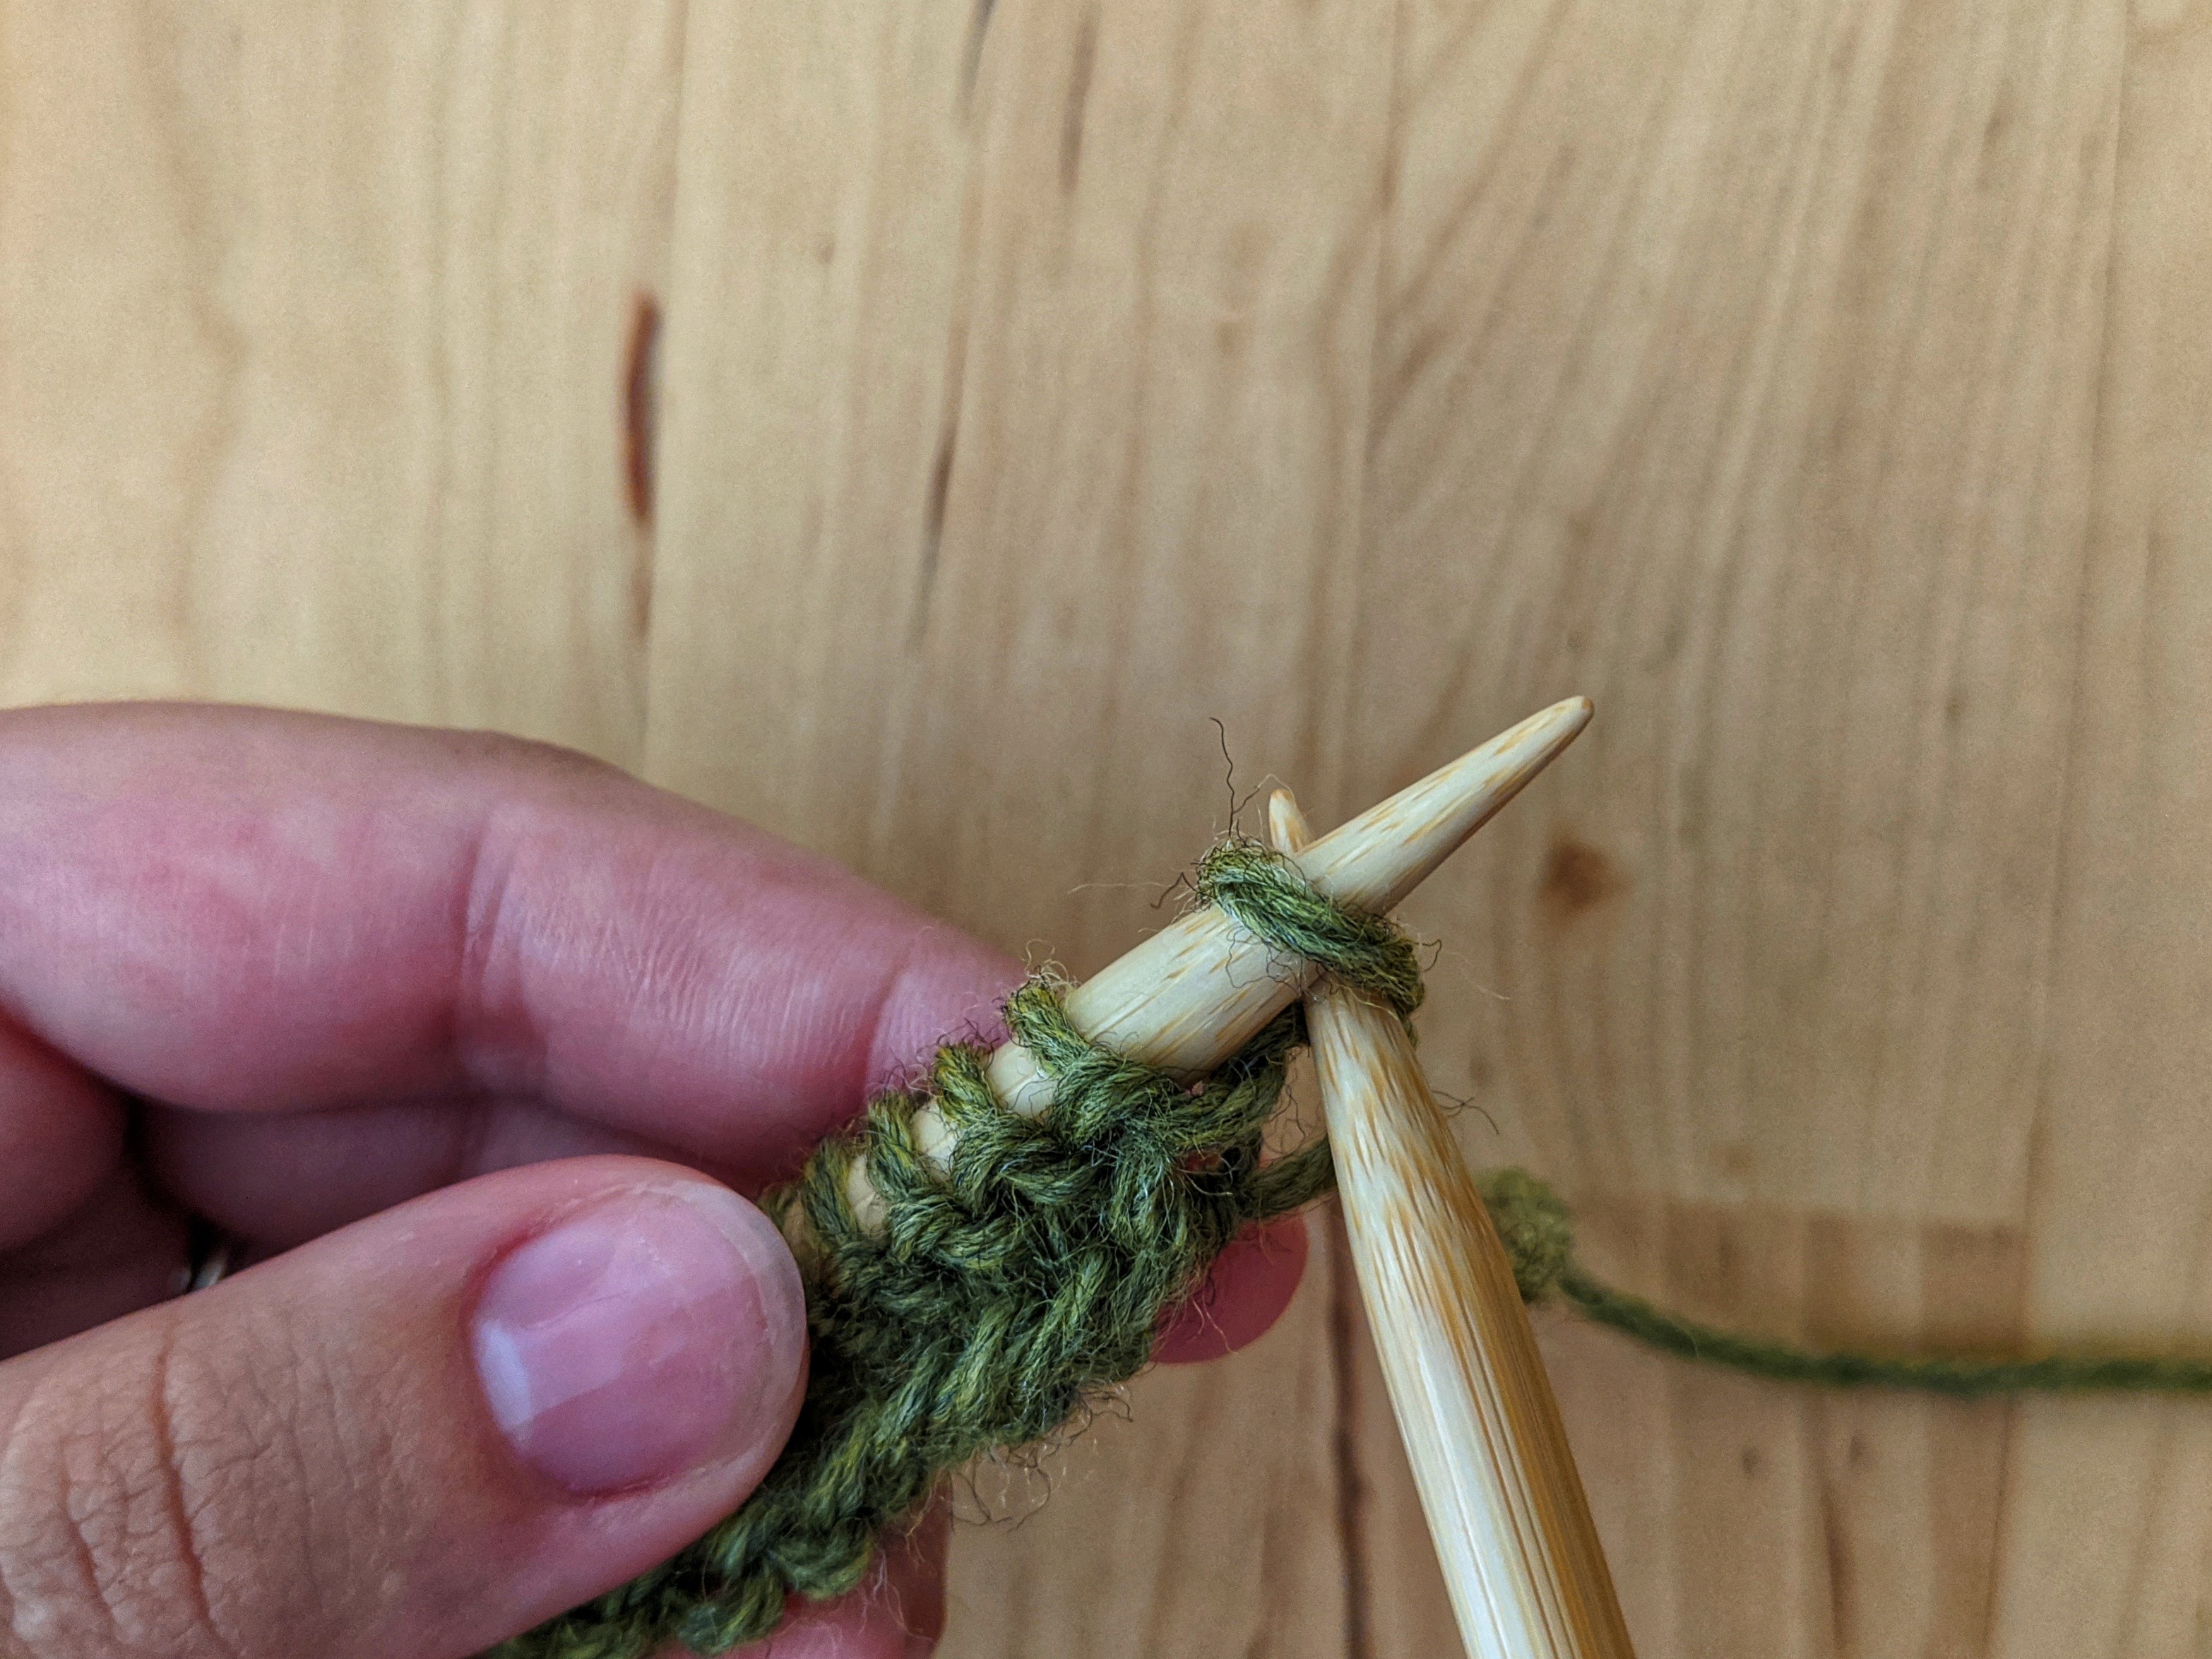
With your right hand, insert the tip of the right needle into the first loop on the left needle. To help define placement of the right needle, think of the stitch loop (the stitch you’re inserting your needle into) as having two “legs.” You are inserting the needle between the right (front) and left (back) legs of one single loop. Do not to insert the needle between the first and second stitches (on the left needle), but rather through the legs of the first stitch.
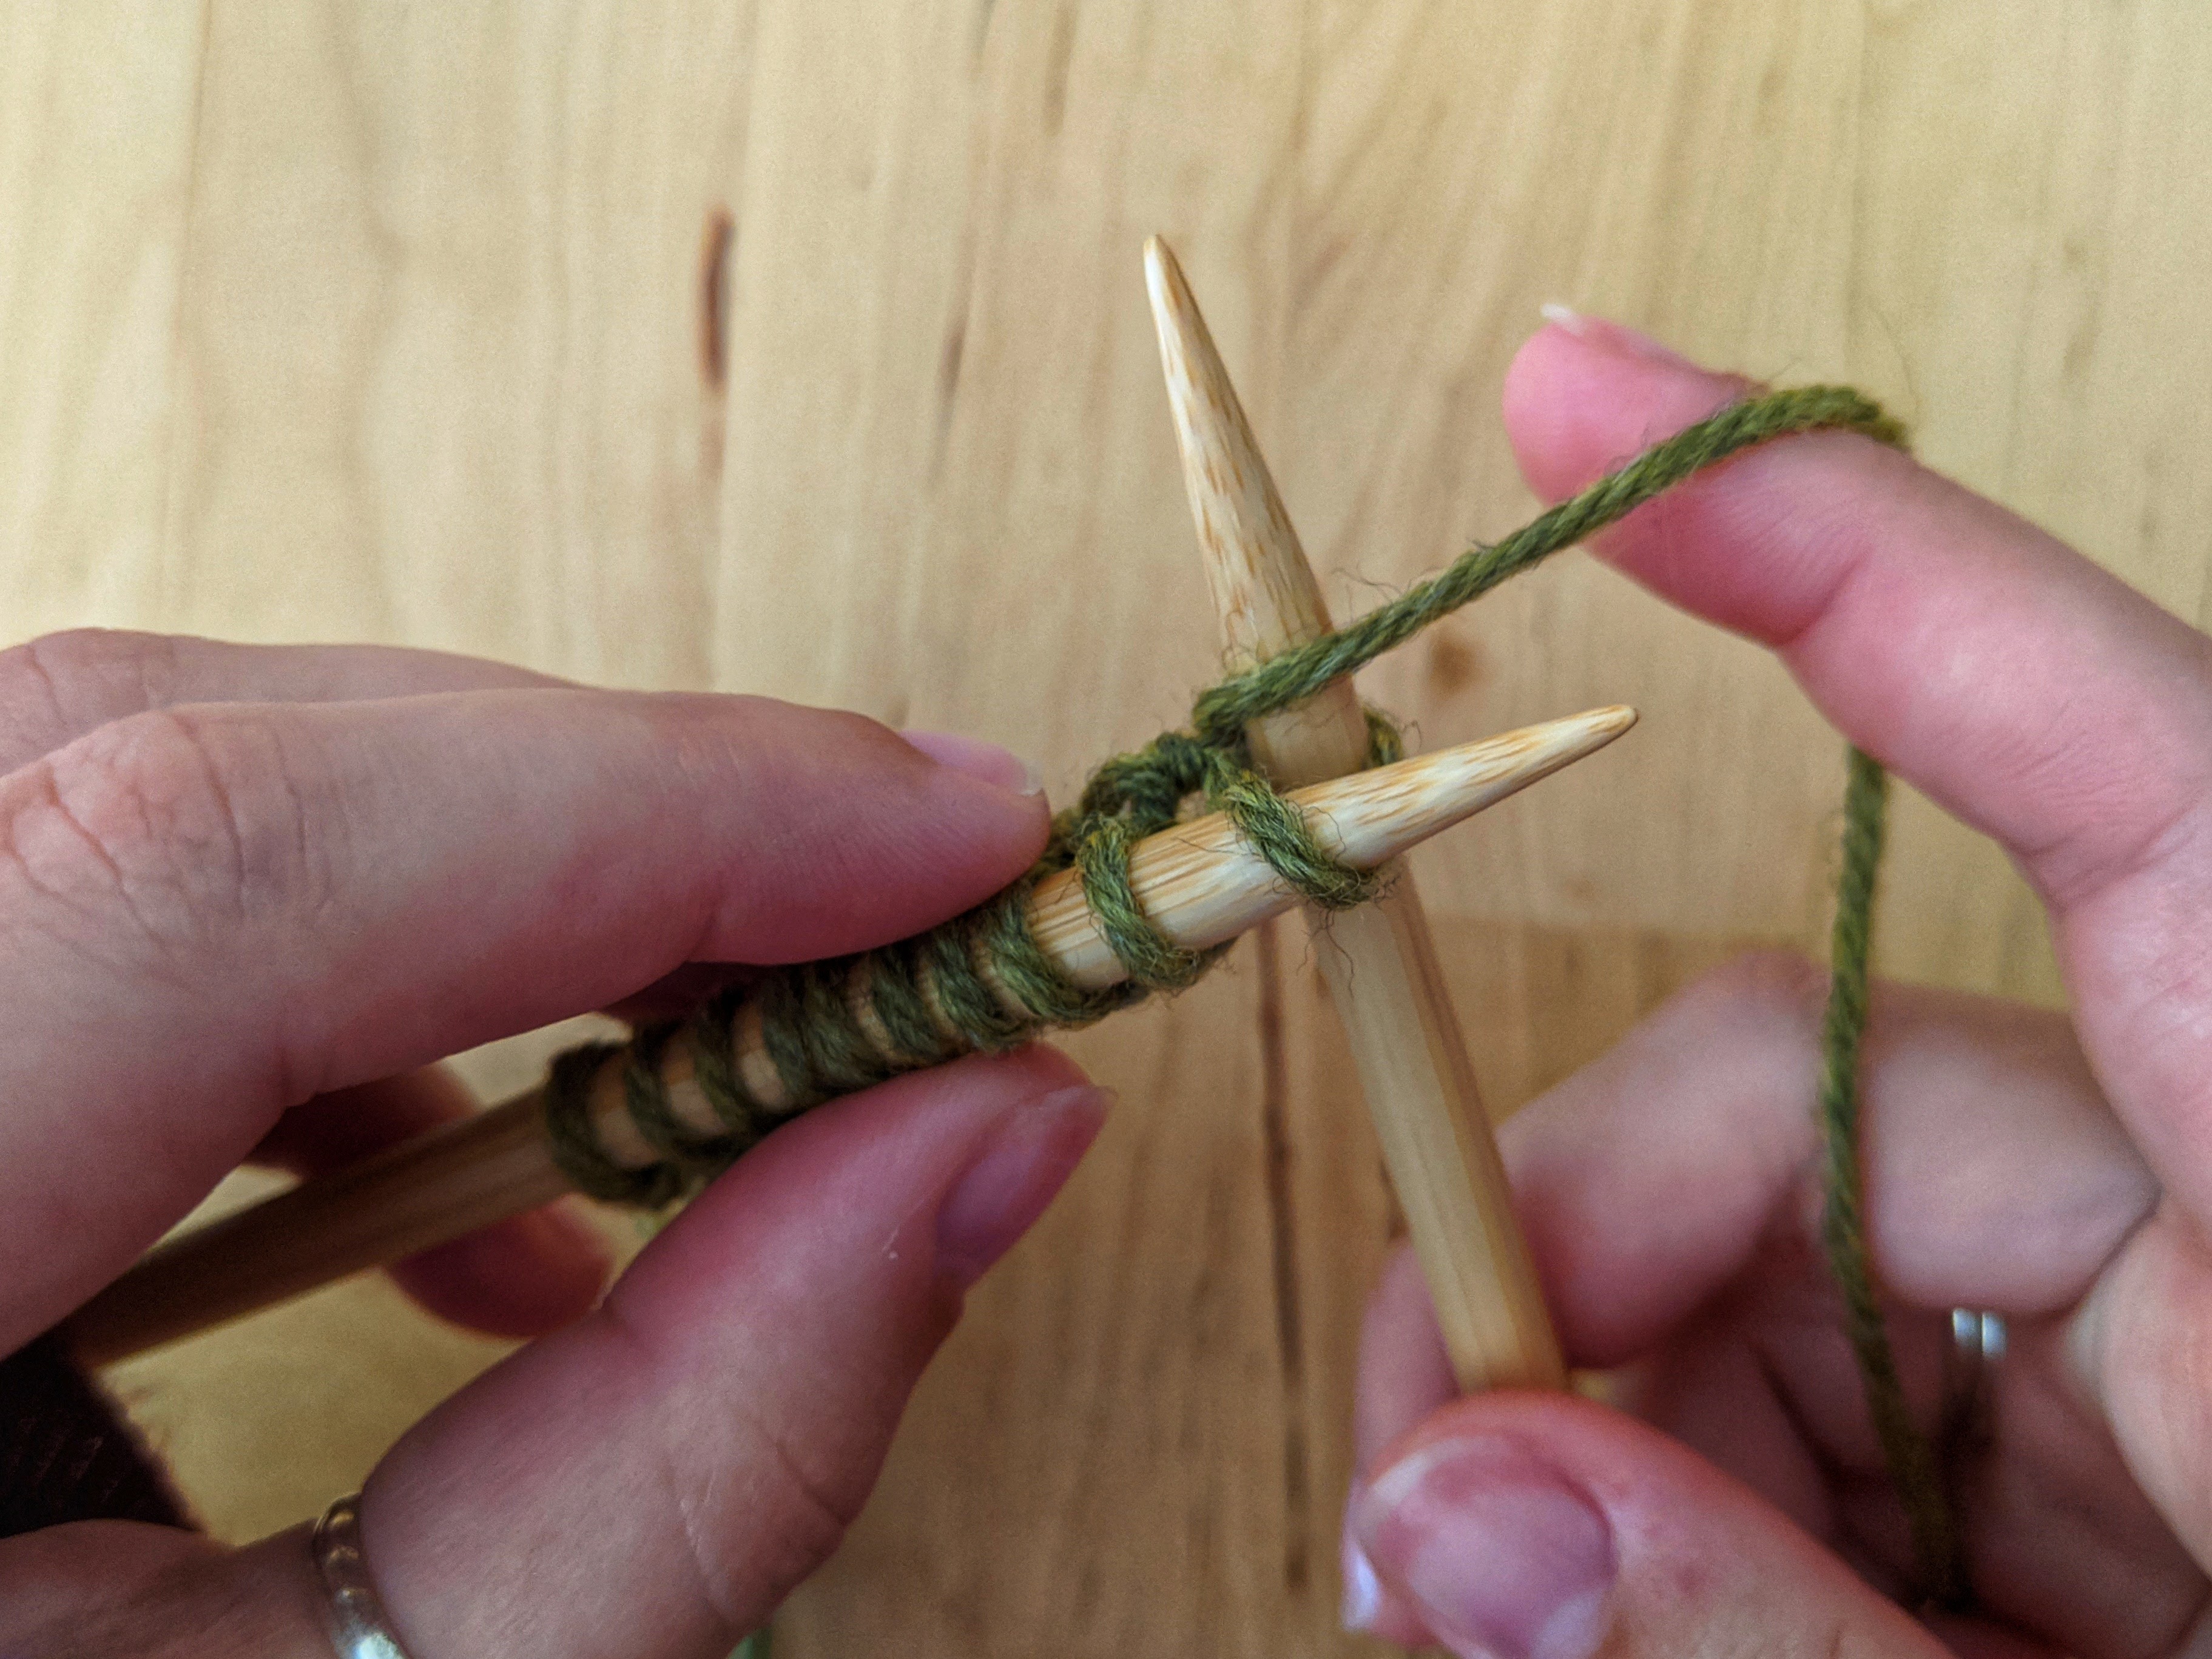
Next, wrap the working yarn around the right needle. I tend to wrap the yarn away from me first and then towards me and to the right. In other words, I wrap from left to right. You can wrap from right to left if you desire, just be consistent.
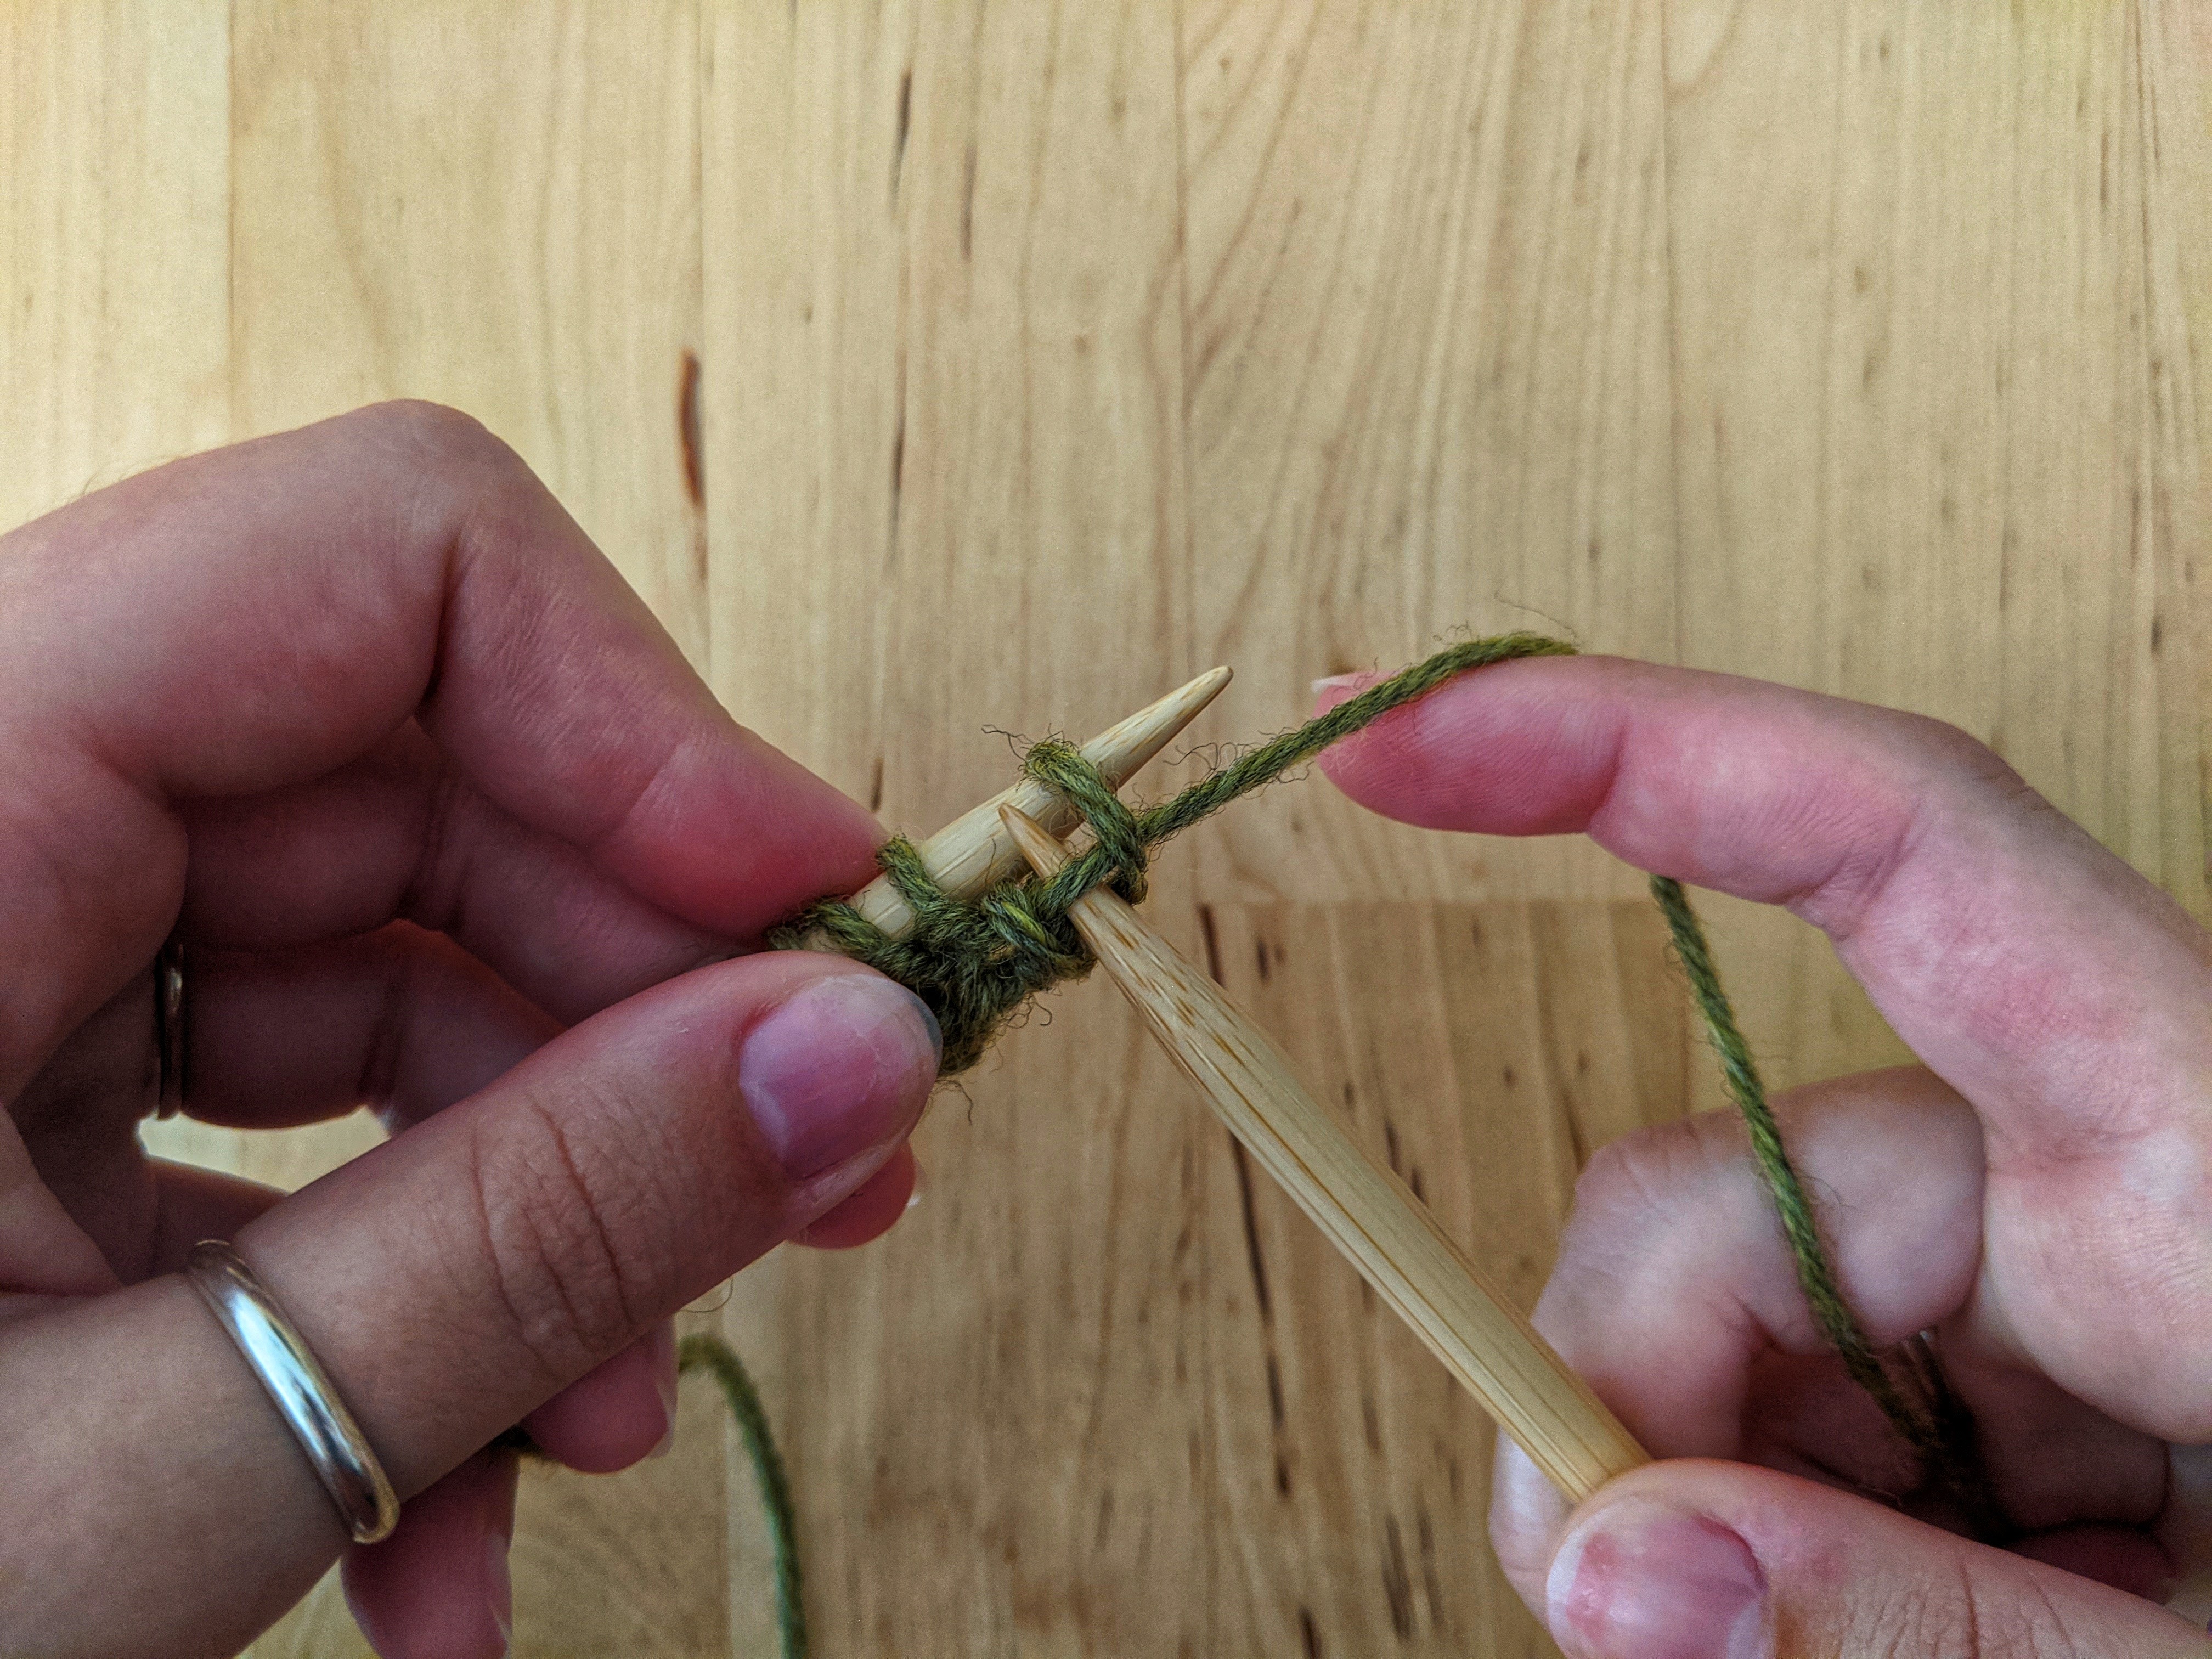
Now this is the tricky part. Take the right needle with the yarn wrapped around it towards you and back through the loop on the left needle, placing it to the left of the first stitch on the left needle. Try not to drop the yarn from your right needle, as this is your new stitch!
If you do drop the yarn from your right needle, that is okay. Just begin this process again by inserting your right needle into the stitch on the left needle, wrapping the yarn around your needle, and pulling it through.

Then, slide the old stitch off the left needle, which, in turn, moves the new stitch to the right needle…and done! One stitch has been knit.
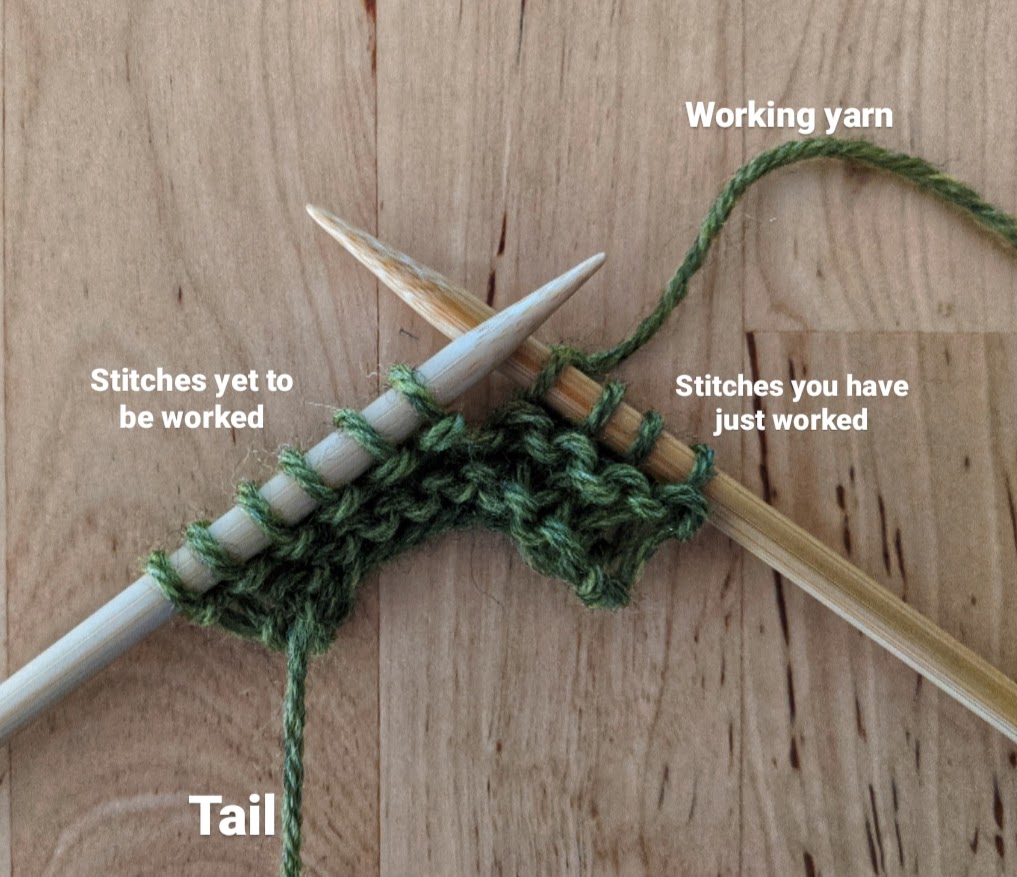
Knit the remaining stitches on your needle. Then to begin the next row, swap the needles in your hands, so that the full needle is now in your left hand (the needle with the stitches) and the empty needle is now in your right hand (the free needle). One needle will hold the stitches yet to be worked and one needle will hold the stitches you have just worked.
Continue this process until you are satisfied with the length of your knitting, and then it will be time to bind off.
If you set down your knitting and are unsure which needle is which, remember that the working yarn is behind the work (when knitting) and hangs off the most recently worked stitch in the row or hangs off the right needle (if you set your work down mid-way through a row).
If you’re in search of a repeatable cadence for knitting, I suggest:
insert the needle through the stitch
wrap the yarn around the needle
push the needle to the other side of the loop
and slide the old stitch off the left needle.
Here is a video in which I knit two stitches. Notice my hand placement, and how I use my index fingers to support and push the needles through the process.
I tend to use my left pointer and middle fingers to squeeze the tip of the right needle after inserting into the stitch (0:02 in the video below). Notice how I hold the working yarn alongside the right needle with my right hand (0:05). I use my left pointer finger to push the right needle through the loop (0:08). And, I use my right pointer finger to push the left needle back to make sliding the new stitch off the left needle easier (0:10).
This is what works best for me. It might look different for you, but that is okay. This is a form of muscle memory that will develop over time.
A note on dropping stitches:
Dropping stitches is what happens when a loop falls from the needle without being worked. If left, it can unravel your knitting. This is a very common problem especially when learning to knit because you’re still figuring out what tension works best for you within your work. Knitting too loosely can cause stitches to drop without you realizing, and knitting too tight can cause one to yank at their work, inadvertently pulling multiple stitches off the needles. Knitting should feel comfortable and smooth. There should be some space between the loop and the needle, but not too much. A good rule of thumb is if your stitches cannot easily move up and down the needle, they’re too tight. Working with wool can also help, because wool has a “sticky” element to its fiber makeup. Bamboo or wood needles can also help prevent dropping stitches because, in my experience, they grip the yarn better than metal or aluminum needles do.
A tip to combat dropping stitches is to find the sweet spot on your needles that allows your stitches to be close enough together to move comfortably when knitting, but far enough apart that they do not fall off easily. For me, the sweet spot is right at where the needle begins to taper.
Bind Off
Binding off is the process by which a knitter reduces the number of stitches. This is largely used to finish a knitting project, but is sometimes used for shaping in garments. One does not always need to bind off in order to finish a project. For example, you can cut a long tail of the yarn and weave it through the stitches on your needle, pulling it tight as in the crown of a hat, or weave the remaining stitches together at the toe of a sock, but for just learning how to knit, and for most flat knitting, a traditional bind off is the way to go. (If you are using Bestor’s Cast on, Bind Off book, this bind off method can be found on page 146.)
Here is a video showing the process for the beginning stitches in the bind off row.
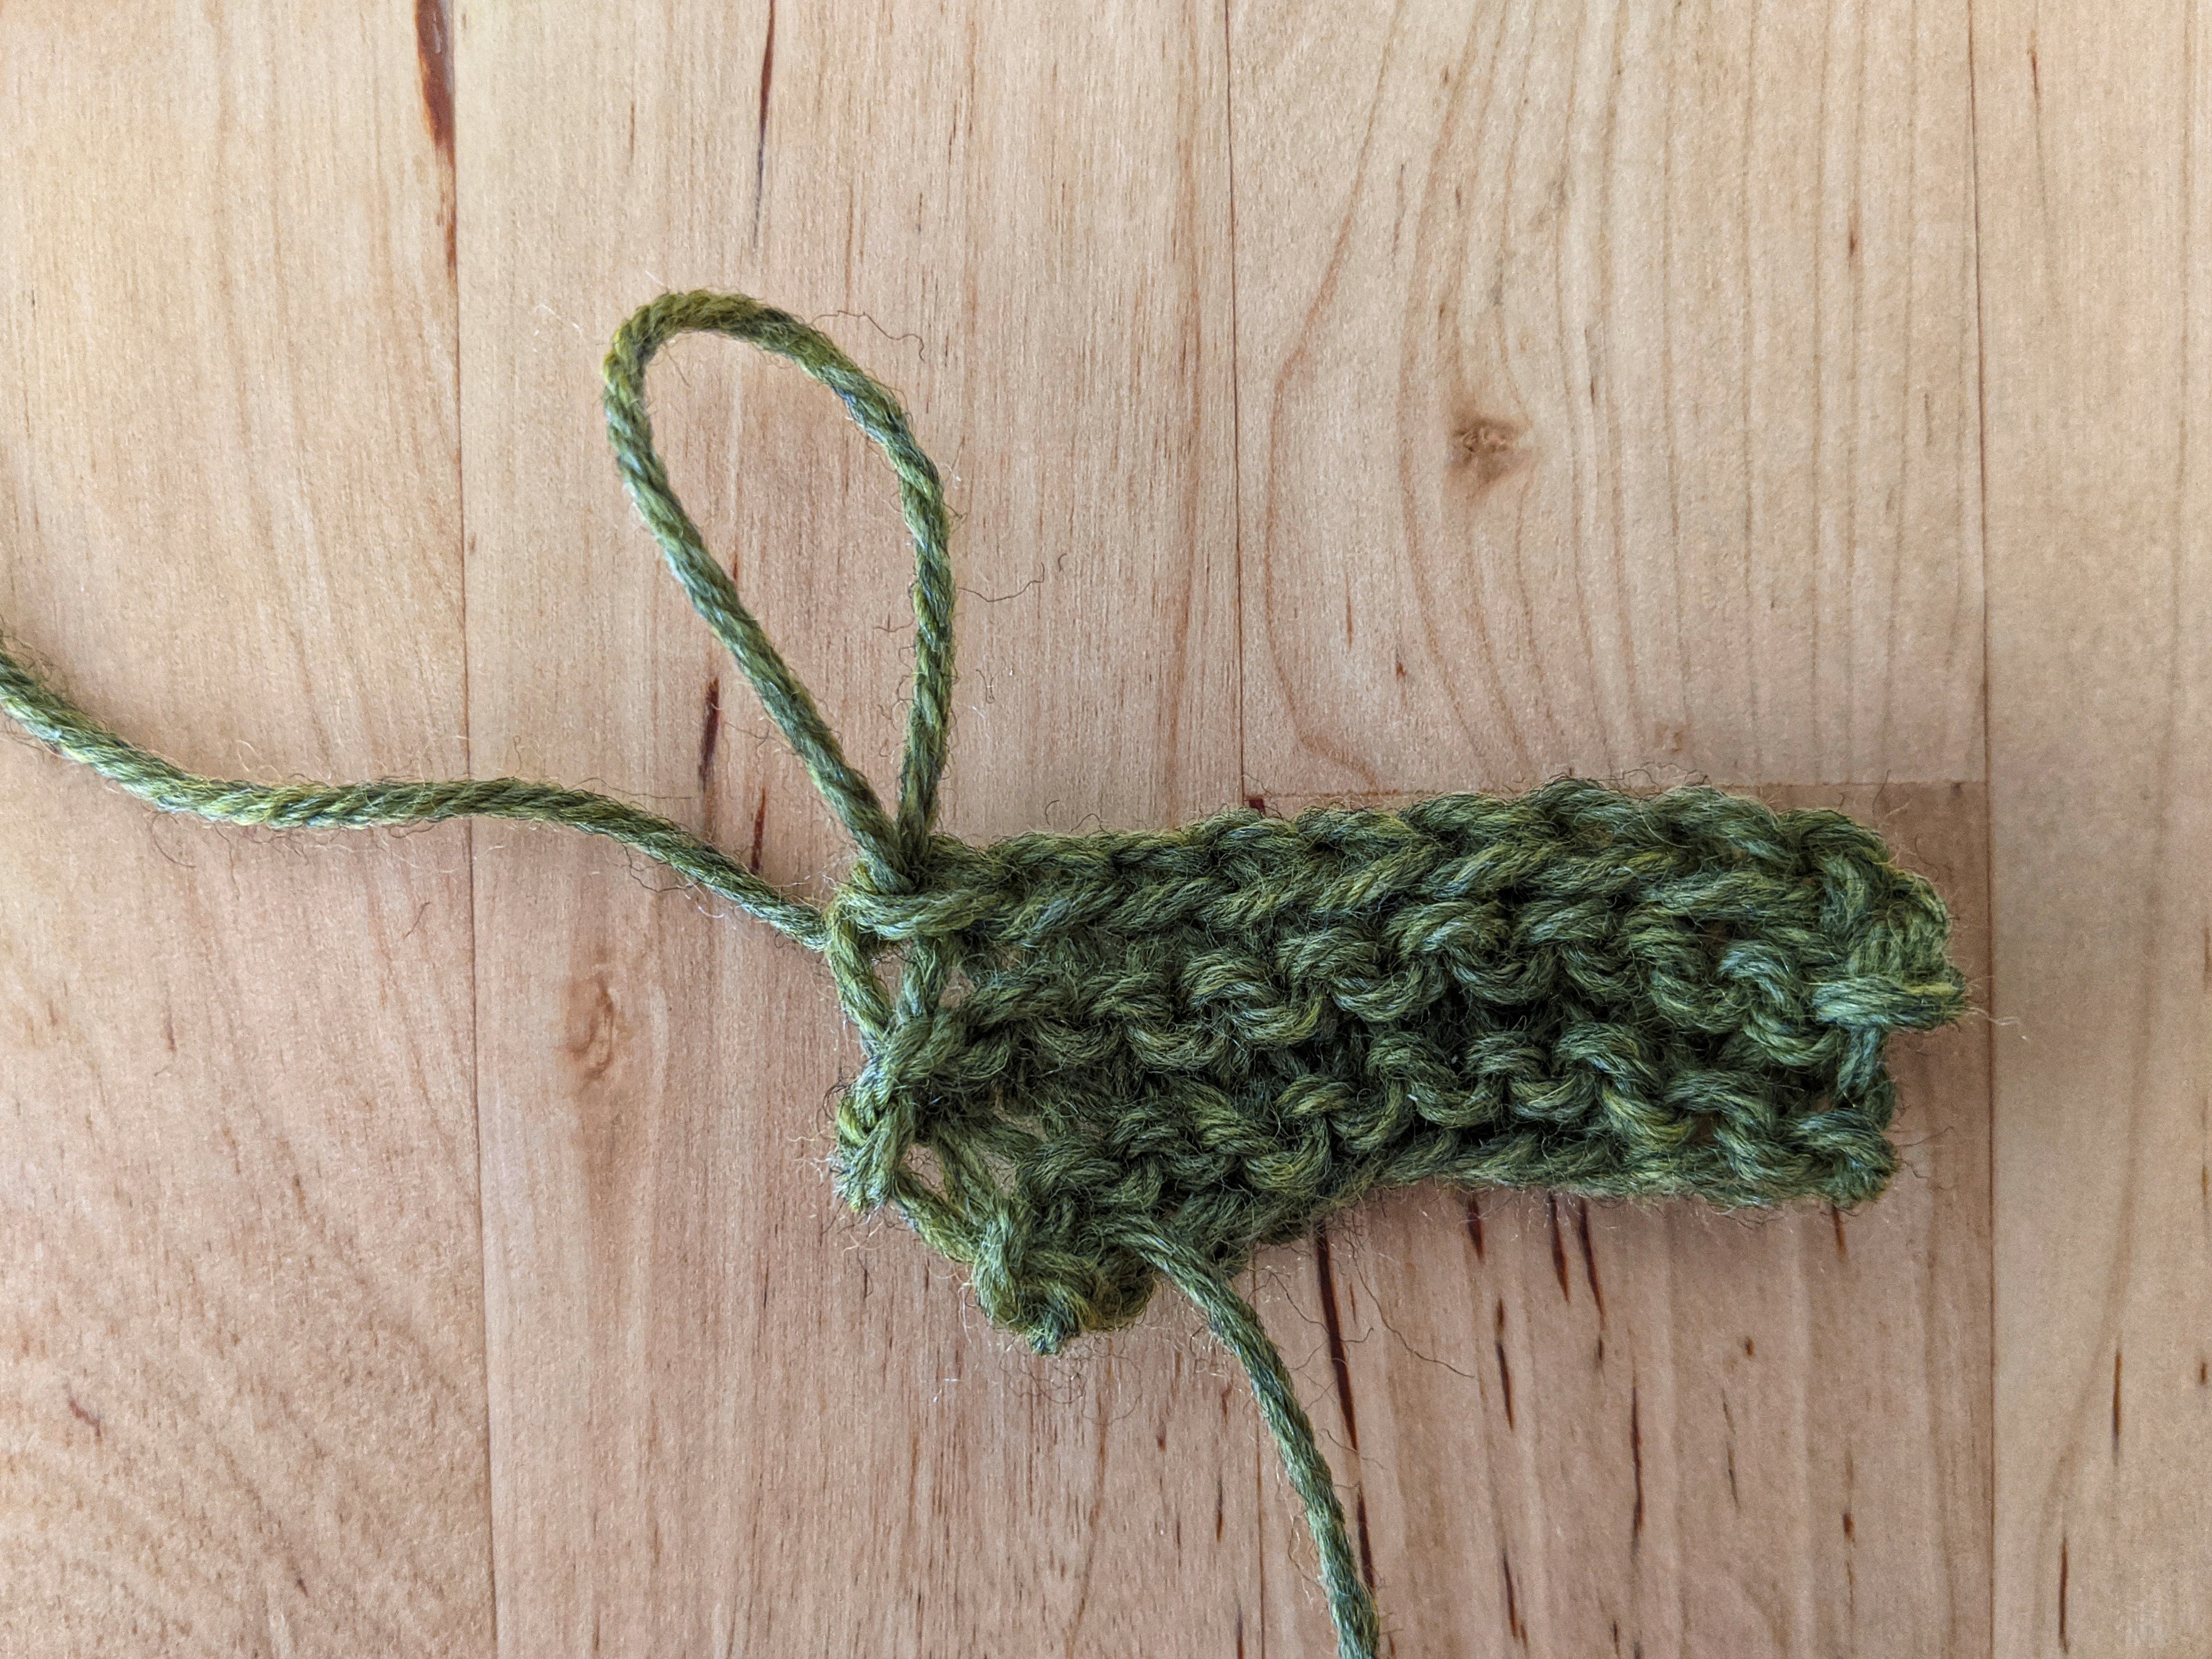
At the beginning of the row, knit the first two stitches as usual.

Then, insert your left needle into the first stitch you worked and pull it OVER the second stitch you worked, slipping it off the needle.

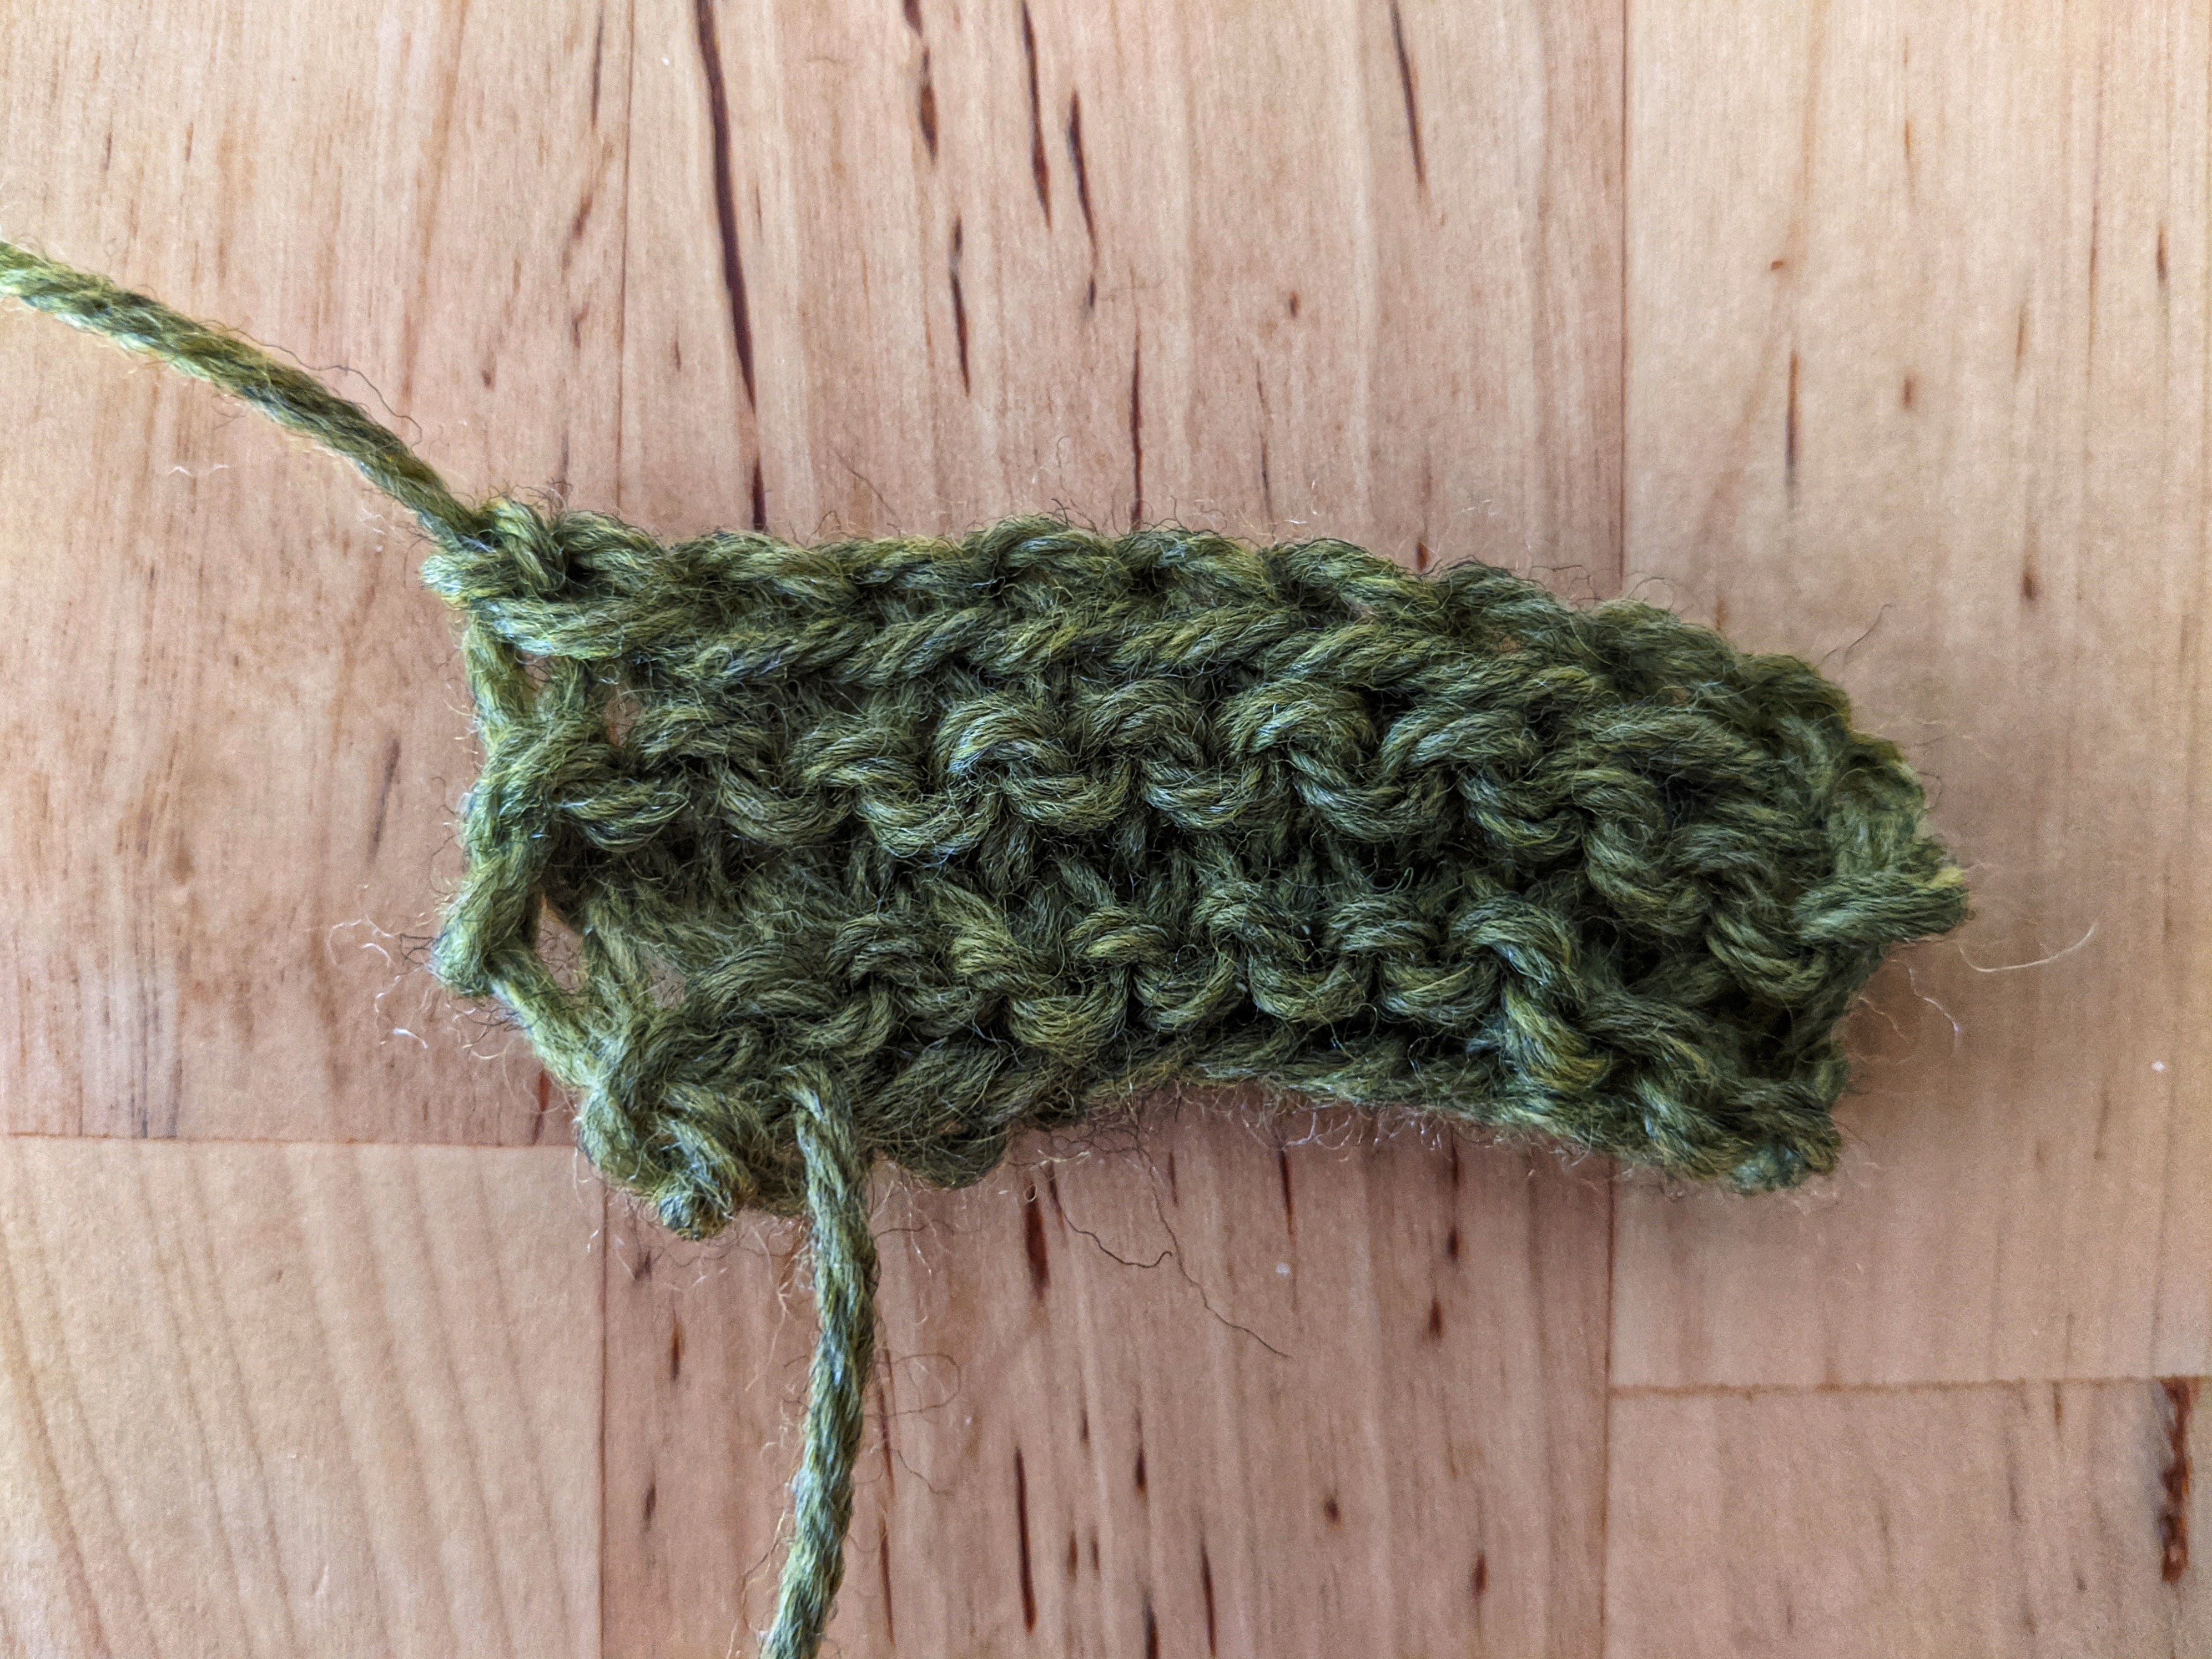
Then, continue knitting one stitch and pulling the previous stitch over the one you just knit to the end of the row. Remember, you only knit two stitches to begin the bind off row; knit one stitch and pull the previous stitch over for the remainder of the bind off row.

Repeat this process until you have one stitch remaining on your right needle.
When you come to the last stitch, cut the yarn and pull the end through the loop. Pull tight to create a knot.


Here is a video showing the bind off method within the row. In this video I bind off one stitch.
And there you have it! All the essentials for your knitting toolbox. I hope you pick up a pair of needles and give this a try. I enjoy knitting because it is such a relaxing activity for me. I hope you find it enjoyable, too! Until Friday, happy knitting!

2 thoughts on “How to Knit”