
I couldn’t start a yarn craft blog without offering some insight into the basics. In this post, I will walk you through how to work your first few crochet stitches! These are all the stitches you need to know in order to make my Easy-Peasy Dishcloth. I have an in-depth post about my recommendations for a beginner’s crochet kit, too!
Materials needed:
- a crochet hook
- yarn
- scissors
In my photos, I am using a size H/8 crochet hook and Lily Sugar ‘n Cream yarn. The hook can be purchased here (as part of the Cozy Crochet Kit mentioned in my “Welcome to Bilingwool” post) and the yarn can be purchased here, or at most craft stores. My favorite brand of knitting needles and crochet hooks are Knitter’s Pride, which can be found here.
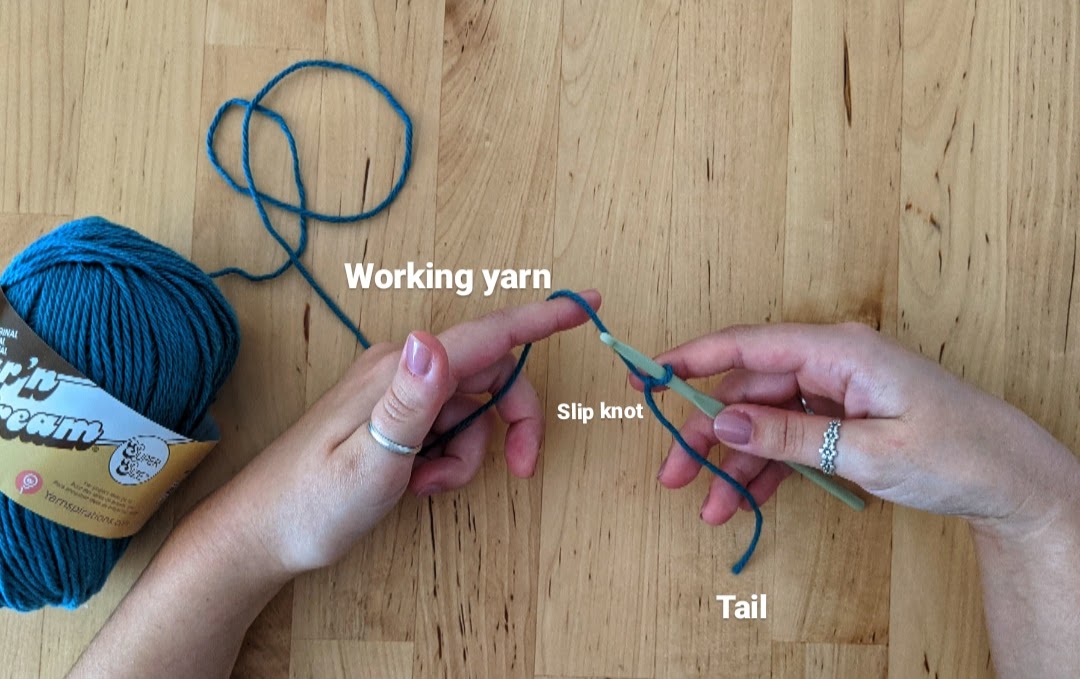
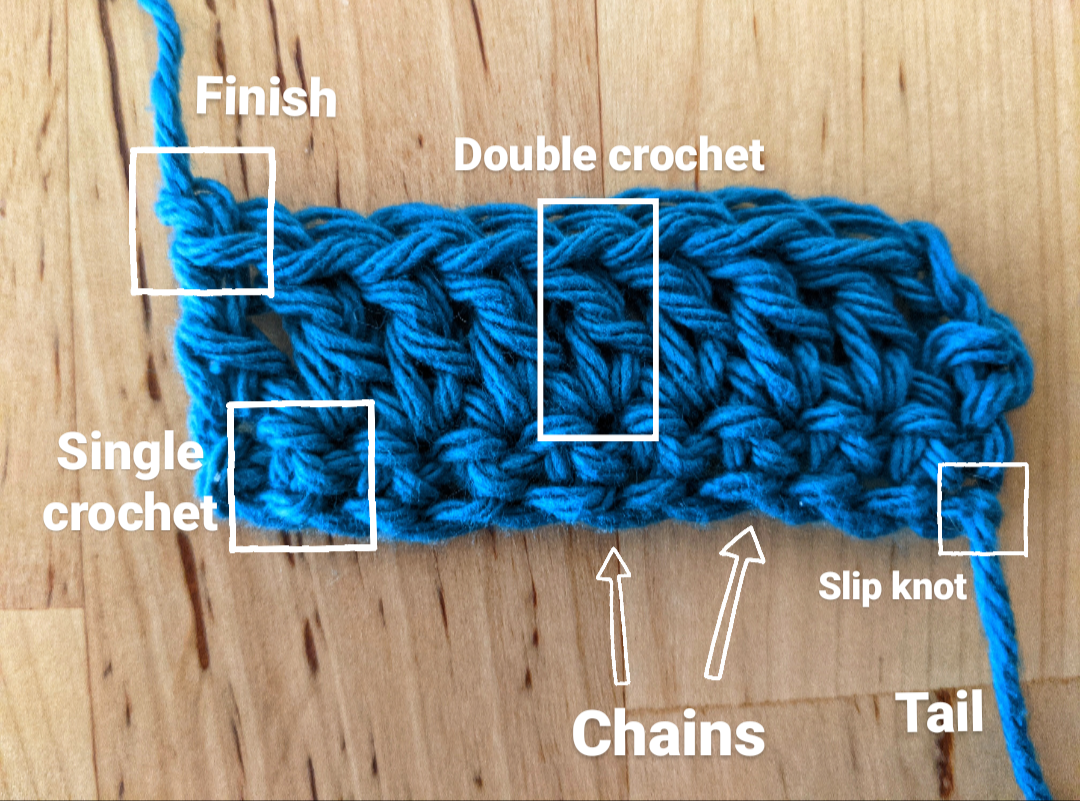
There are some important terms I will be using throughout this post that are necessary to define before beginning. A yarn tail usually refers to the piece of yarn that hangs off the beginning of your work, while the working yarn is the end that is connected to the skein. A slip knot is the very first step to many crocheting (and knitting) projects. A yarn over is the act of wrapping the yarn around the hook/needle once. A skein is the yarn from which you are working. (Other names for a skein are: hank, ball, and cone.) All of these elements will be explained more in the photos and text below.

Slip Knot
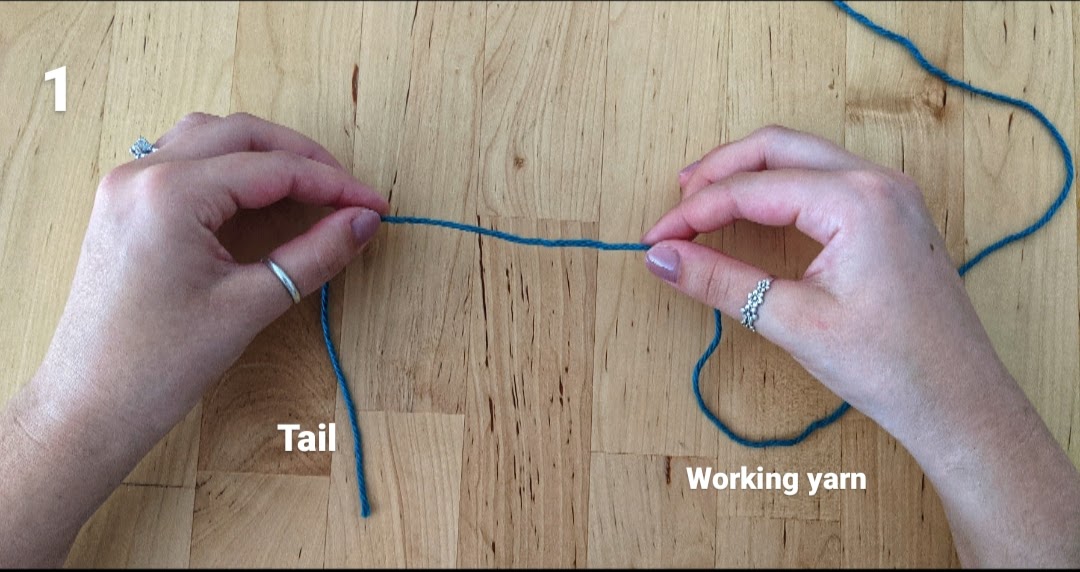
The first step of making many crochet projects is making a slip knot. In order to do this, hold the tail end of the yarn about three inches apart with both thumbs.

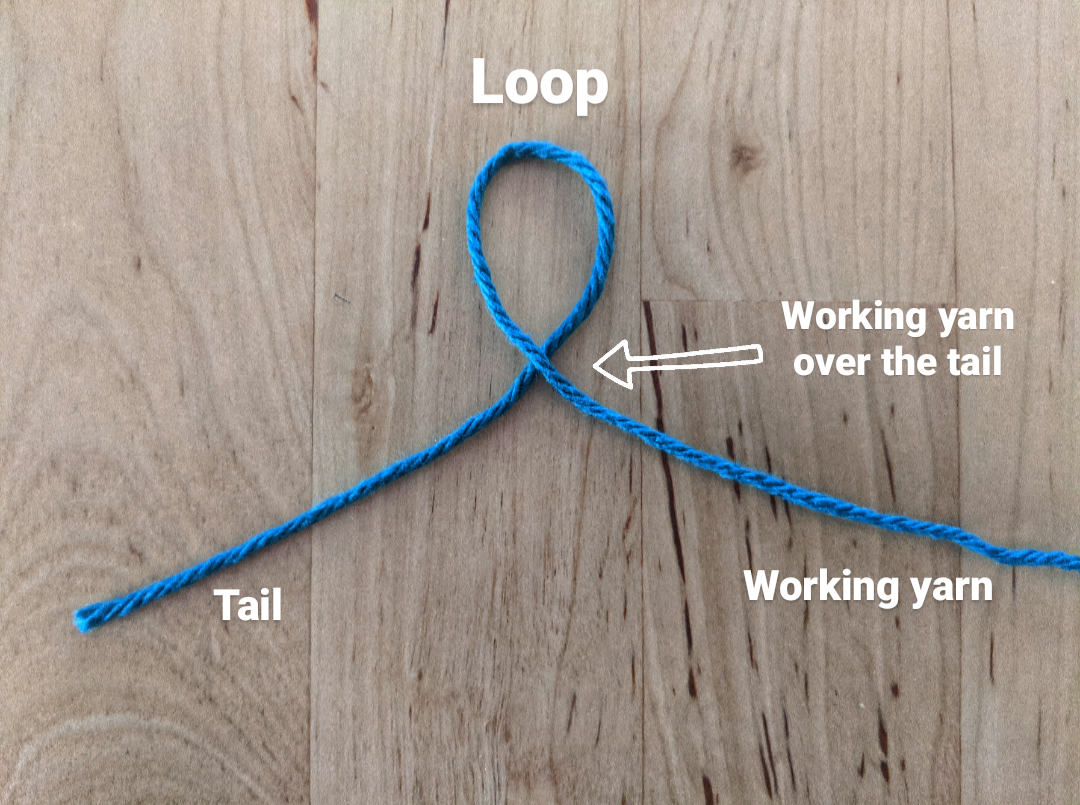
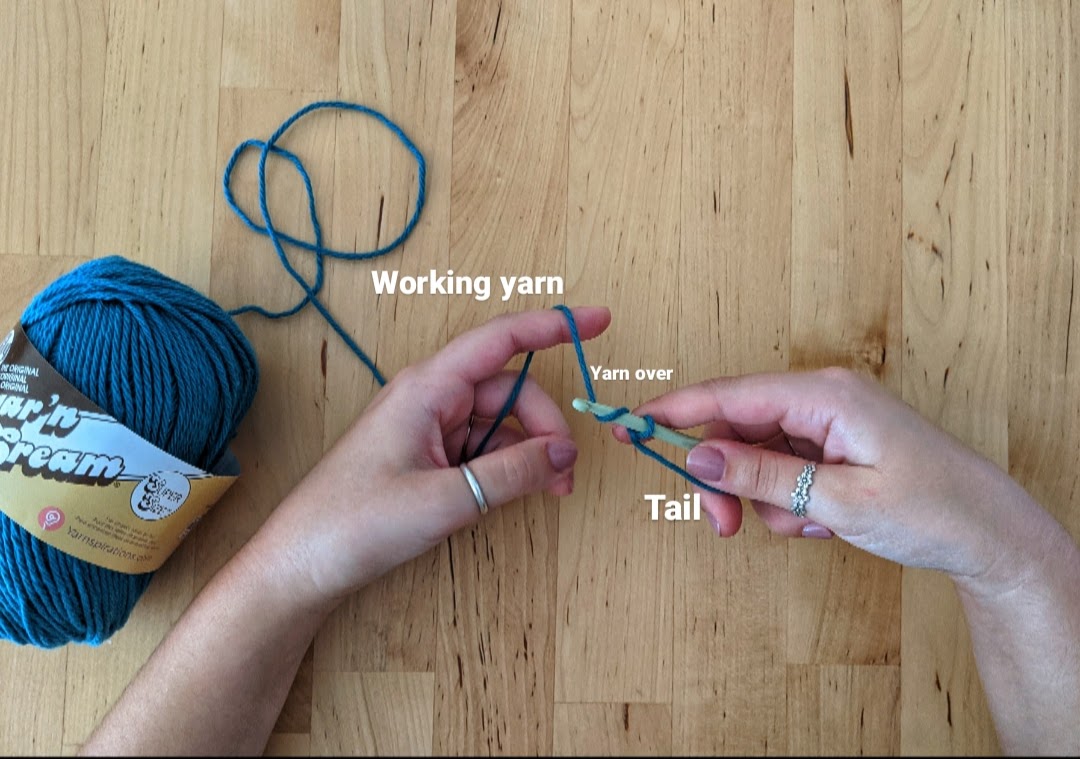
Cross the working yarn over the tail to make a simple loop.
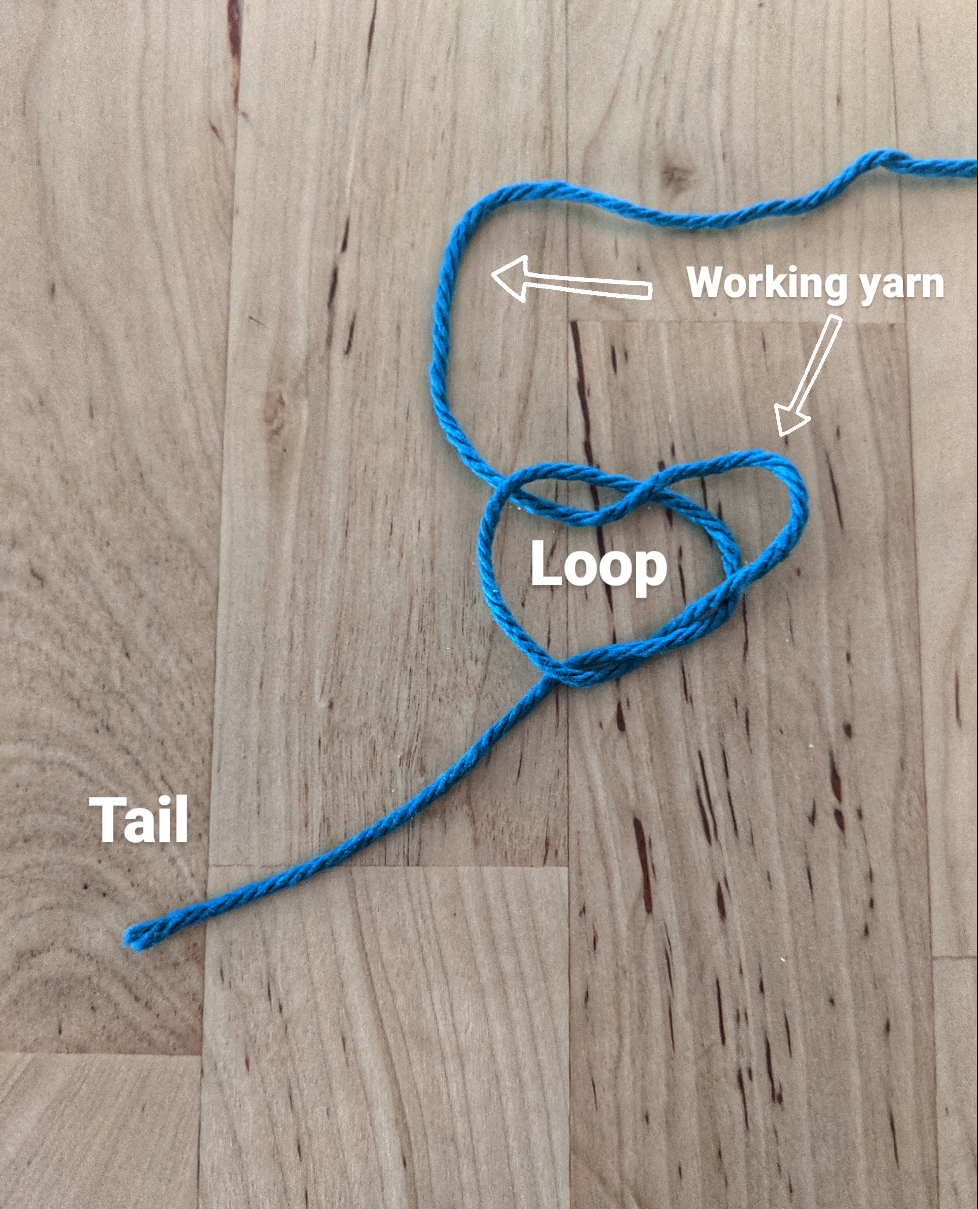
Then, pull the working yarn (the one that is connected to your skein) over the tail, under the loop, and through the loop, thus creating a new loop.

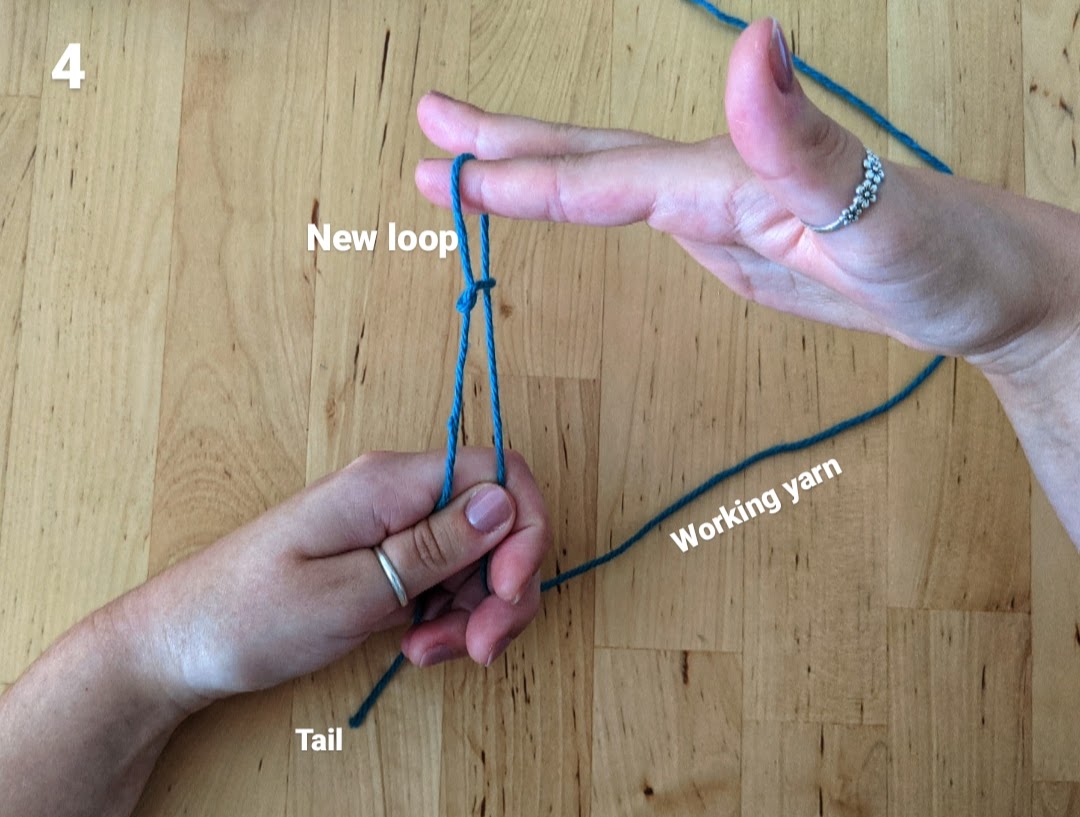
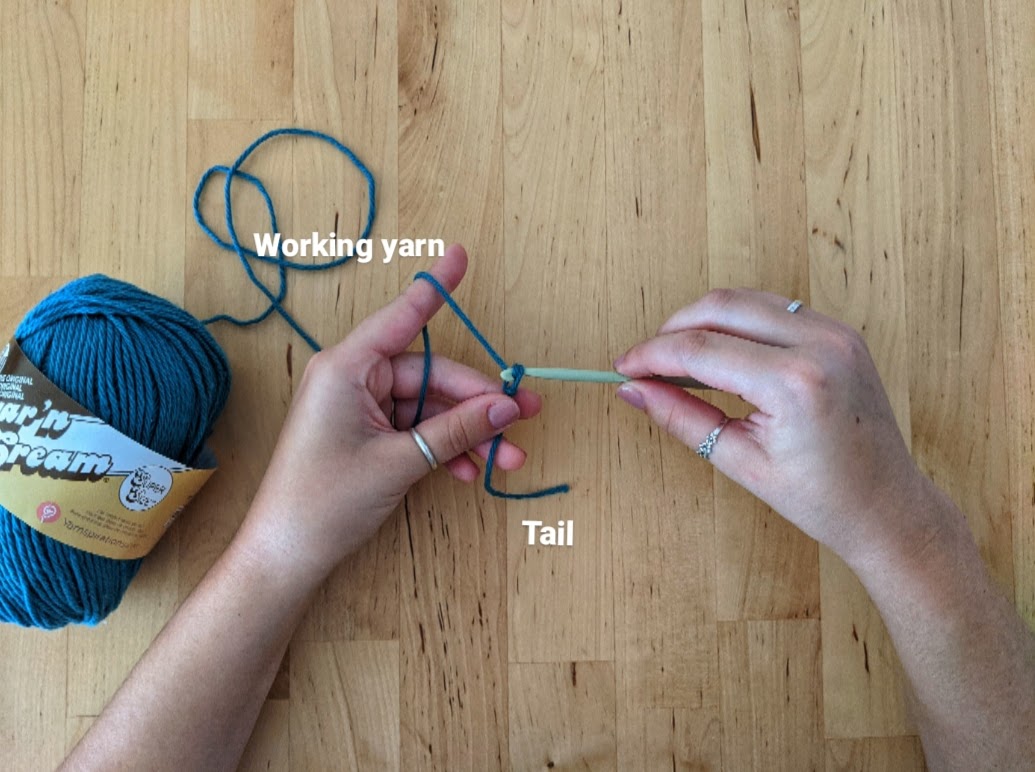
Finally, pull both ends while holding your finger through the new loop to adjust the size of your slip knot. (It is worth noting that slip knots will disappear if you pull on both ends simultaneously, without also holding onto the new loop.)

Here are two more looks at how to make a slip knot!


Chain
We will be making chains now. Chains are the essential stitches on which most crochet projects build. Chains are the seeds from which your yarn flowers grow! Chains are abbreviated as “ch” and many times followed by a number. For example, “ch 4” means chain four.
After creating your slip knot, insert your crochet hook through the loop.
Notice my hand placement; I am holding the yarn tail alongside my crochet hook in my right hand, and I wrapped my working yarn over my index finger of my left hand and in the crook of my ring finger and little finger. This specific hand placement helps me maintain even tension.
Next, yarn over. I typically wrap the yarn from behind the hook towards me.
Using the curved tip of the crochet hook, pull the yarn over through the slip knot.
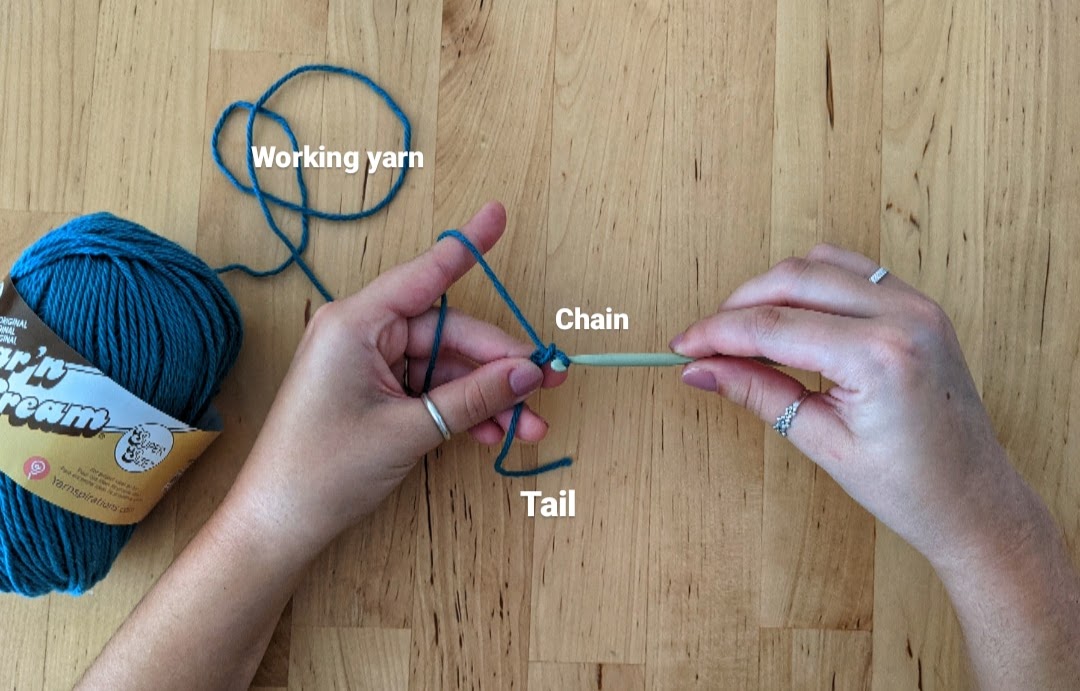
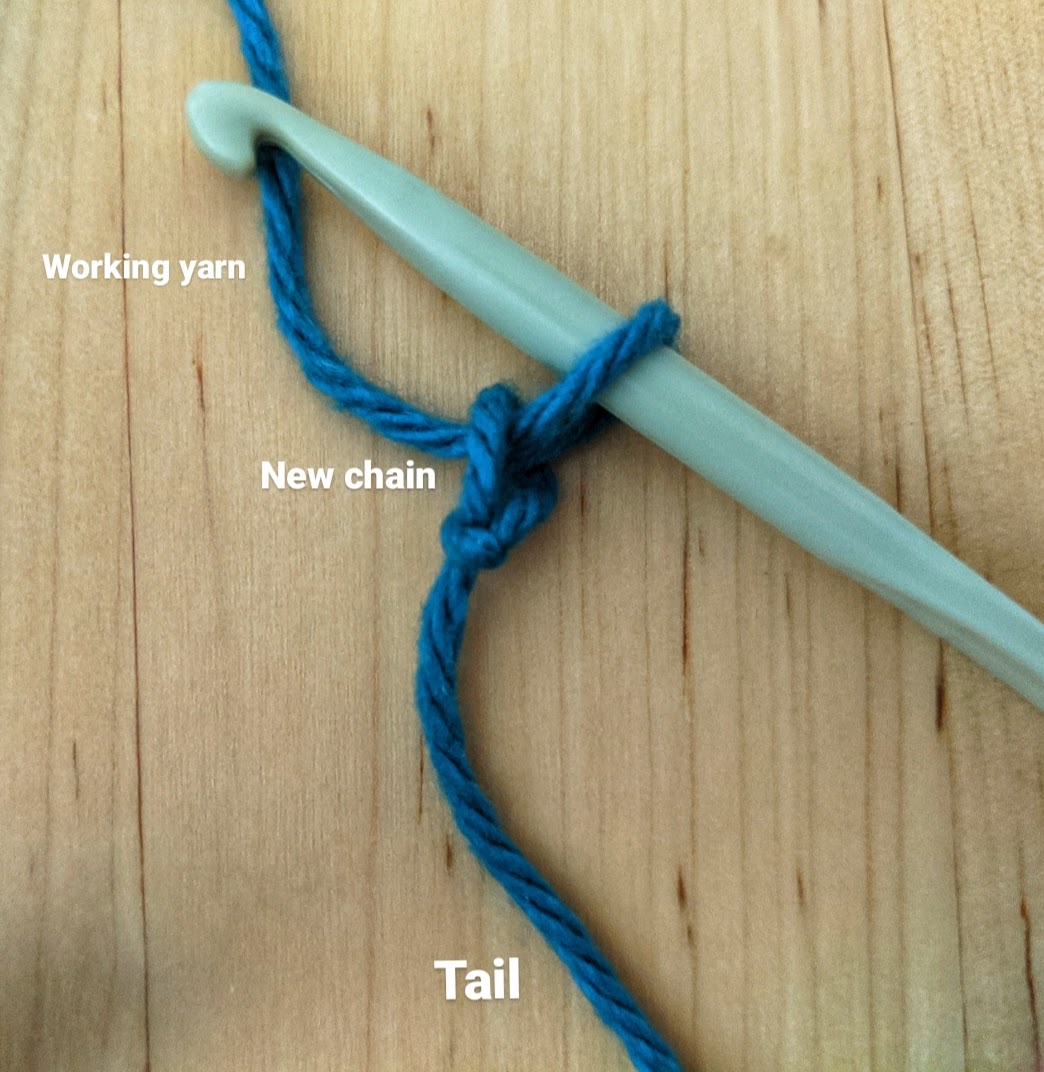
You have officially chained 1! Pat yourself on the back because you have officially started crocheting!
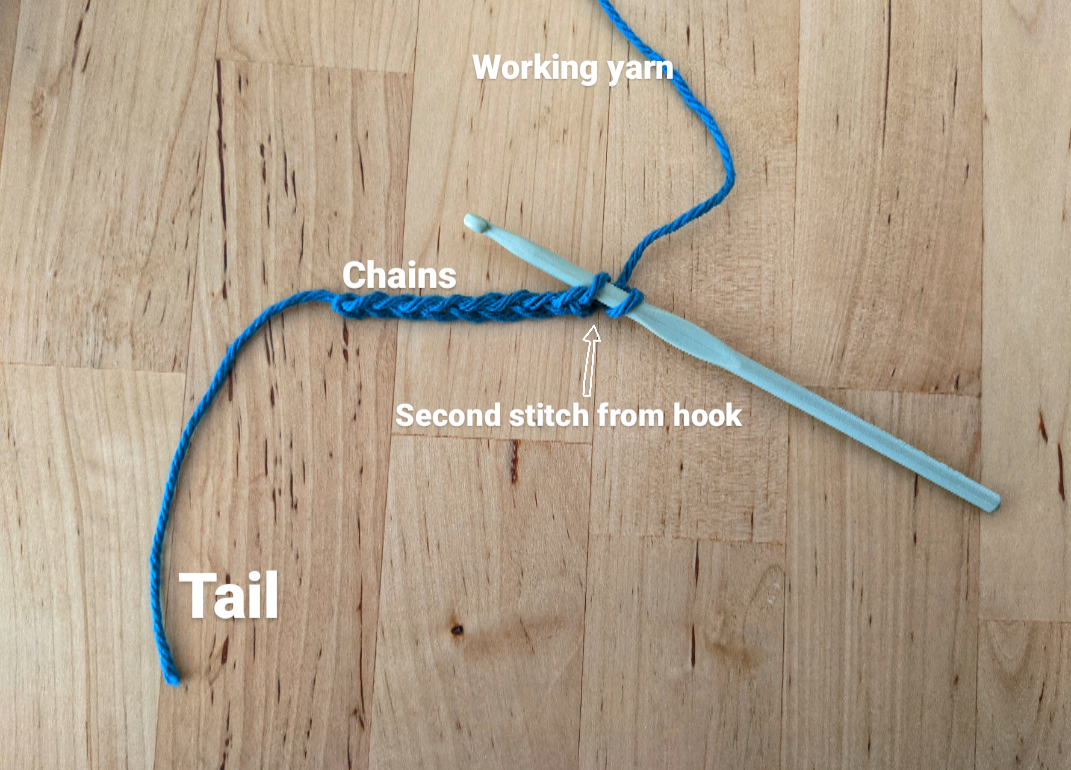
Here is a video showing me making two chains.
I recommend making a chain over and over until you feel confident in the size and regularity of your chains. Notice what finger arrangements make your chains look the best. Notice that looser work tends to be easier to manage than tighter work, but work that’s too loose can be unmanageable. Notice that keeping an even tension on the working yarn helps manage the tightness of your chains.
Also, anything in knit and crochet can be undone. If you want to re-do a stitch, or start over completely, simply take out your hook (or needles) and pull on the working yarn until your desired amount of stitches are undone.
Single Crochet
Single crochets are often abbreviated as “sc” in many patterns. They are a great way to make a row of chains more substantial.
Insert your hook into the second stitch from your hook.
Then, yarn over. Pull yarn through the stitch. Now you have two loops on your hook.

Yarn over, and pull through both loops on your hook.

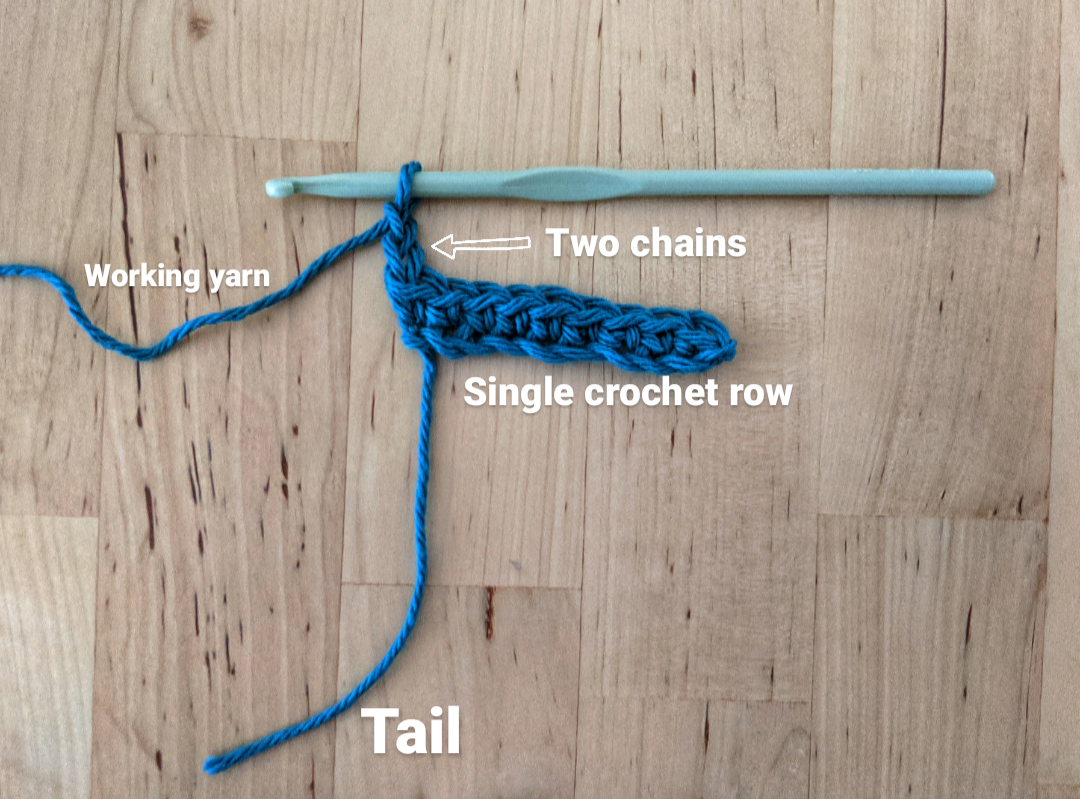
Ta-da! You did it! Single crochets are such wonderful, tightly-woven stitches that work as a great foundation row for many projects.

Here is a video showing the entire process.
Double Crochet
Double crochets (abbreviated “dc”) are like working two single crochets in the same stitch. They are taller and use more yarn than a single crochet. Many crochet projects are made up of entirely double crochets. The majority of my Easy-Peasy Dishcloth is worked in double crochet.
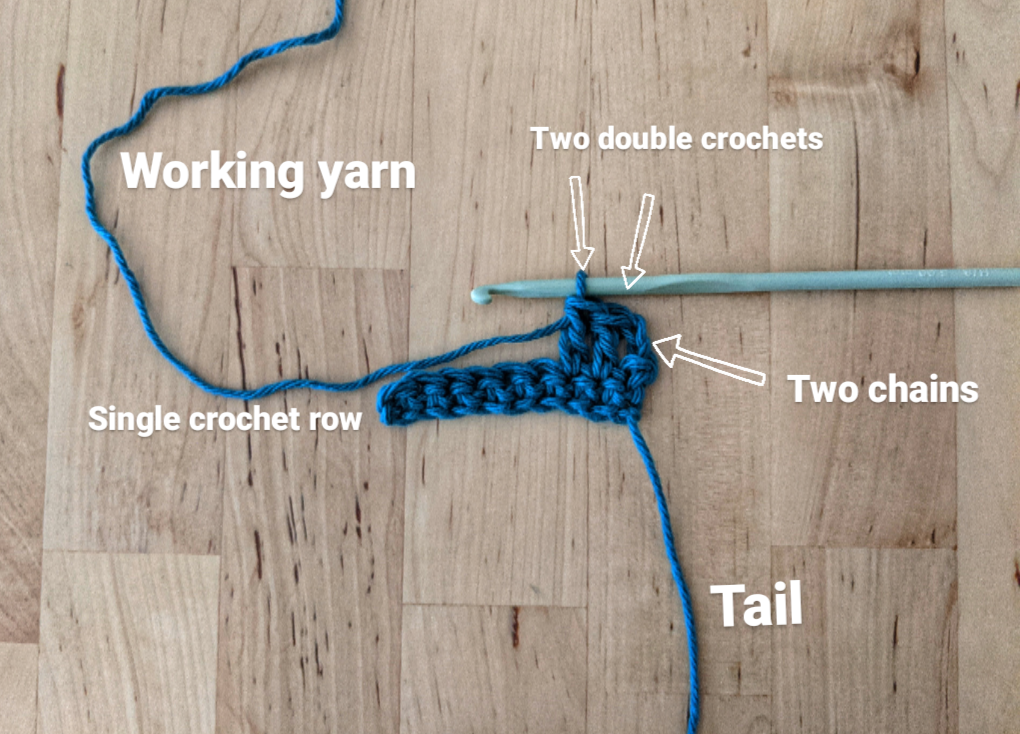
It is important to note that before starting a double crochet row, you must chain two before beginning a double crochet stitch. This is done to even out the height of the double crochet stitches across the row. In my video, I am starting a new row of double crochets, so first I chain two (to even the height of the upcoming row) and TURN my work so that I can work into the existing stitches.
To begin, yarn over BEFORE inserting into the stitch. In the following photos, I have one completed double crochet and one disguised double crochet (chain 2) in my row so far.

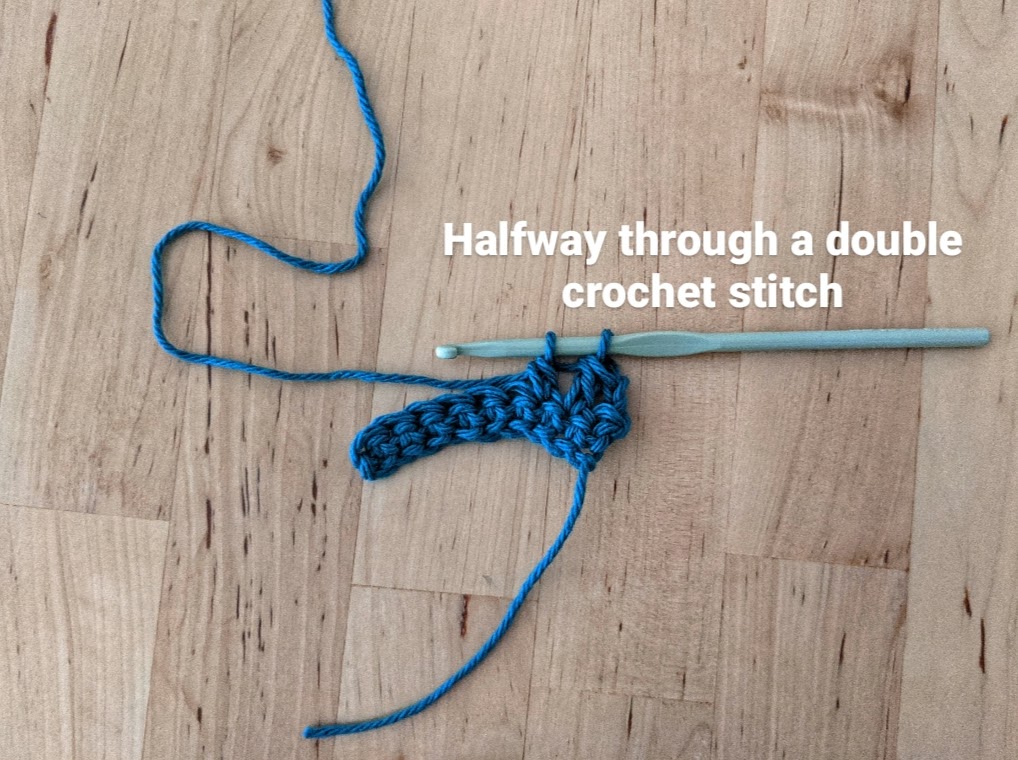
Insert your hook into the next stitch from your hook. Yarn over, pull through. You now have three loops on your hook.


Yarn over, pull through two loops. You will have two loops left on your needle.
Yarn over, pull through two loops. You will have one loop left on your needle.

…and done! One double crochet made.
Finishing
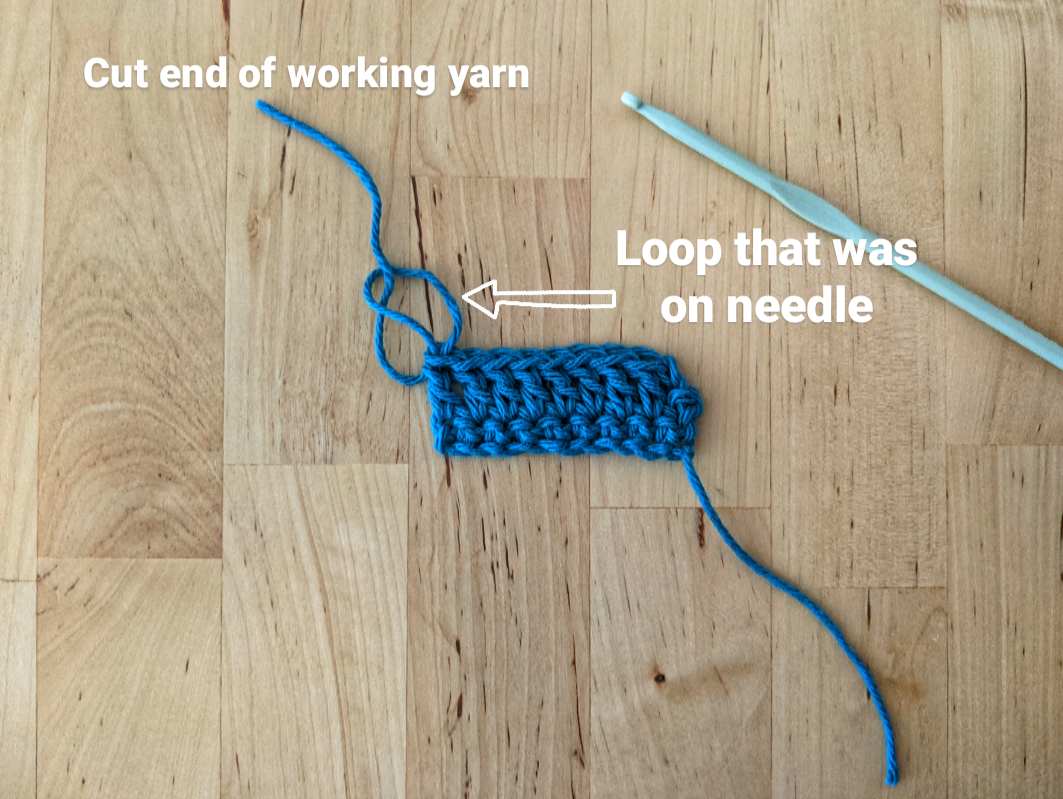
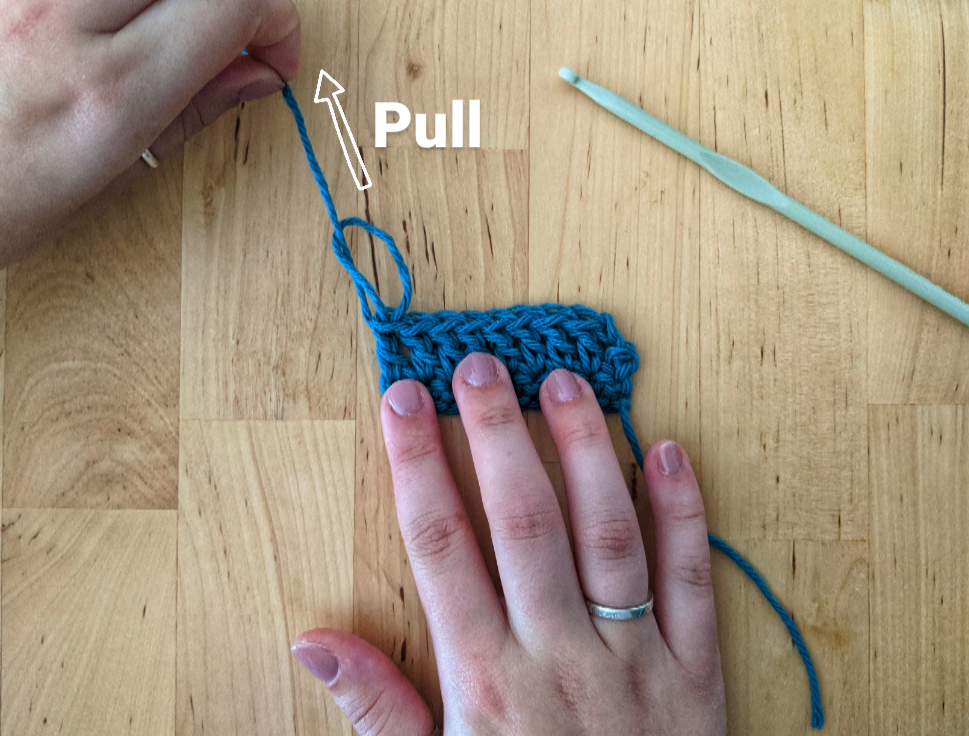
To finish any crochet project, cut the working yarn about three inches down from your crochet hook. Take your hook out of your current loop. Then pull the cut end of the working yarn through the loop and pull tight, creating a knot. Alternatively, you could begin to make a chain and continue to pull the yarn until it is completely through the loop, forming a knot.

Here is your finished piece.
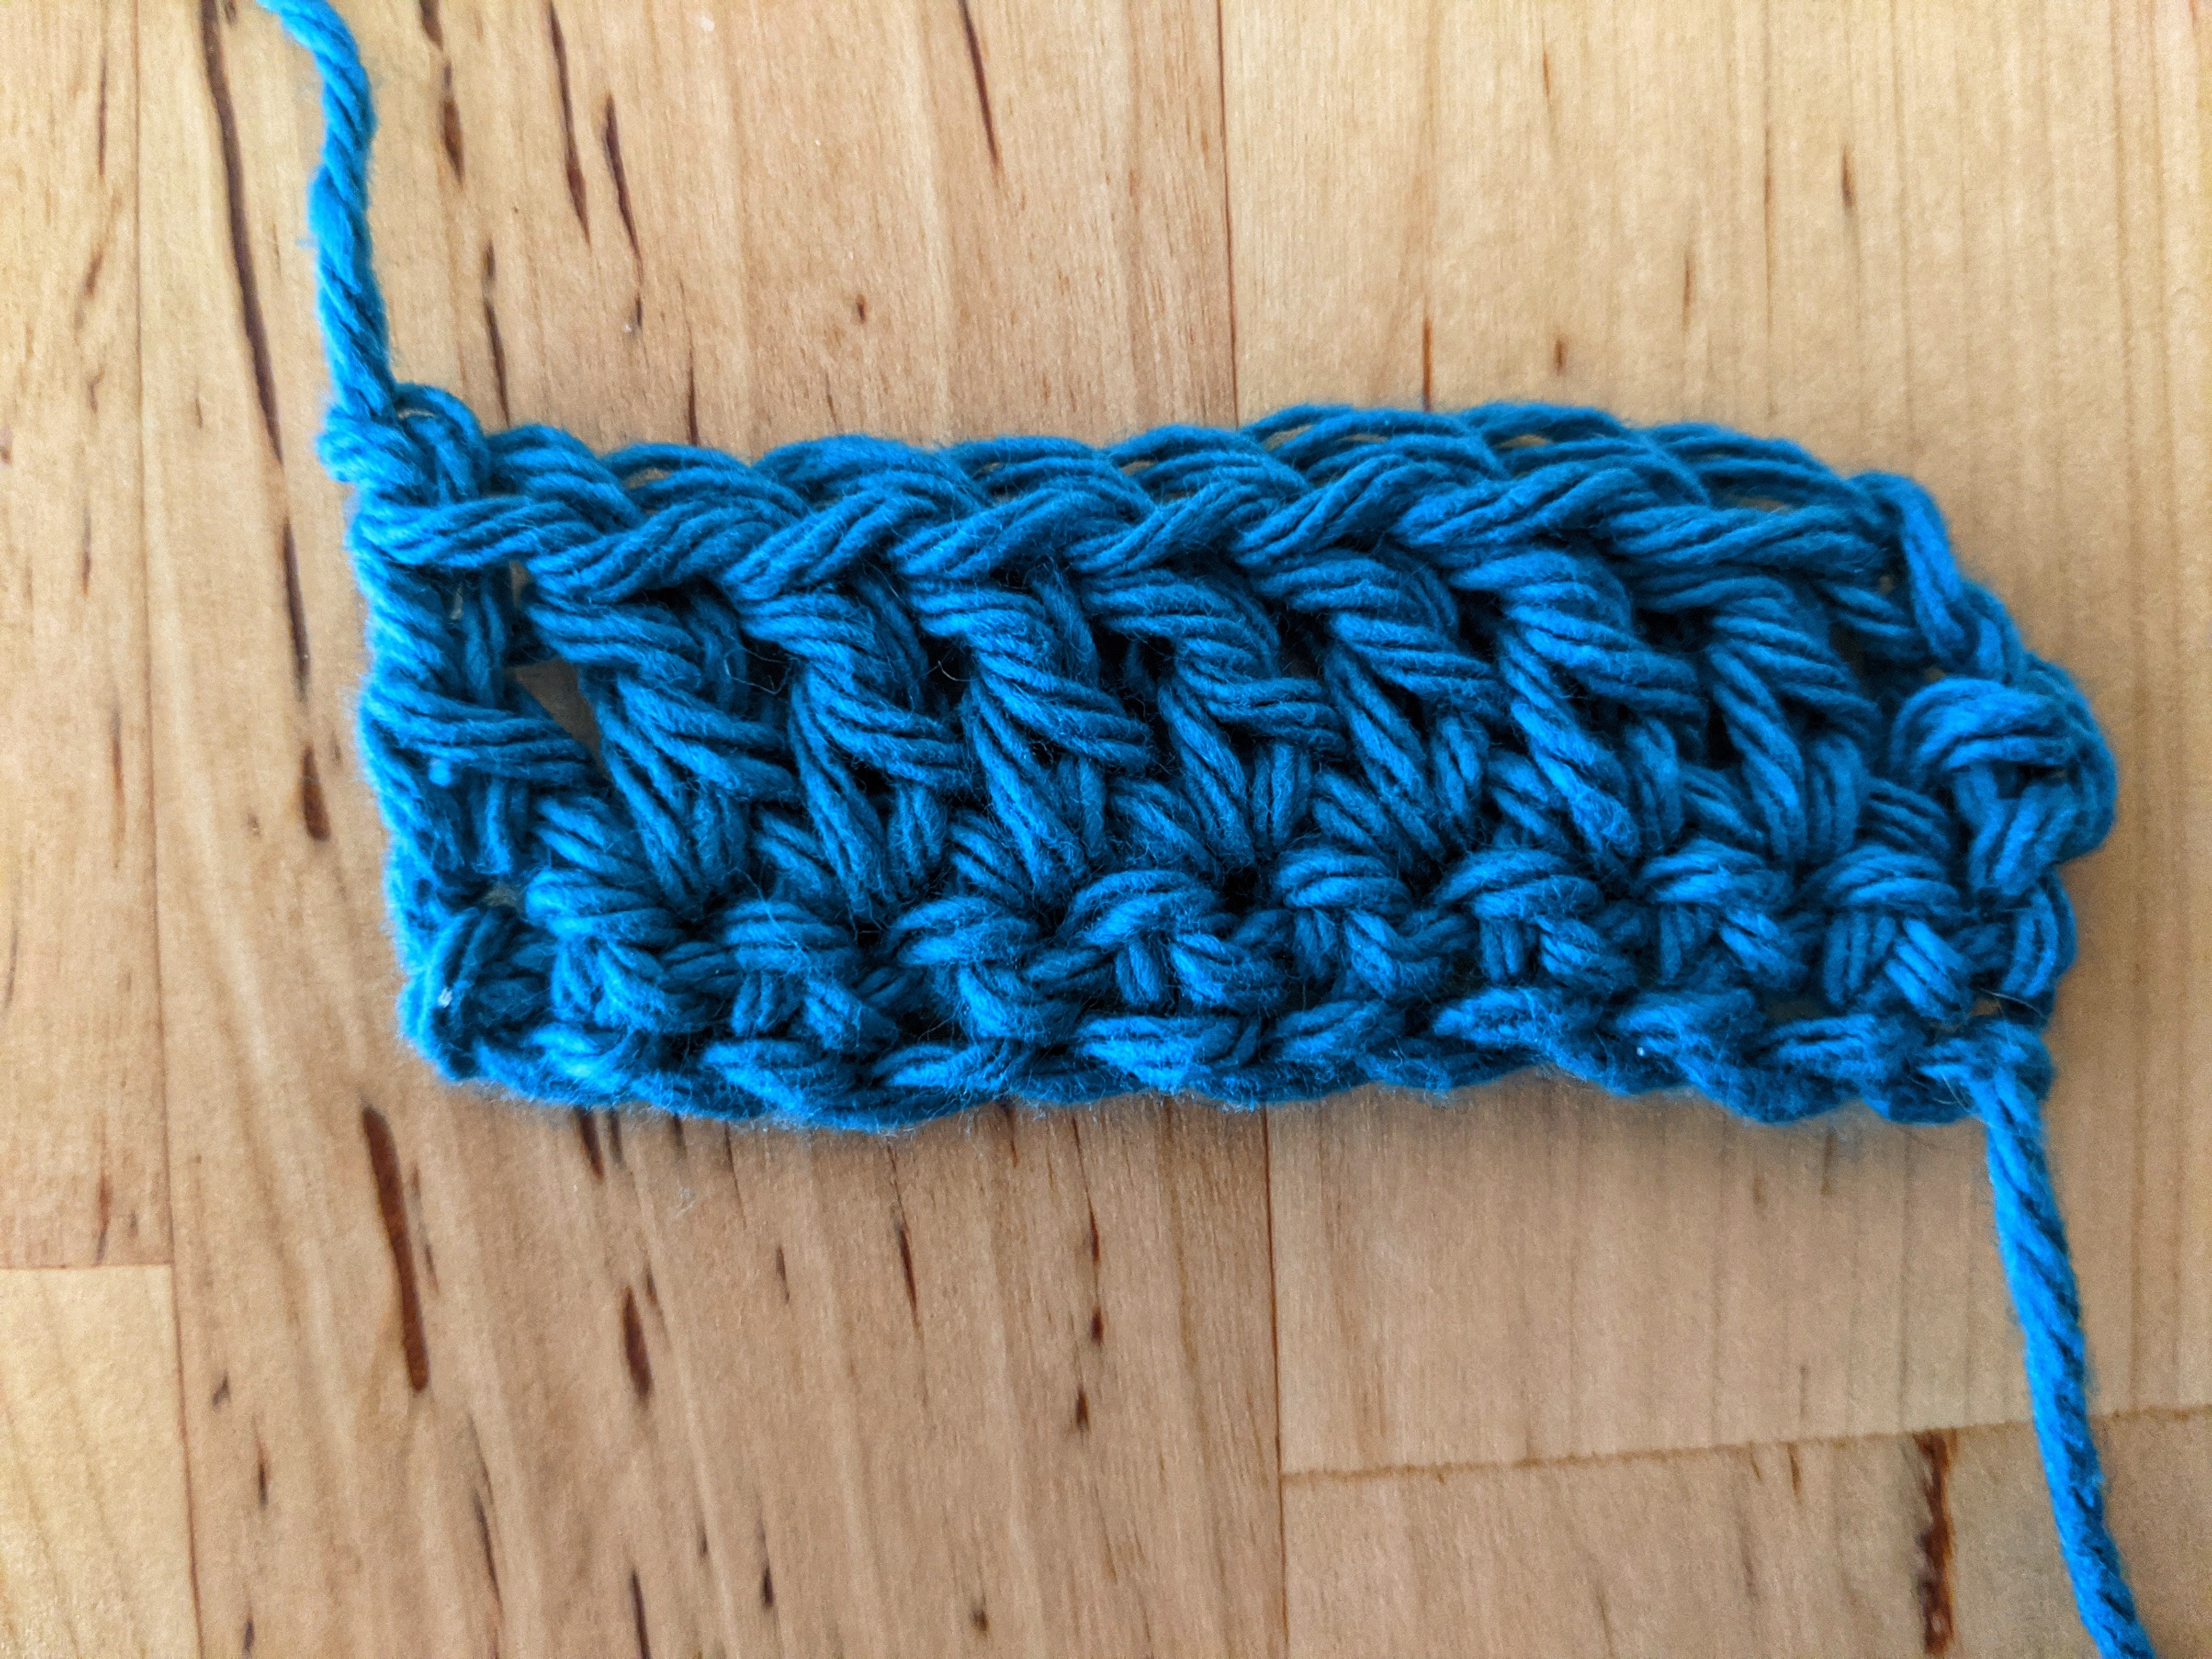
You worked your first few stitches of crochet! Congratulations! Practice is so important when it comes to knit and crochet. Don’t get discouraged if you don’t pick it up immediately; attempts that don’t succeed teach you more about how to succeed. I believe in you!
There are other crochet stitches that I have not mentioned in this post, including (but not limited to) the slip stitch, half-double crochet, and treble crochet. I will be addressing those in a later post!

This was very thorough and well explained. I appreciate all the written details along with the pictures.
LikeLiked by 1 person