add a fun twist to your knitting
Hello everyone! What a beautiful day we have today. I’m listening to “Banana Pancakes” by Jack Johnson as I work this morning. The sun is shining, the leaves are falling, and I feel so grateful to be writing about knitting for you all!

Today I wanted to share with you a tutorial for knitting cables. They are a relatively easy way to add some texture and visual interest to your garments. Cables look like braids, twists, or interlocking patterns in knitting. They look harder than they are, I promise. I have included an easy pattern to practice cables, if you are interested.
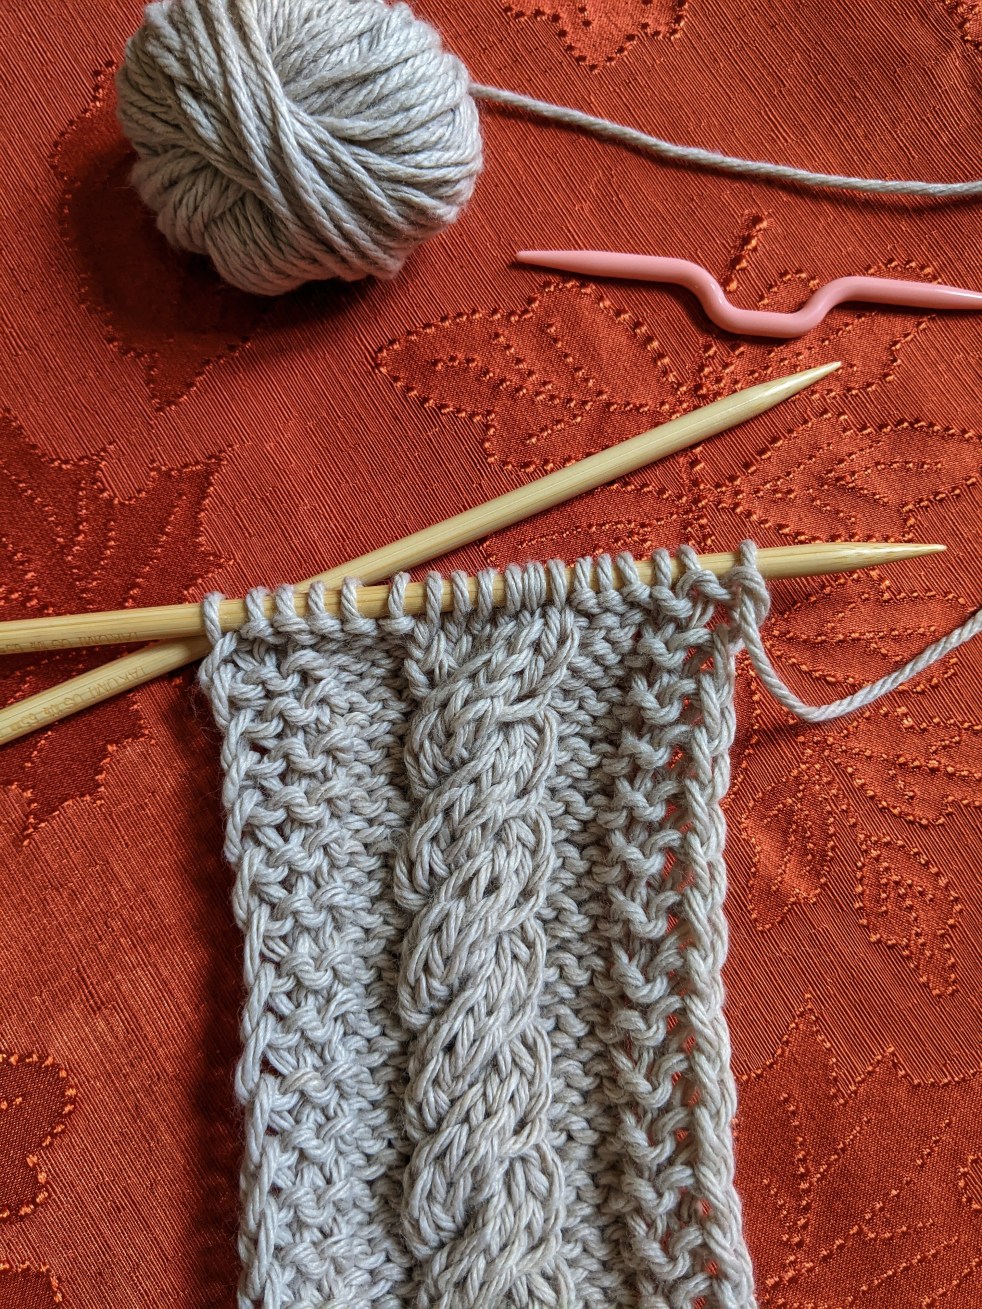
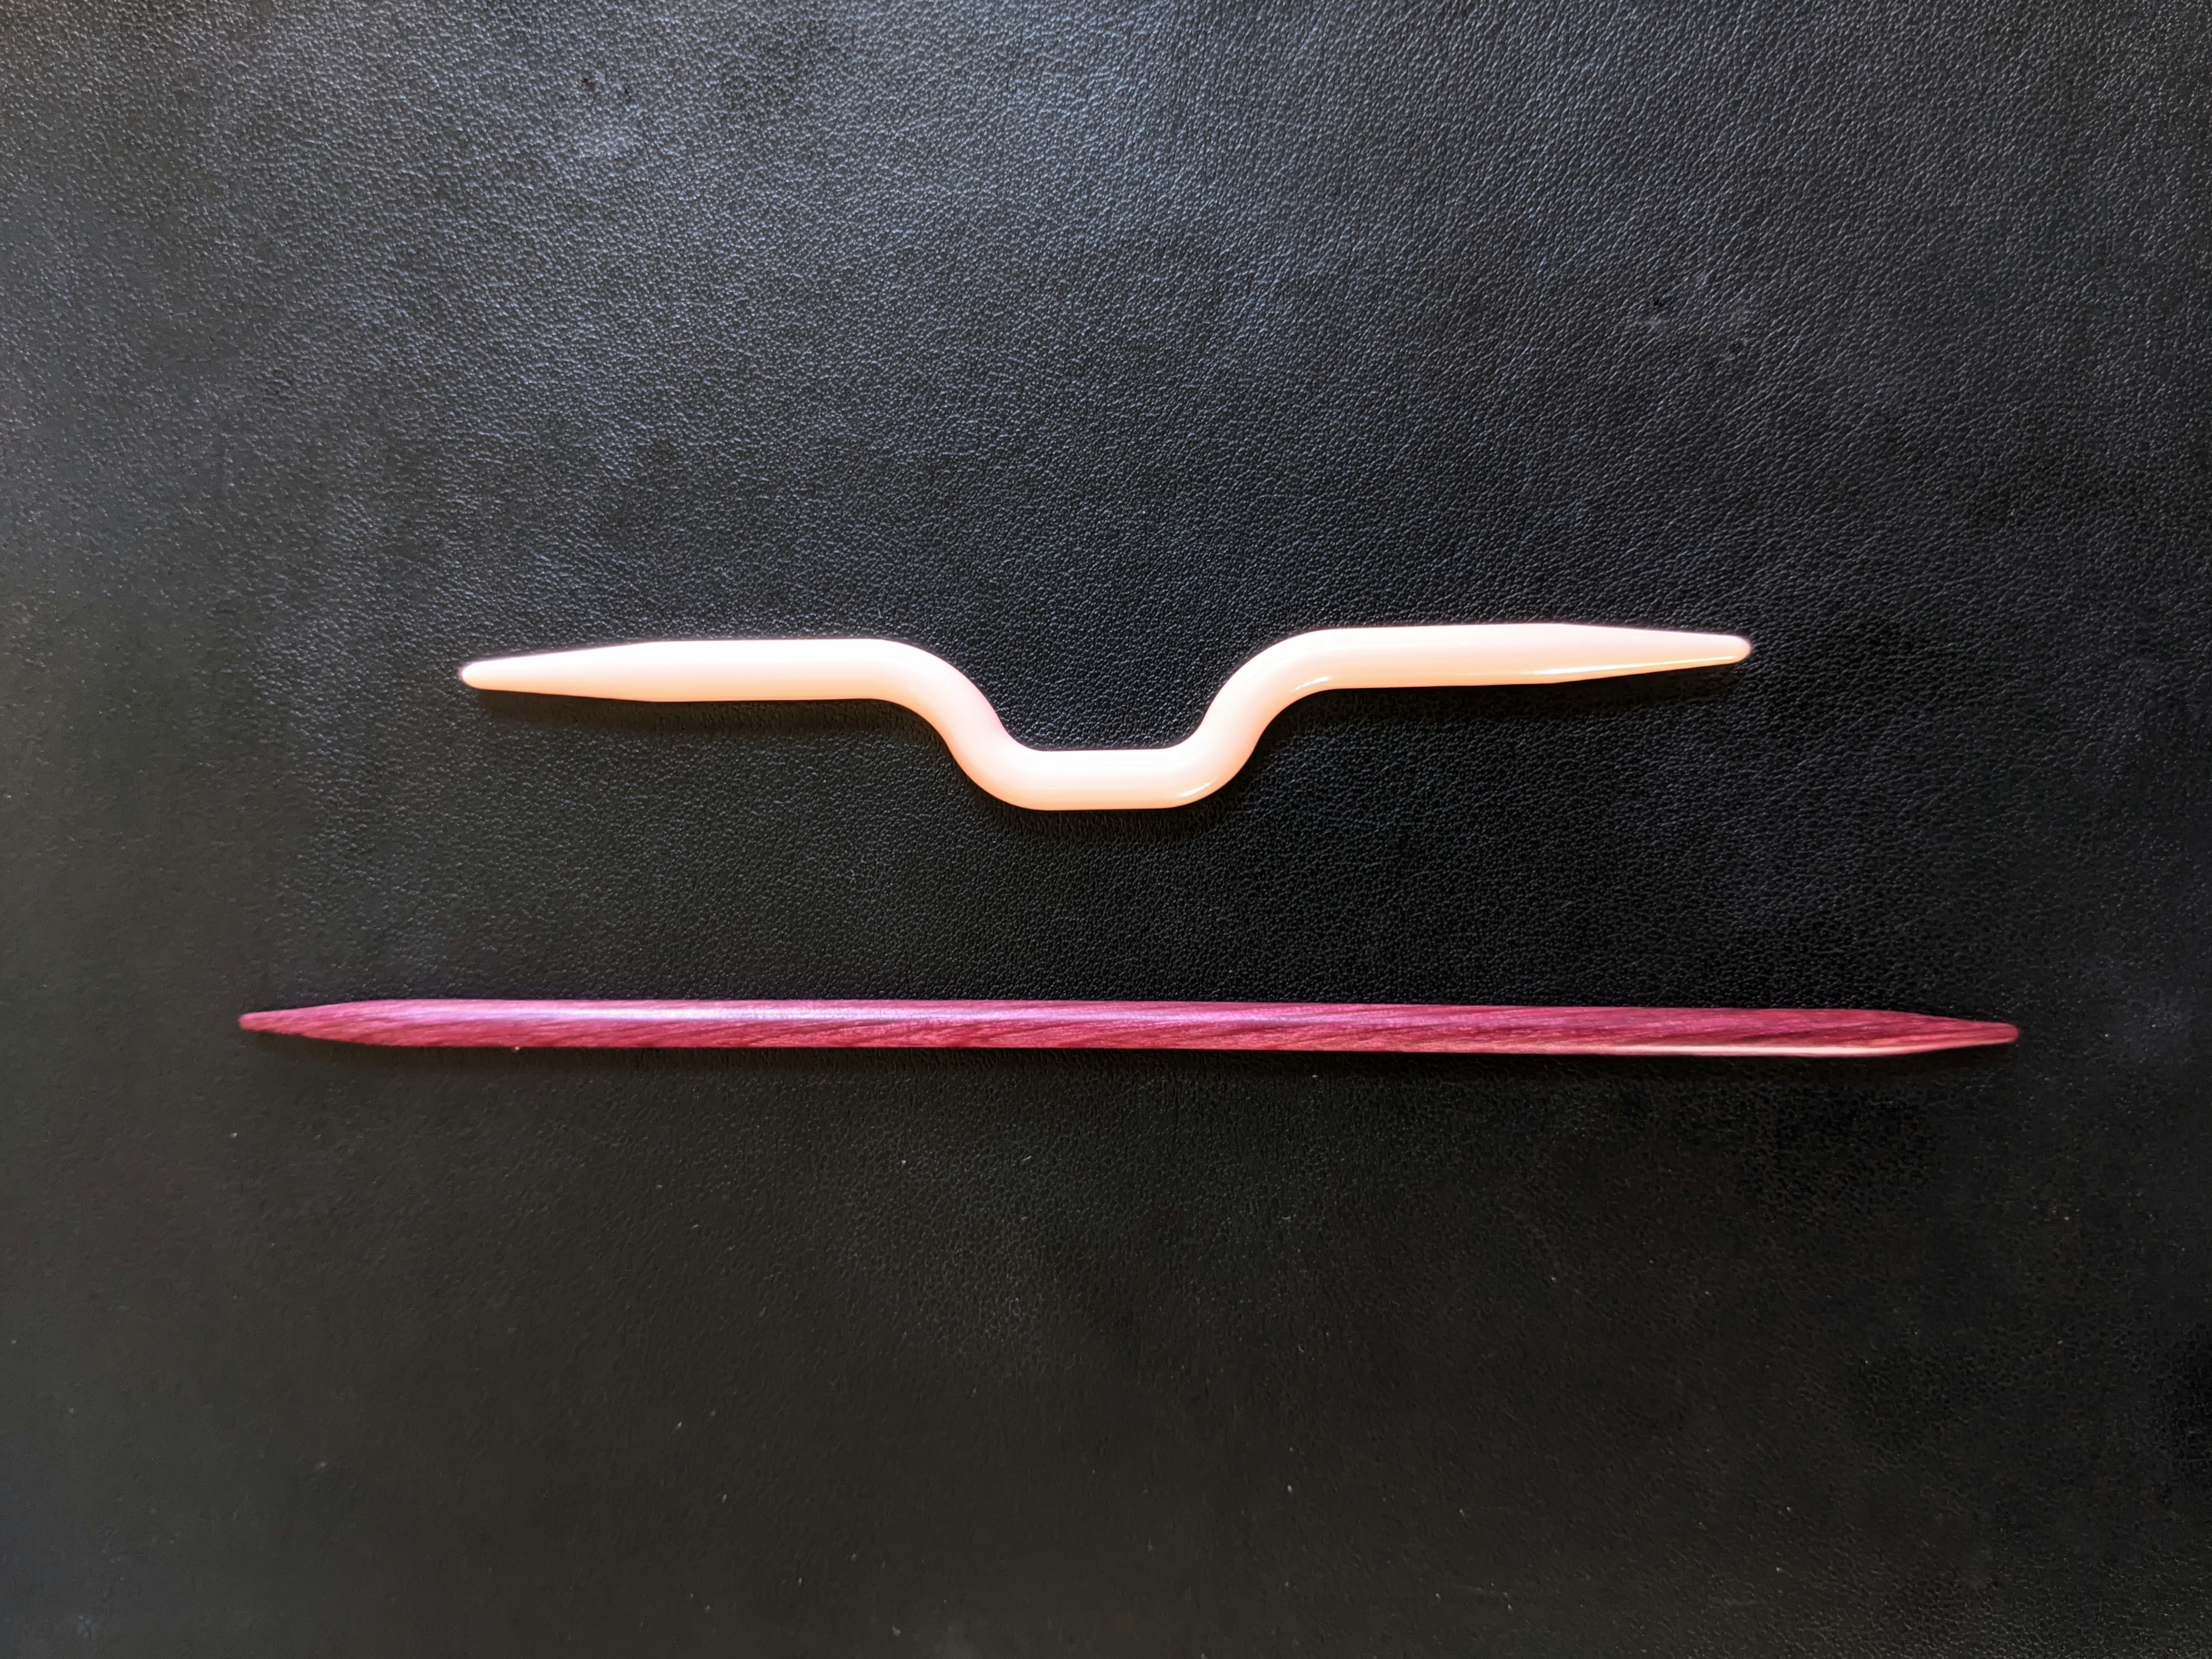
The supplies you’ll need for cable knitting, beyond your existing knitting project (needles + yarn), is either a double pointed needle or a cable needle. You can find cable needles at any big craft store and online.
There are numerous styles of cables, however today I am going to focus on two common, basic methods: C#F (cable a number of stiches forward), and C#B (cable a number of stitches back). These are also referred to as Cable # Left and Cable # Right, respectively.
Cables are commonly worked over an even number of stitches (but there are certainly cables worked over an odd number of stitches, too). Typical cable nomenclature in patterns looks like: C2F, C2B, C4F, C4B, C6F, C6B, and so on.
Tutorial
Arrive at the place in your work where you wish to begin your cable. If you are following a pattern, make sure you know whether you need to cable forwards or backwards (CF=cable forwards, CB=cable backwards).
Cable Forwards // Cable to the Left
For the tutorial, I will be demonstrating Cable 6 Forward (C6F). Feel free to adapt this number of stiches to your work/pattern.
First, determine the number of stiches over which your cable will be worked, and divide in half. (For example: C4F = two groups of two stitches each. C2F = two groups of one stitch each.) This is a conceptual step to help you understand your work. There are no physical tasks to be completed for this step.
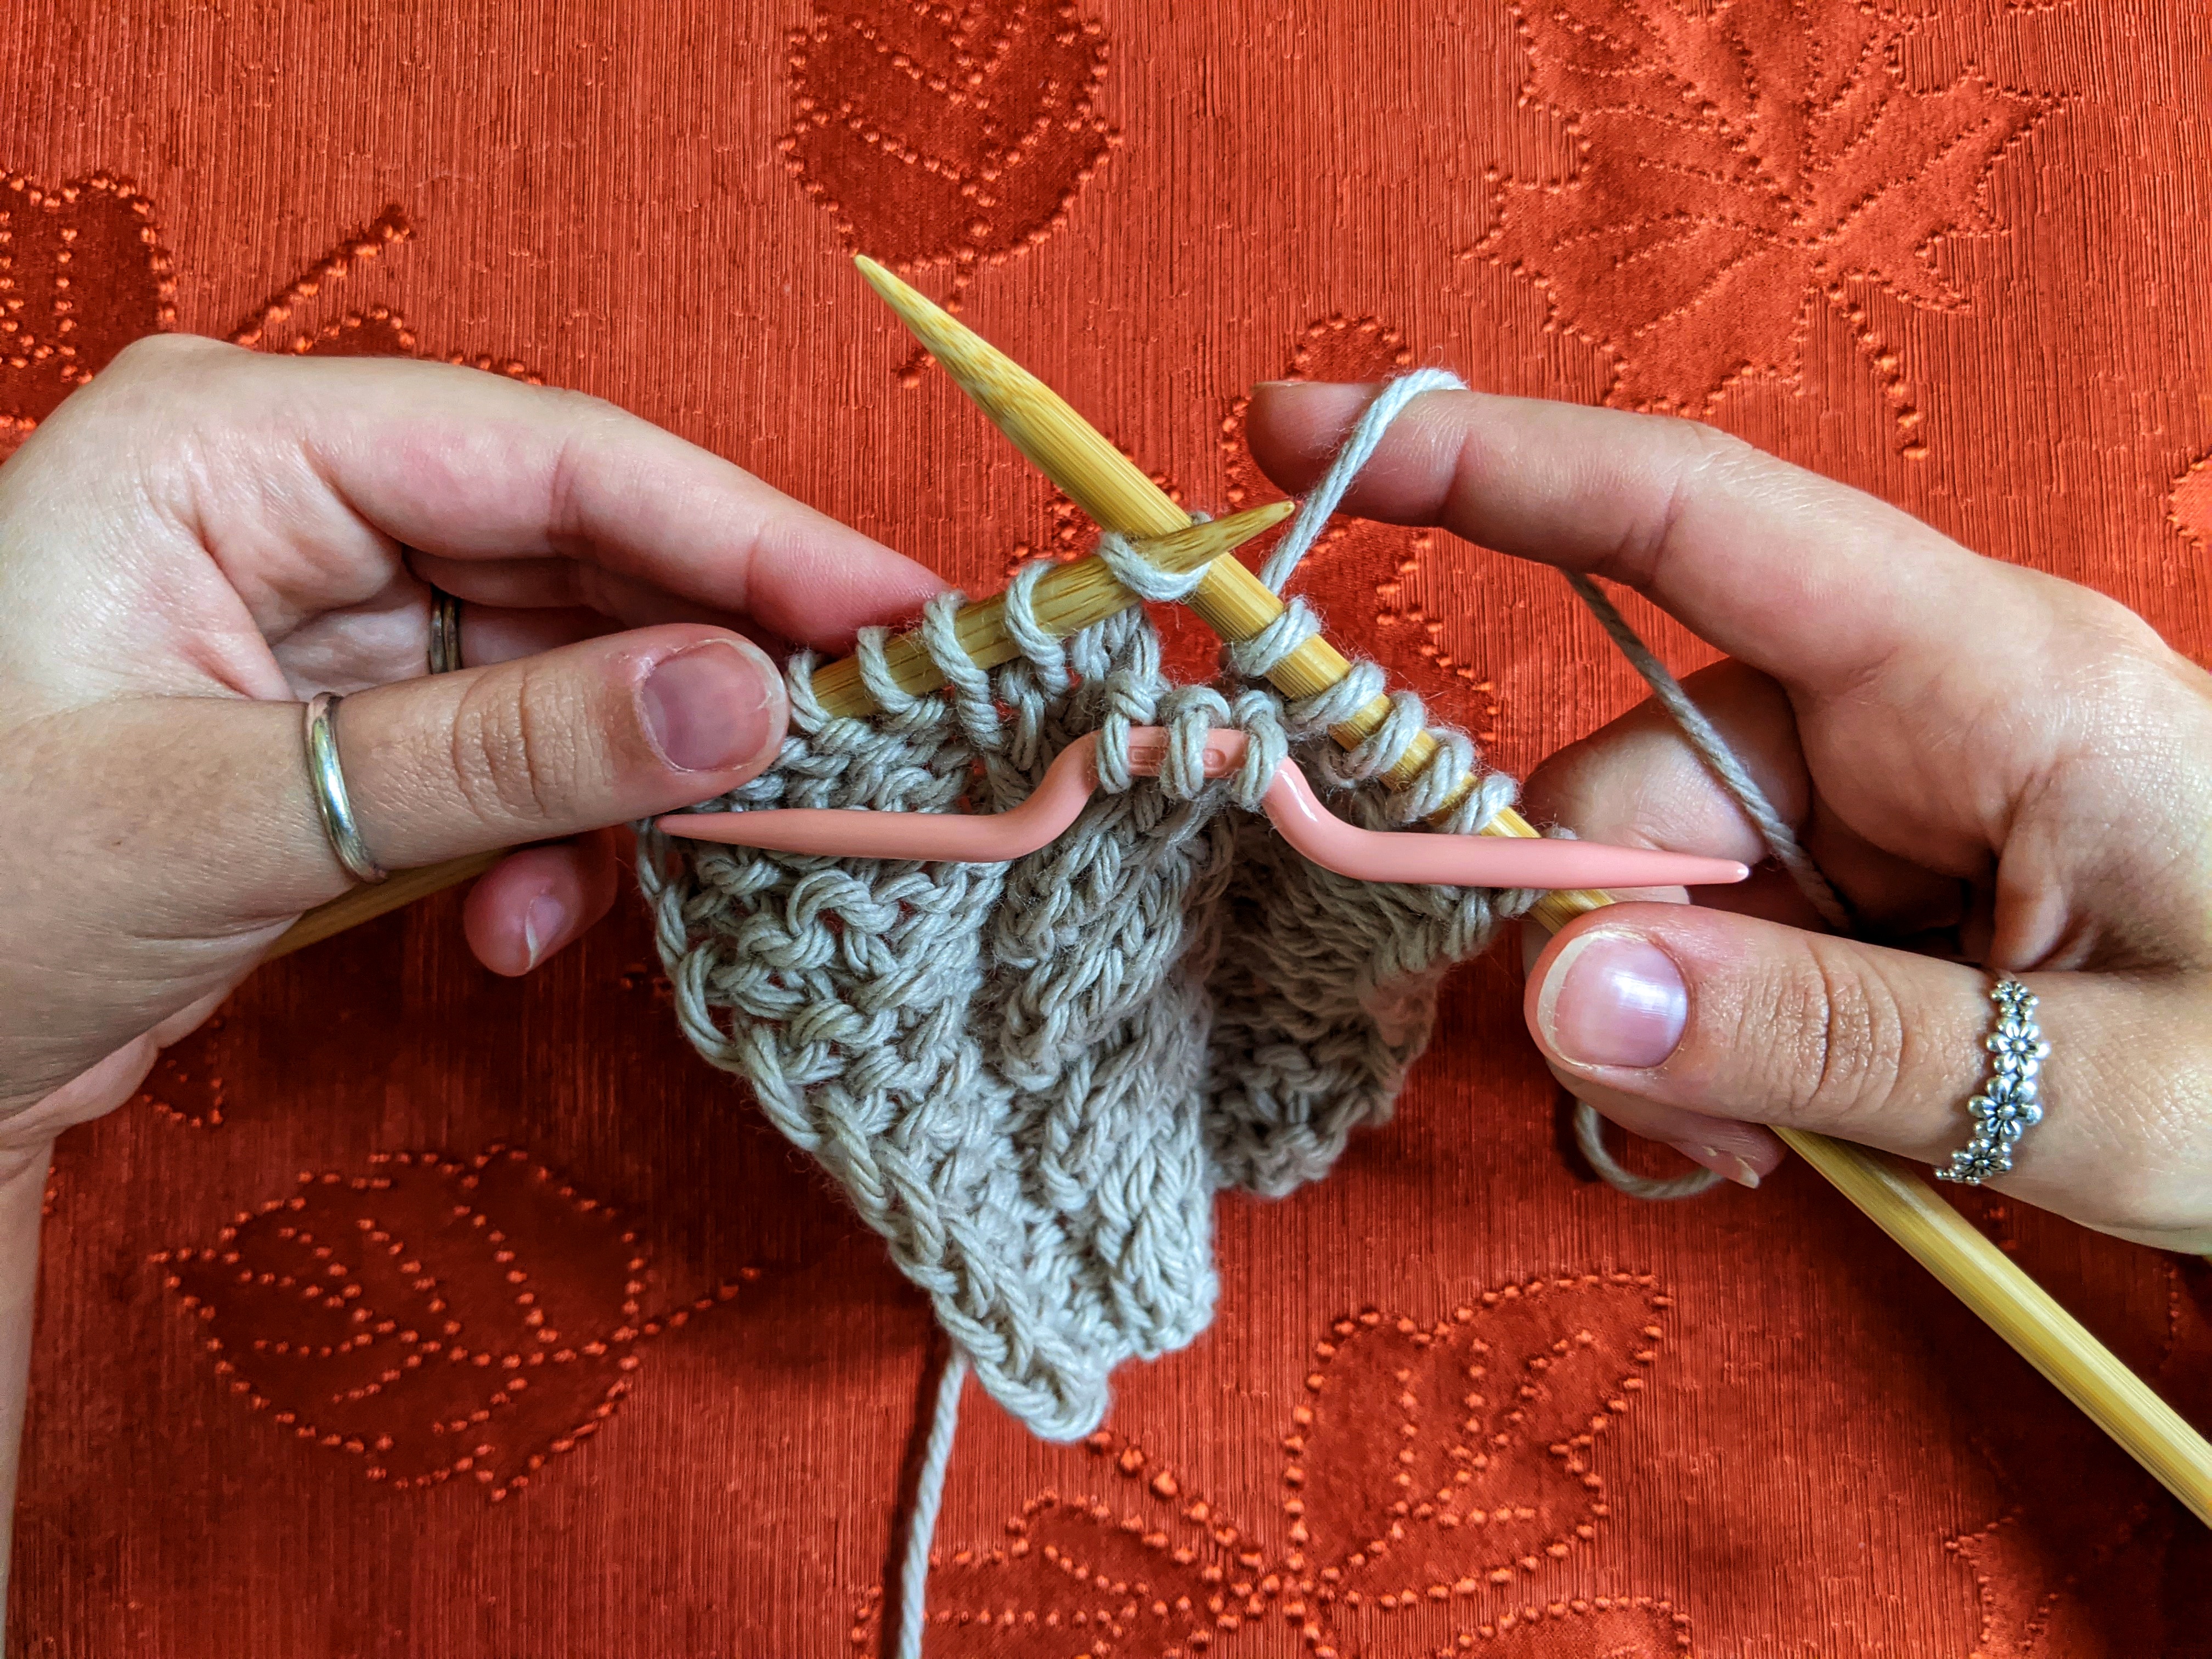
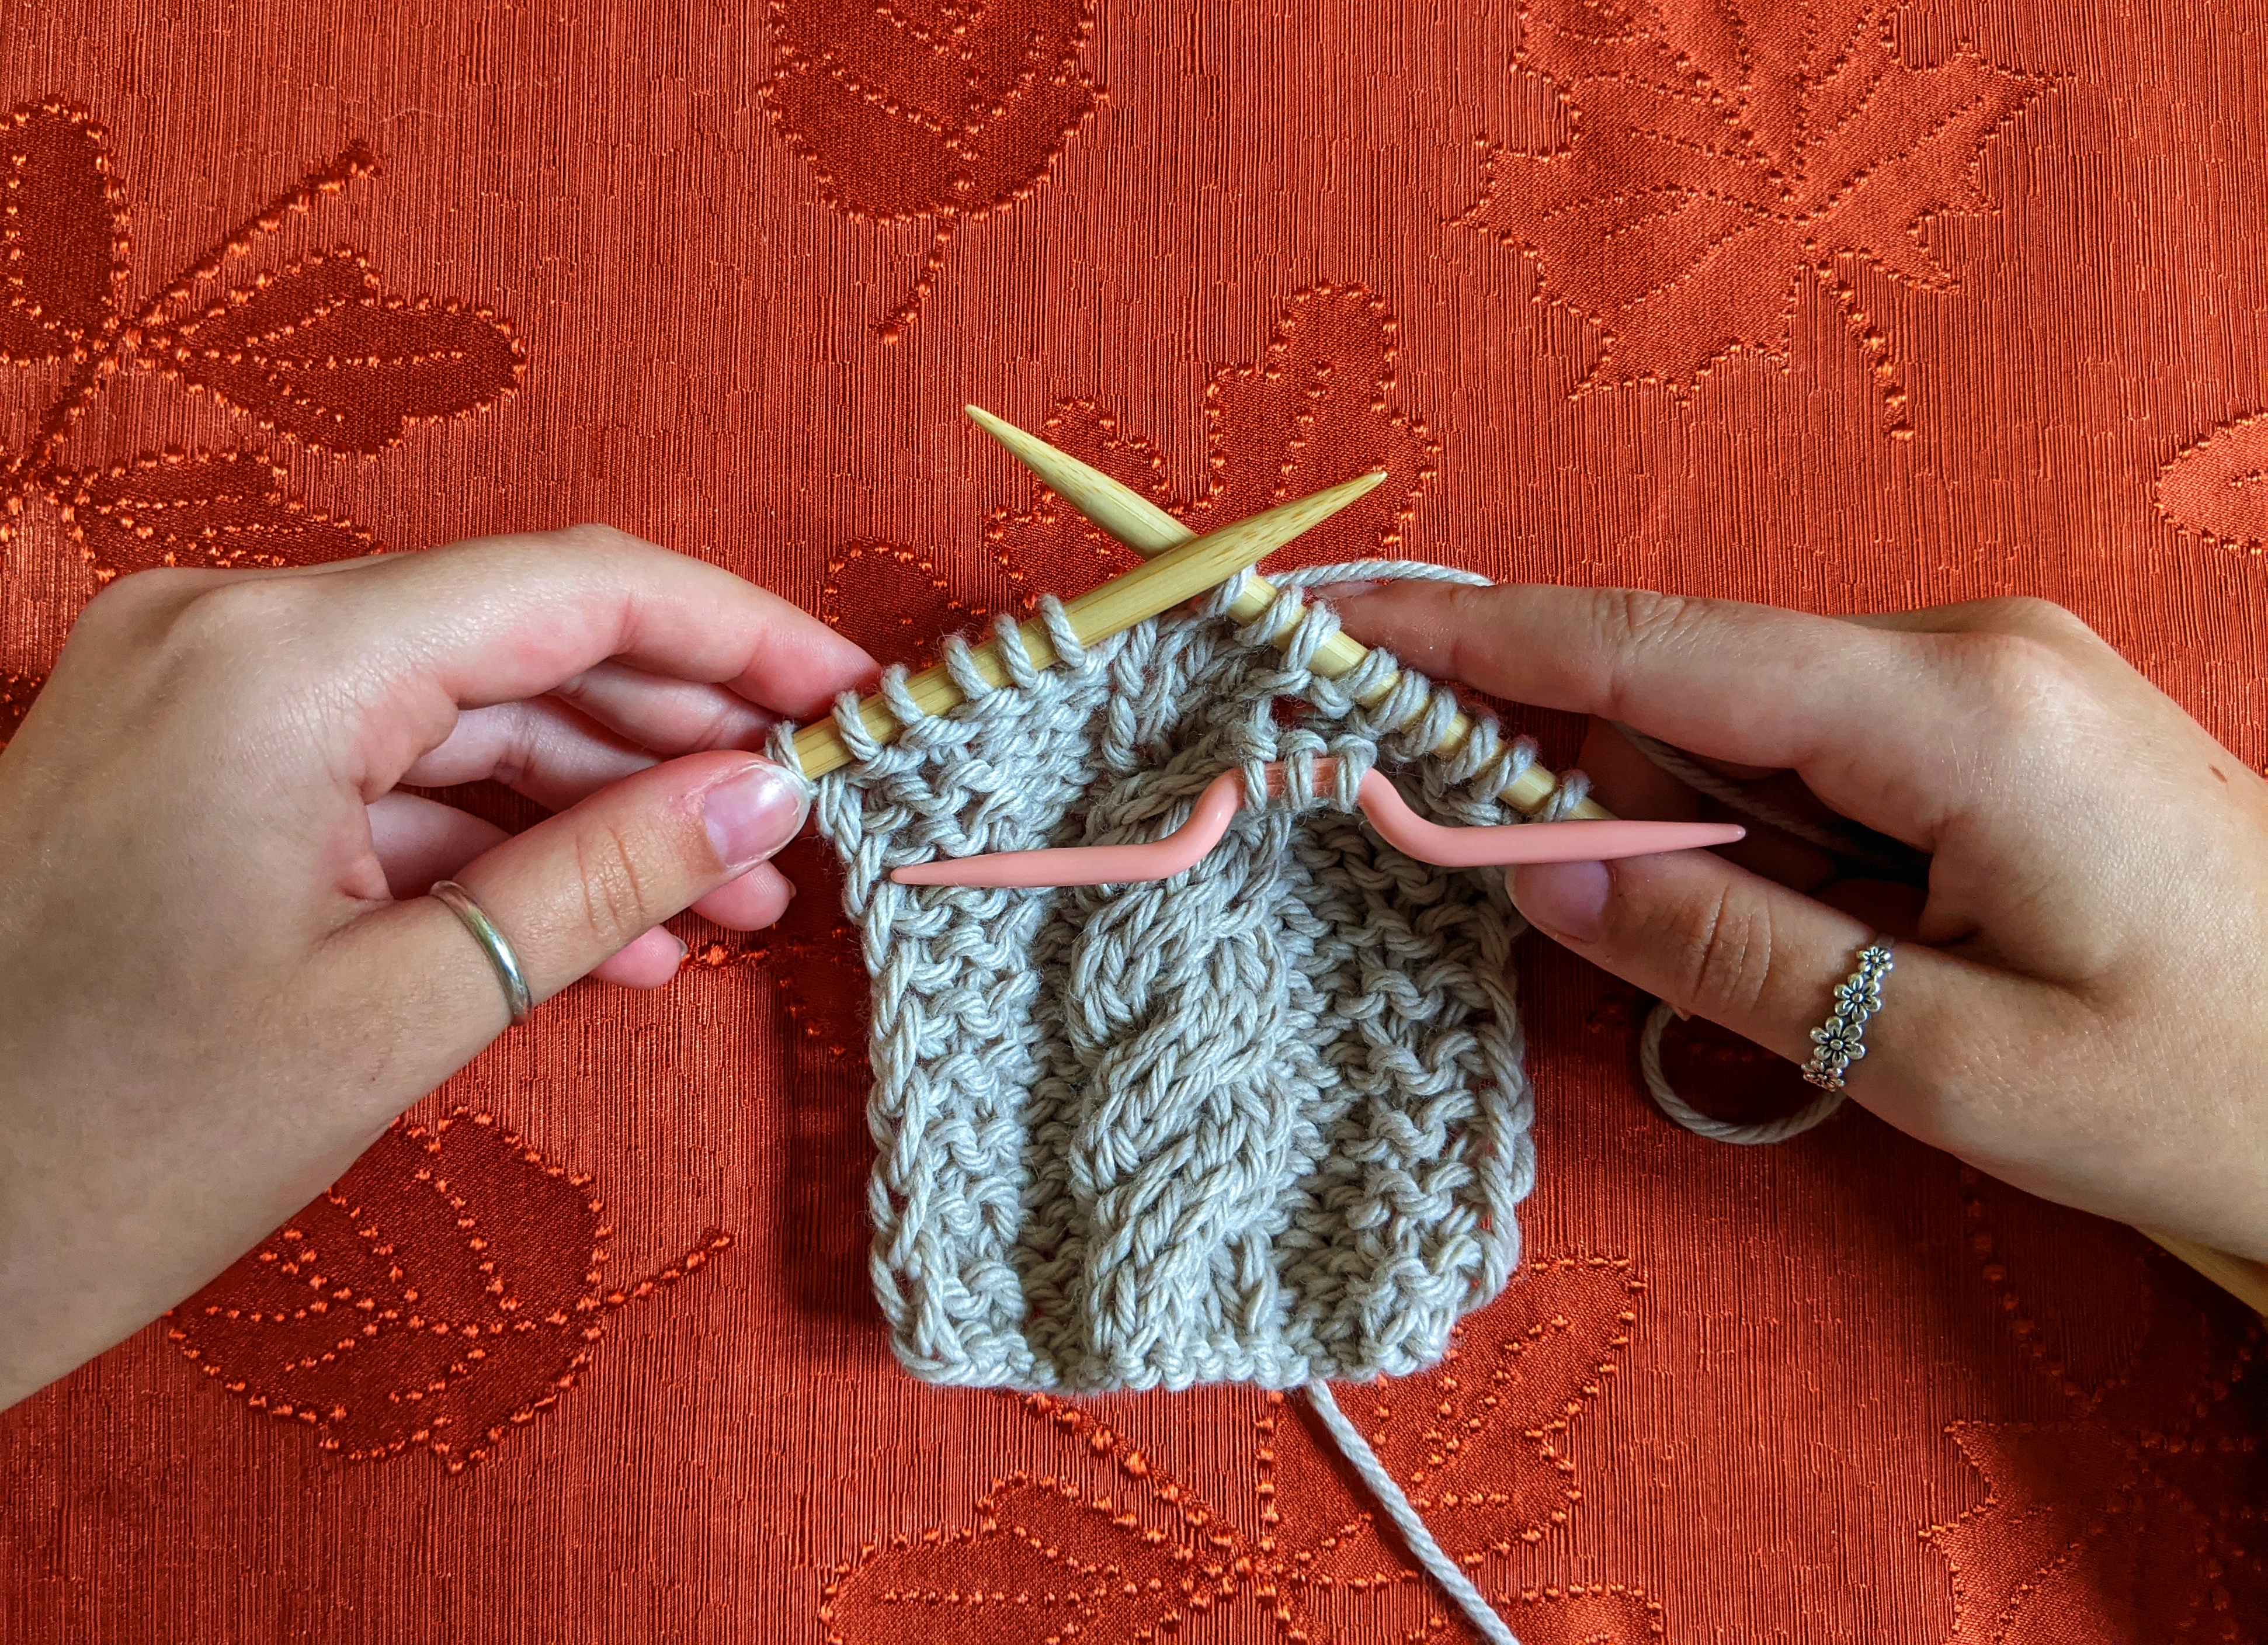
C6F is split into two groups of three stiches. Slip the first three stiches onto your cable needle.

Move in *FRONT* of the work.
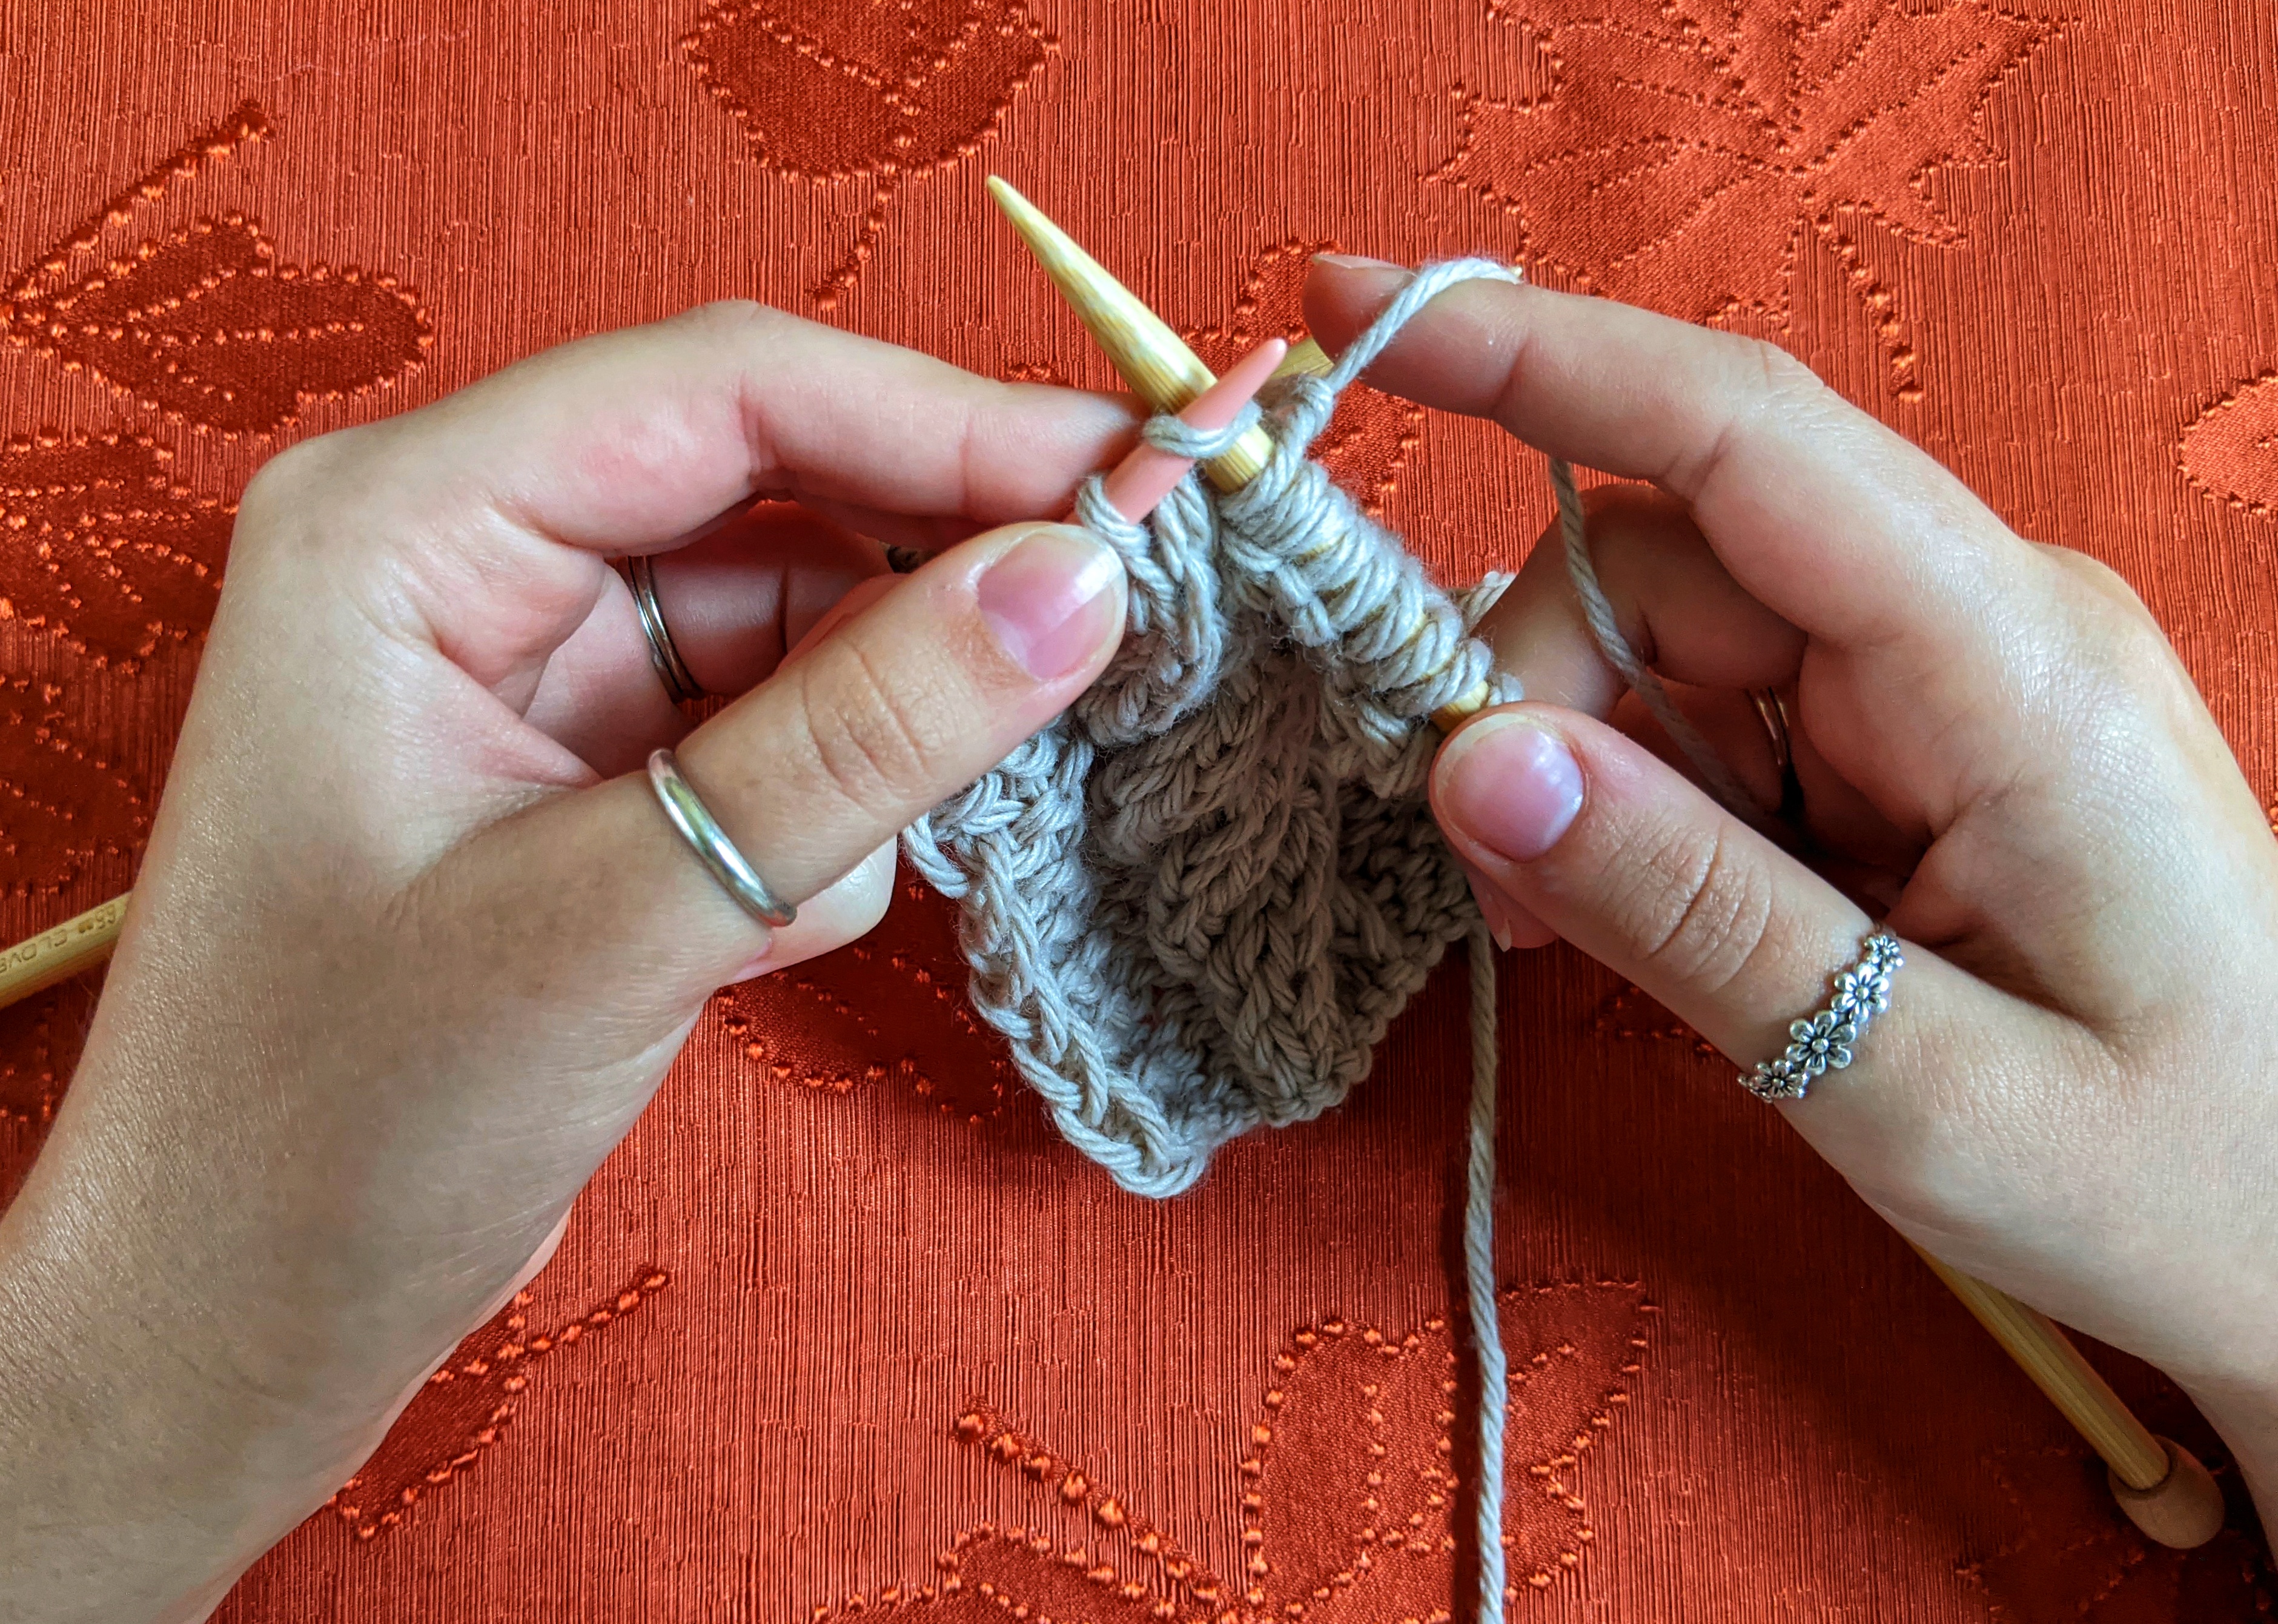
Then, knit the next three stitches on your needle.
Now, knit the three stitches on your cable needle.
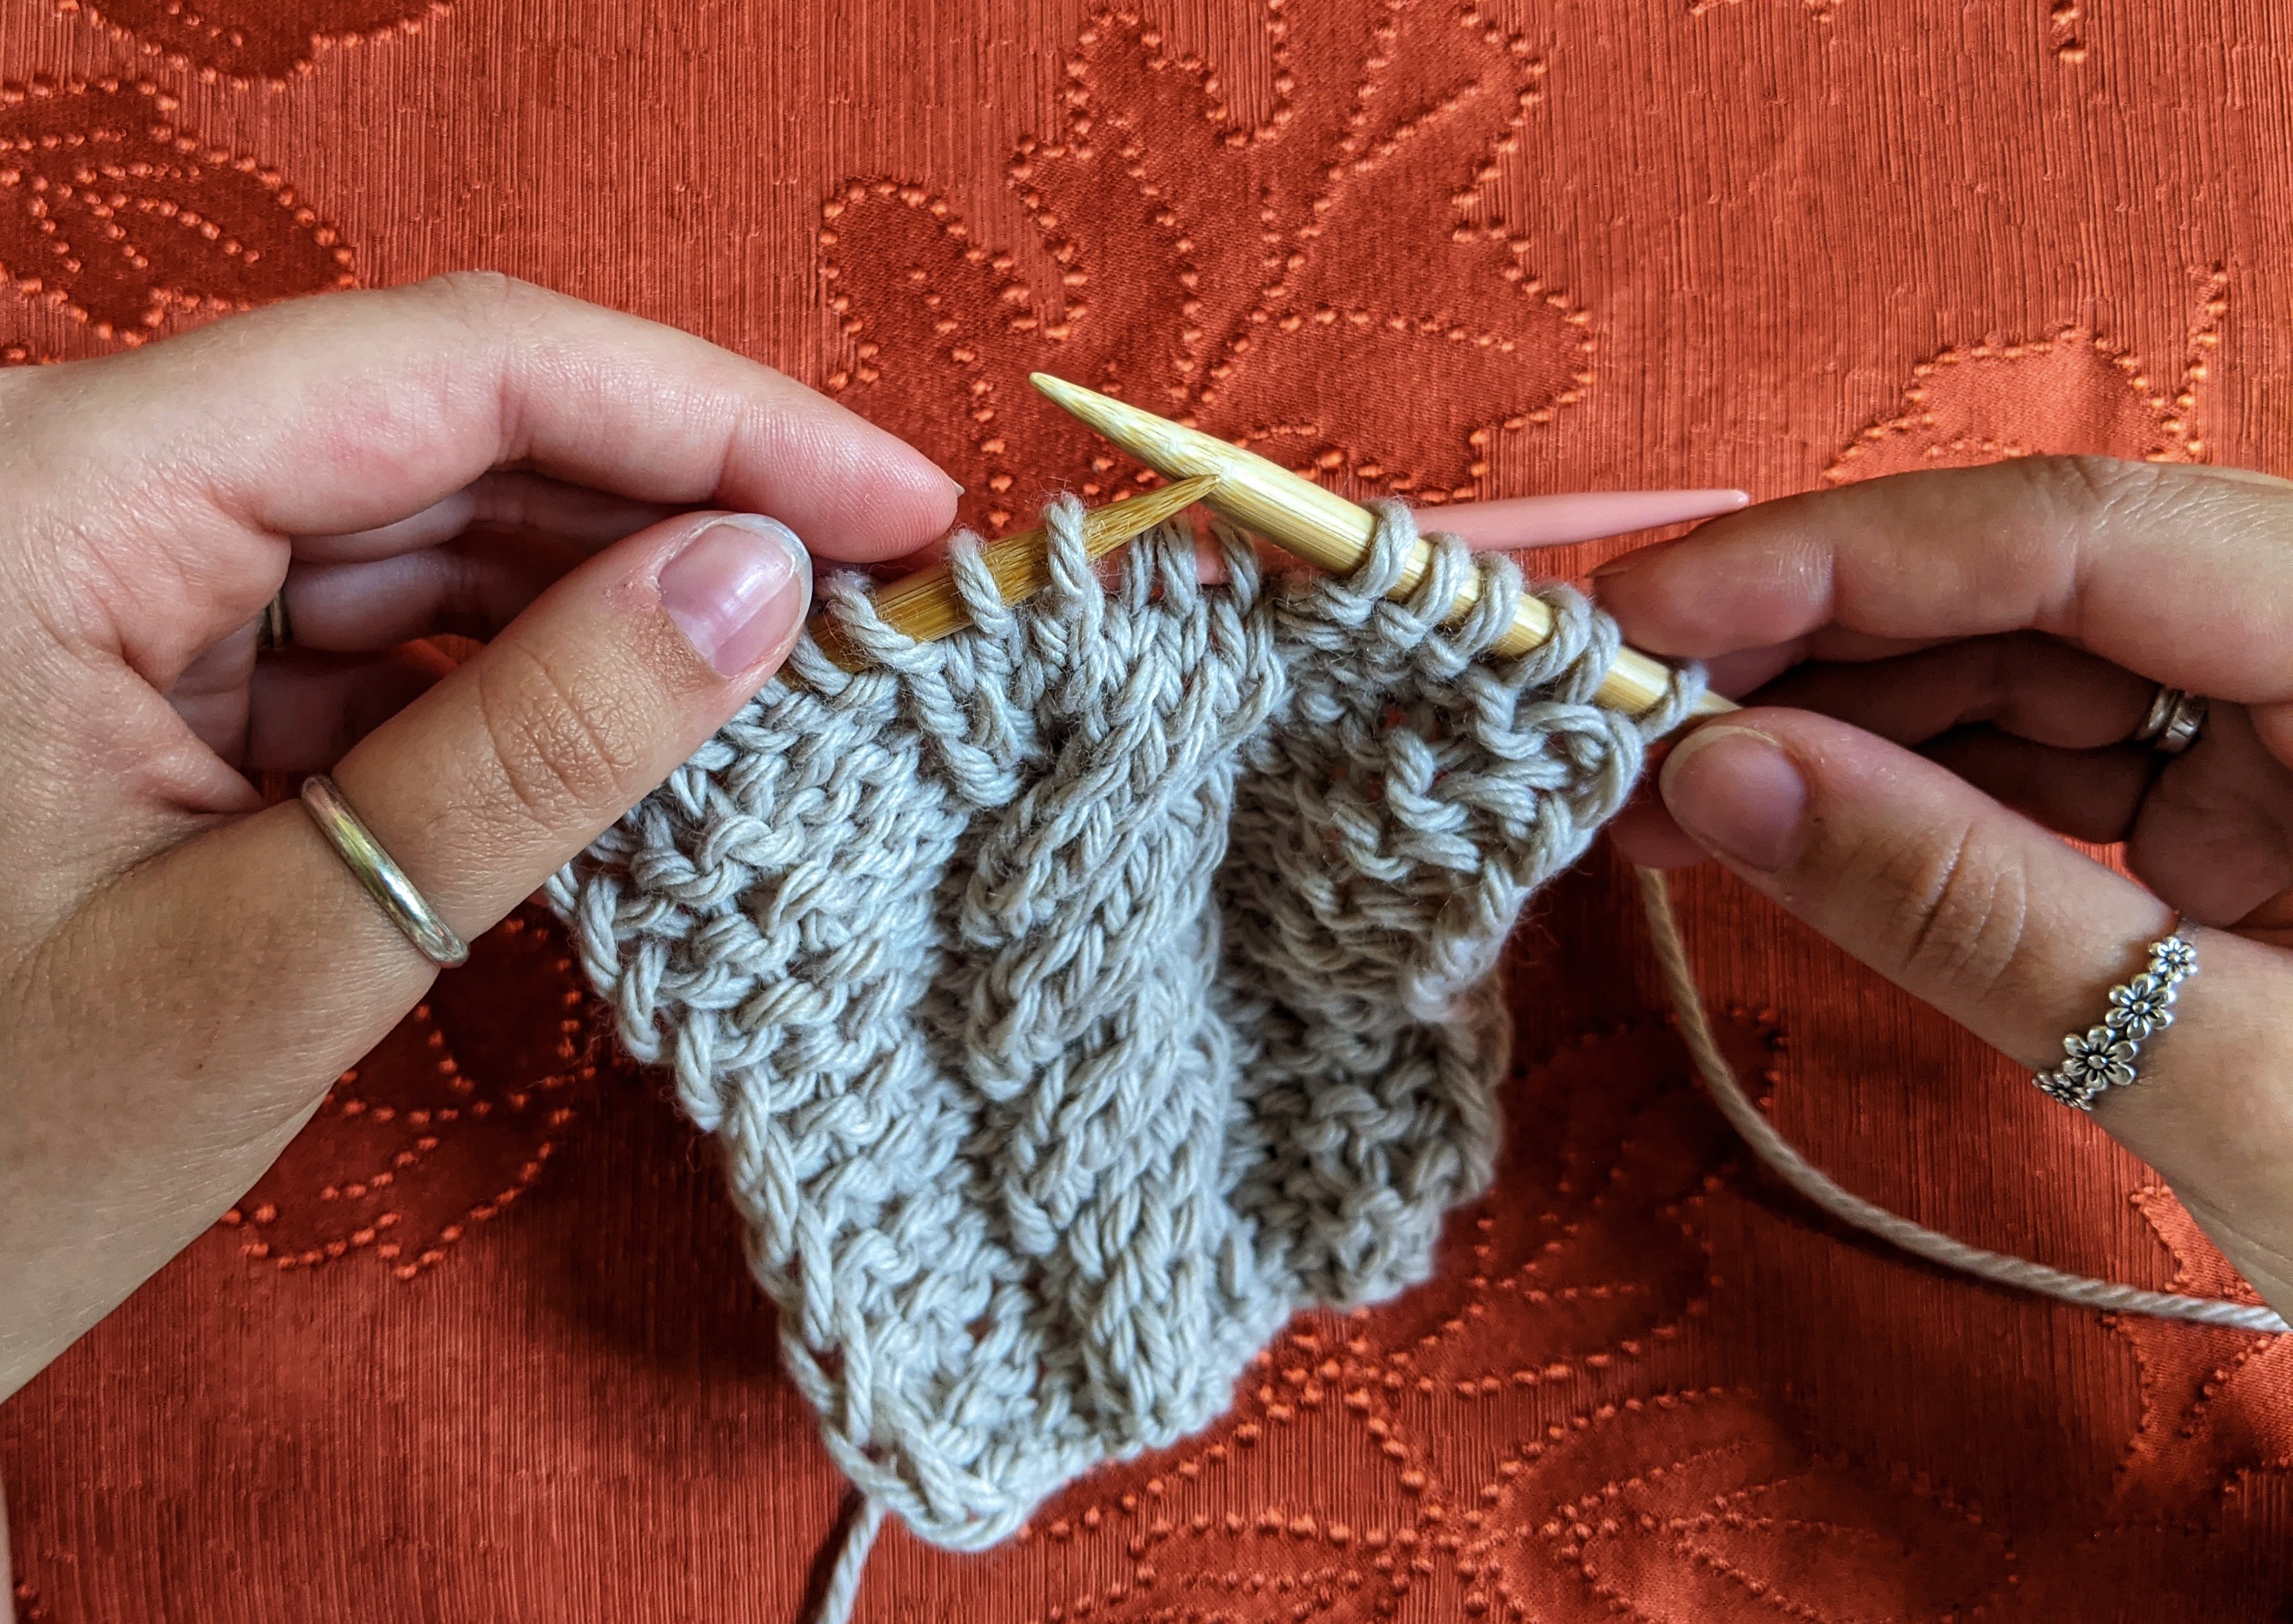
Done! You have completed one Cable 6 Forward. Notice how the twist goes to the left.

Cable Backwards // Cable to the Right
As with cabling forwards, mentally determine half of the number of stitches allotted for your cable. Cable 6 Backwards (C6B) is worked over six stitches, so this means we are dividing the stiches into two groups of three stitches each.
Slip the first three stiches onto your cable needle.
Move to *BACK* of work.

Then, knit the next three stitches on your knitting needle.


Now, knit the three stiches on your cable needle.

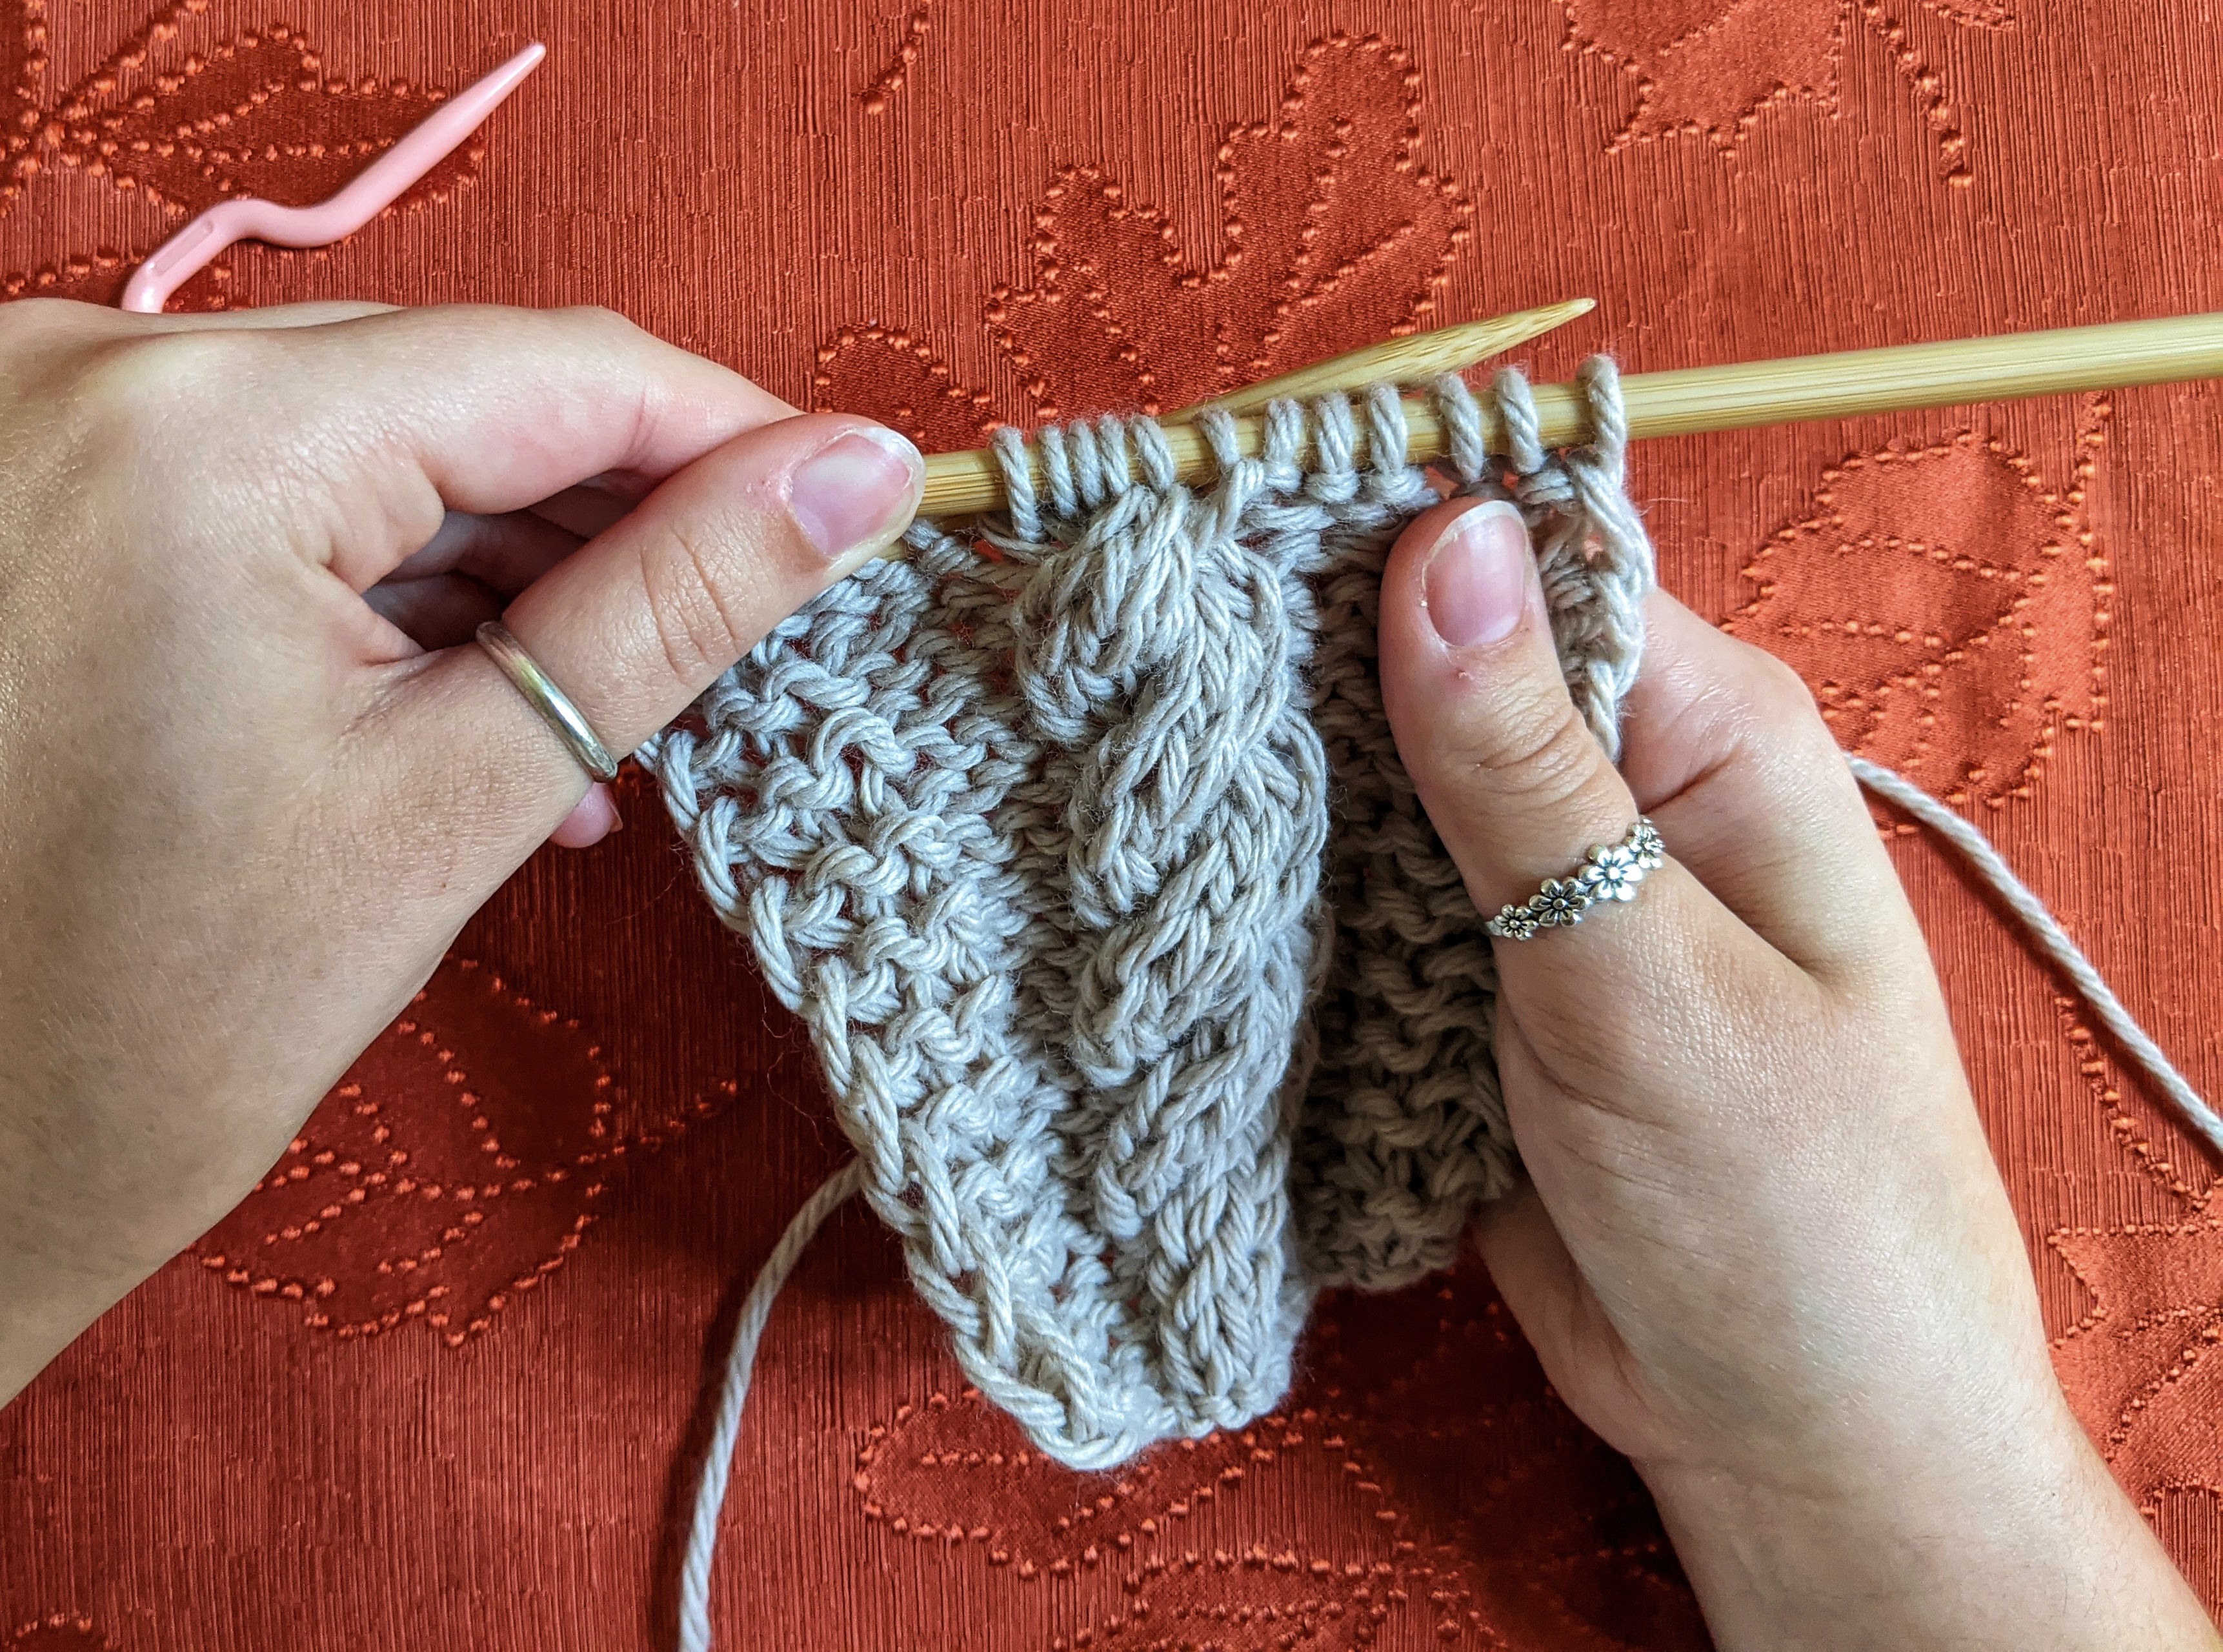
Done! You have completed one Cable 6 Backwards. Notice how the twist goes to the right.
Notes
Cables are easy and quick. Here are a few tips to help make them look better and make the process more smooth.
- Be careful not to drop stiches during this process. Dropping a stitch is when a stitch falls off the needle and does not get picked back up. This can cause your knitting to unravel. To help prevent dropping stitches, slide your stitches far up your knitting needle when you are initially setting up the cable. Using “sticky” yarns like acrylic and wool will help, and using bamboo or wood needles will help grip your yarn better.
- Work one or a few “processing rows” between cable rows. This helps to “process” the cable you just worked, and even out the stitches and tension on your needles. In my pattern below, I have four rows between cables. You can work more or less to make the sections between cables longer/shorter.
- Holes are to be expected. Here is a great video showing ways to help close the gap from knitting cables.
- Many cable patterns you will find feature cable sections worked against the wrong side/purl side of stockinette stitch. This is to help amplify and better display your cables! Think of these purl stitches as a frame for your artwork.
Cabled Scarf and Matching Headband Pattern

Here is an easy pattern for practicing cables. Both the headband and the scarf are worked with the same directions. The scarf is just longer!
Supplies: Size 10 knitting needles; Berroco Vintage Chunky yarn (I am using the color “stone”); cable needle
Cast on 18 stitches.
Row 1 (RS): Sl 1, K2, P3, K6, P3, K3.
Row 2 (WS): Sl 1, K5, P6, K6.
Rows 3 + 4: Repeat rows 1 + 2
Row 5 (Cable Row): Sl 1, K2, P3, C6B, P3, K3.
Repeat rows 1-5 until 1″ less than desired length.
Headband 20-24″ long (make 1″ shorter than head circumference to account for stretch)
Scarf 60″-70″ long (or whatever size you like scarves to be)
Work Rows 1- 4. Bind off. Weave in ends.
Headband only: sew together short ends to create a loop. (Optional: line with fleece or flannel!)
Abbreviation guide:
K = knit
P = purl
Sl = slip stitch (purl-wise)
C6B = Cable 6 Back. Slip three stitches on cable needle, hold at back of work. Knit next three stitches on needle, then
knit the three stitches on cable needle.
That’s all I have for you today! Have a fantastic week. Until Friday, happy cable knitting!

One thought on “Knitting Cables”